

This Tiramisu Cake turns your favorite Italian dessert into a delicious and decadent layer cake. Coffee soaked layers paired with mascarpone buttercream.

This is going to be another one of those posts where you will hopefully learn something from my mistakes.
It’s no secret that I have fails in the kitchen more often than I’d like to admit. I figure most normal people do though, so why not just lay all the cards out on the table, right?
Things don’t always go how you expect. And this time, with this Tiramisu Cake, it was due to a rookie mistake on my part.


What is Tiramisu?
Tiramisu is an Italian dessert consisting of coffee-soaked lady fingers layered with a whipped mascarpone cream filling and dusted with cocoa powder. It is heaven.
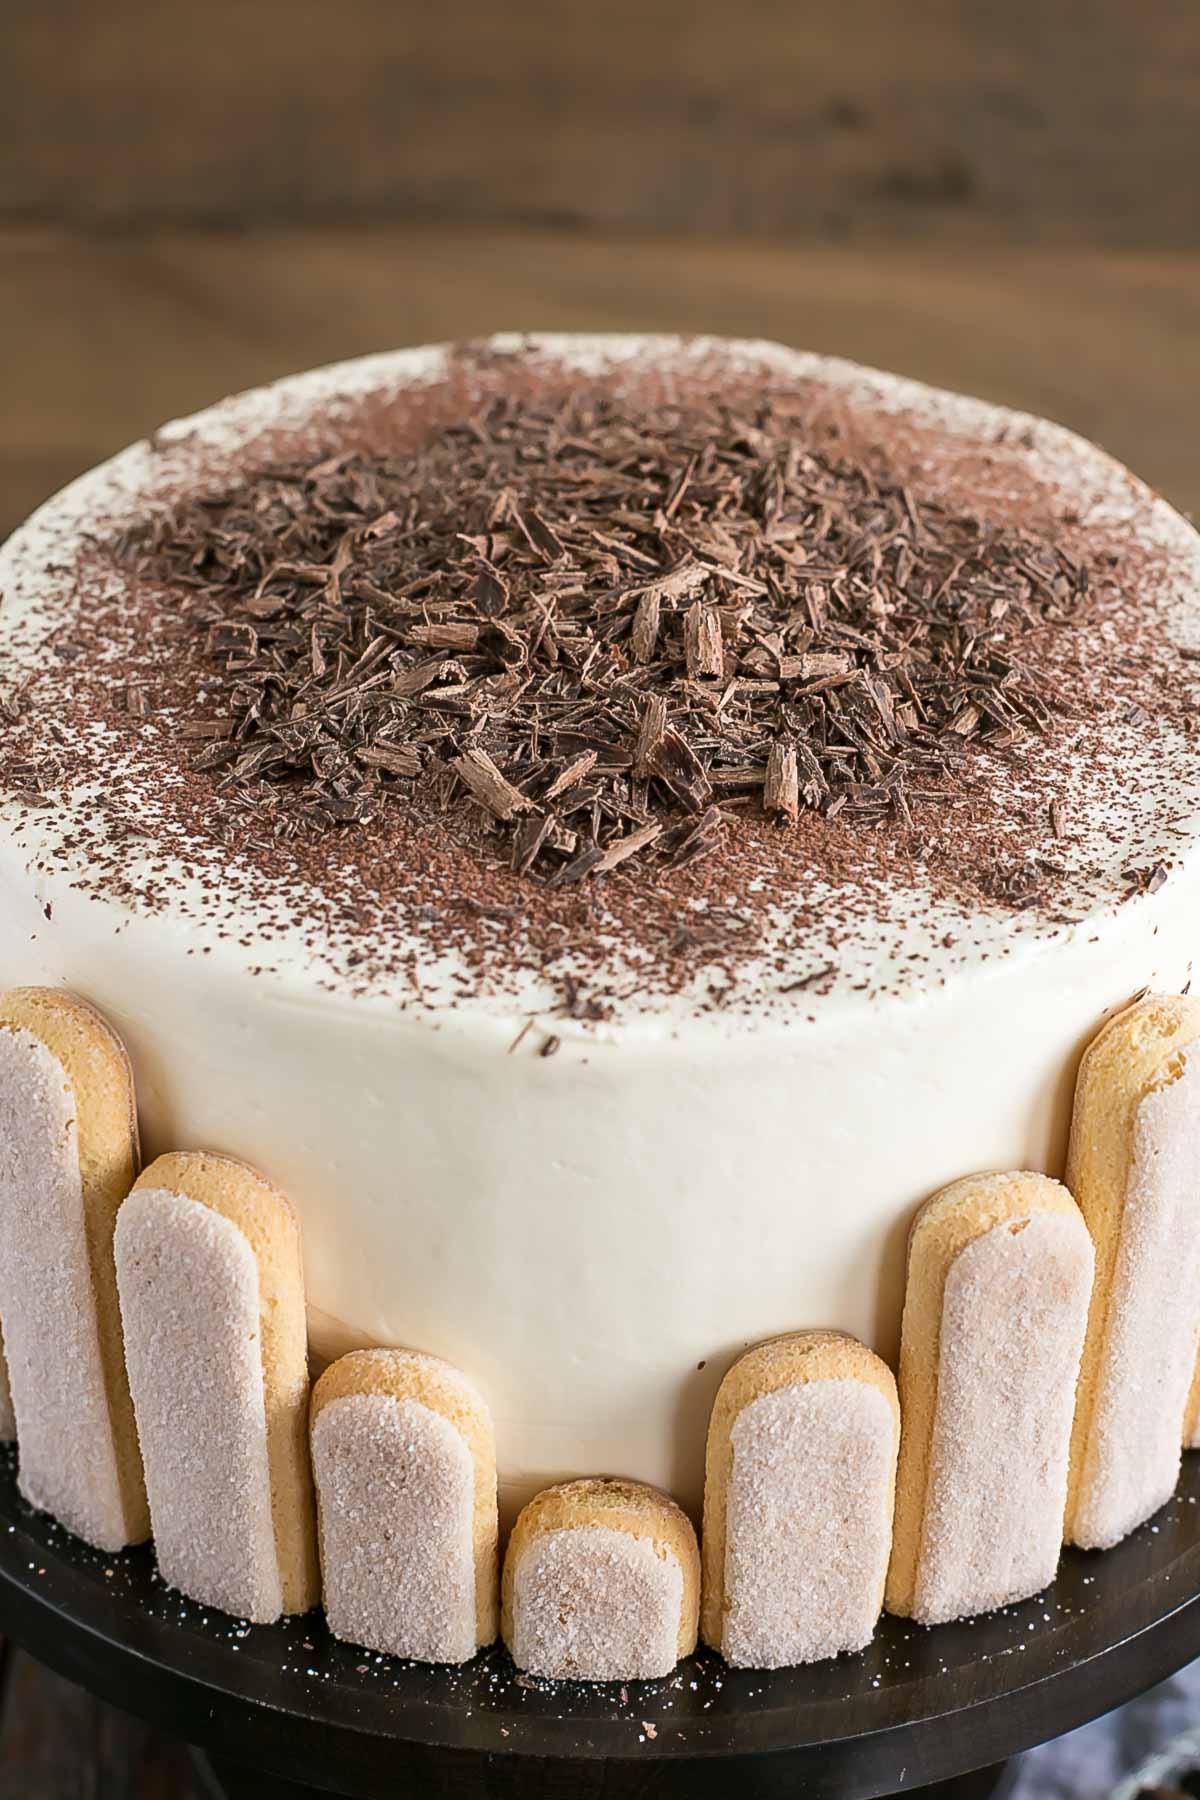
To transform this delicious dessert into a layer cake I used the following:
- Vanilla cake layers
- Coffee simple syrup
- Mascarpone frosting
- Lady fingers
- Chocolate shavings & cocoa powder
How to Make this Tiramisu Cake
For the cake layers I used my favorite Vanilla Cake recipe. No tweaks, just straight up. I thought it would be the perfect base for this Tiramisu cake.
The coffee simple syrup is a must do. Not optional especially since soaking lady fingers in coffee is a key part of the traditional dessert! Adding the coffee syrup adds a delicious flavor and moisture to the cake. You can leave the liqueur out if you prefer though.
The mascarpone frosting is where I ran into trouble…

I am usually really good at making sure all of my ingredients are at room temperature. This is important so that all of the ingredients emulsify together and yield proper results when baking. I never mess around with this when it comes to cookie dough or cake batter, but I tend to be a bit less rigid when it comes to (some) buttercreams.
Even still, I usually check the ingredients to make sure they’re not rock hard. But I actually broke my favorite KitchenAid beater blade a couple of weeks ago because I tried to whip a large chunk of butter when it was still too hard! Sad times.
So this time, with this mascarpone buttercream, I actually cut my butter up into cubes so it would come to room temperature faster. What I failed to do though, and ultimately what caused the issues (I think), is that I didn’t properly bring the tub of mascarpone to room temperature. I didn’t even check it!
I don’t know why I didn’t check it. I guess I thought it would be fine (cream cheese usually is) or that even if it was a bit stiff, it would soften up while it was whipping. What I didn’t anticipate is that the butter and mascarpone would completely curdle and separate when whipped together.
Minor panic set in when I looked into the bowl. I thought that surely more whipping would fix it, so I added in the sugar and whipped it to oblivion. No dice. Honestly, I almost considered using it in this state (wtf Olivia?).
If we still had a grocery store close by, I would have run out and bought new ingredients, but that wasn’t really an option here. Thankfully, I came to my senses and tried a trick to see if I could save it.

How to Save Curdled Buttercream
What seems like a lifetime ago I remember dealing with a curdled/separated Swiss meringue buttercream.
I had frozen some leftover buttercream, thawed it, and started to rewhip it (which is what you should do after thawing). I guess it was still a bit too cold, because what was in my mixer looked like cottage cheese soup.
I’m not even kidding you. This mascarpone frosting didn’t look quite that bad, but it just didn’t look right (or taste right).
What I remembered from last time is that you just needed to warm the frosting up a bit so that it can emulsify properly.
So I grabbed my trusty hair dryer and started heating up the sides of the bowl while the mascarpone buttercream was whipping. The hair dryer has saved me from more than one baking disaster.
Sure enough, after heating it a bit and letting it whip some more, it came together perfectly. You can also heat the buttercream in bursts over a double boiler (whipping between heating) or microwave a small amount of the buttercream and add it back to the bowl and whip. You know, if you’d rather try something more professional, lol.
So learn from my mistakes, people. Make sure all of your ingredients are actually at room temperature, or you’ll have some ugly curdled buttercream on your hands. But if that happens, now you know how to save it now, right??
Cake Tip!
Alternatively, if you don’t want a buttercream, you could make a mascarpone cream like I have in my Strawberry Shortcake Cake. It is lighter and much less sweet but also softer and less stable. Both options will be perfectly delicious.
I’m not in love with how this Tiramisu Cake looks (shocker). I should have done something, anything, with the frosting on the sides. It’s too flat and boring. Ryan says it looks very art deco, which makes me like it a little bit more. Oh well, it’s the taste that matters and it tastes ridiculously delicious!
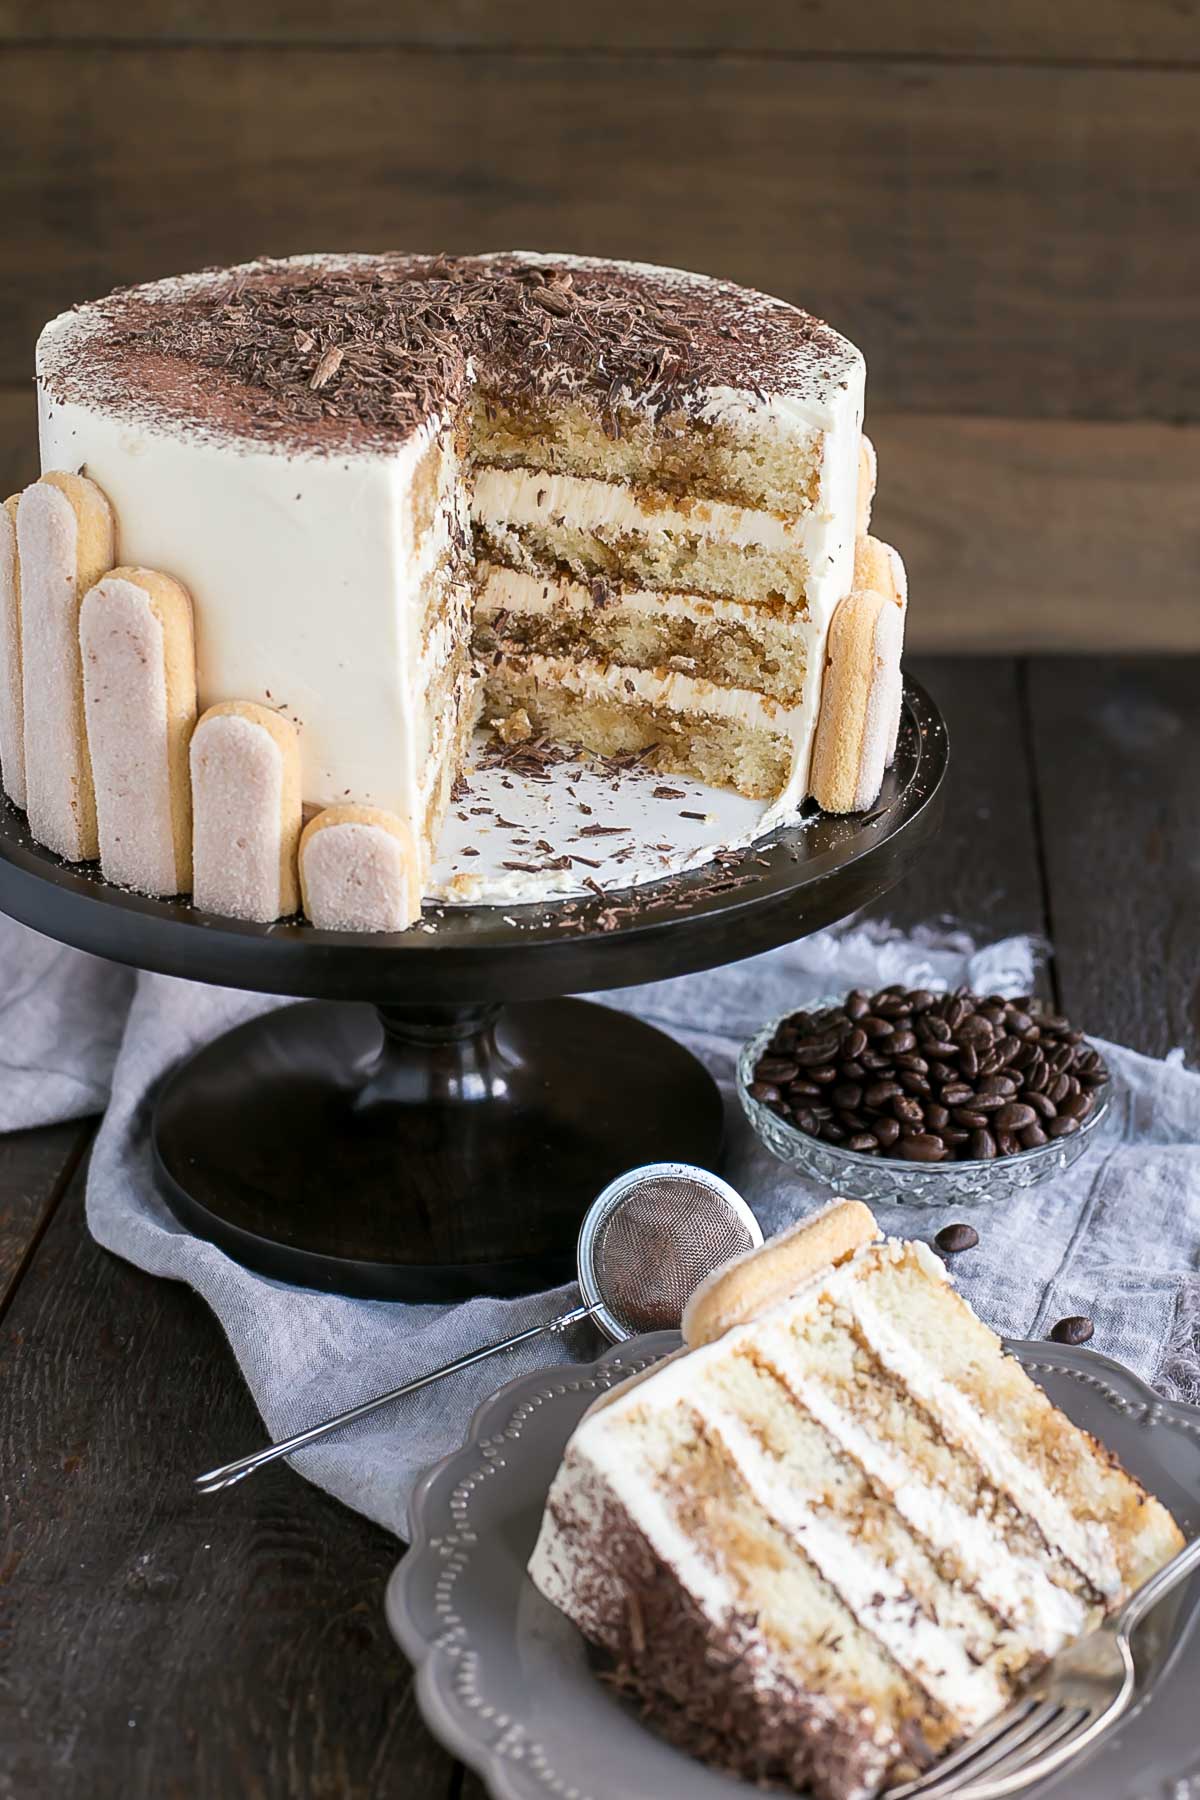
Really, it tastes just like tiramisu. You could just have tiramisu, but this way is better because it’s a CAKE.
Those coffee soaked layers are some of the best I’ve ever had. And the mascarpone buttercream has just the perfect balance of flavors. It’s a bit heavier than what you’d see in a traditional tiramisu, but I wanted the cake to have more structural integrity. Plus, I love a good buttercream.
If you love tiramisu and are looking for something a little different, then this Tiramisu Cake is for you!
Frequently Asked Questions
How can I convert this recipe?
- The recipe as-is will also work in three 6″ pans. For three 8″ pans, 1.5x the recipe. Baking time may need to be adjusted.
- To make cupcakes, all you need to do is reduce the baking time — start checking at 15mins or so. The recipe will make 18-24 cupcakes depending on size.
- For other conversions go here.
Can I make it in advance?
- The cooled cake layers can be baked ahead of time, double wrapped in plastic wrap, and frozen for up to 3 months. Take out 2-3 hours before assembly.
- The frosting can be placed in an airtight container and refrigerated for 1 week for frozen for 3 months. Bring to room temp and rewhip before using.
- The simple syrup can be stored in an airtight container in the fridge for a couple weeks.
- The finished cake (whole or sliced, stored airtight) can be frozen for up to 3 months.
Can I get the measurements by weight/grams?
- There is a Metric option in the recipe card. If you click it it will convert everything to grams.
- This conversion is done automatically and I cannot guarantee the accuracy but many readers have had success using the metric option for this recipe.
Tips for making this Tiramisu Cake
- Make your mascarpone is at room temperature If it’s too cold it can cause the frosting to curdle. See post for details.
- If you don’t want a buttercream you could make a mascarpone cream instead. It will be less sweet but also softer.
- For added flavor, you can add a layer of coffee-soaked lady fingers between the cake layers. This might work best for a two-layer cake (don’t cut the cakes in half horizontally).
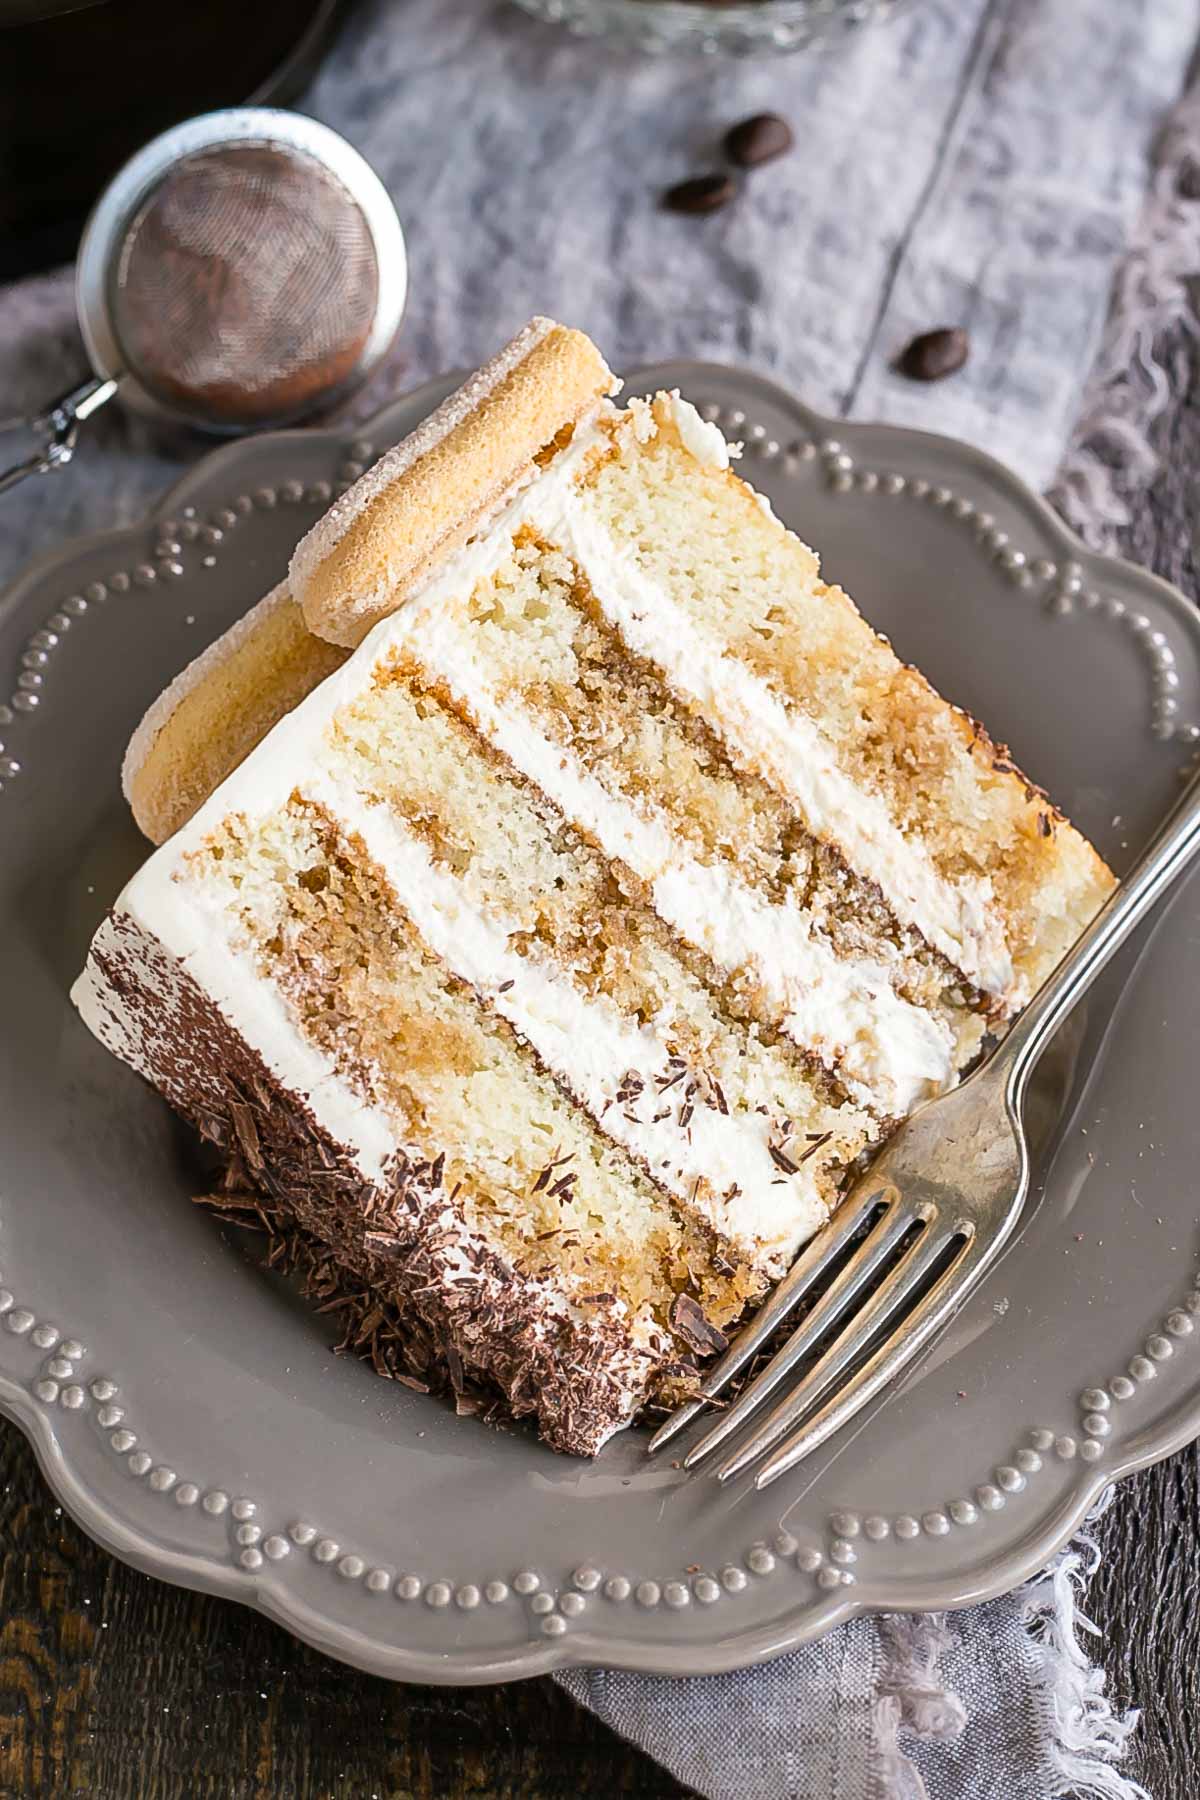
- I was a little too generous with the frosting between the layers (I used about 1 cup per layer). A thinner layer between each would have balanced the cake better. This would also leave enough frosting to do some piping on top.
- The coffee liqueur in the simple syrup is optional – you can leave it out, and it will still taste delicious!
- I like to prepare my cake pans using Homemade Cake Release then line with parchment.
- Learn how to keep your cakes moist using Simple Syrup.
- To help ensure your cake layers bake up nice and flat, check out my How to Bake Flat Cake Layers post!

Tiramisu Cake
Ingredients
Coffee Simple Syrup:
- 1/2 cup water
- 1/2 cup granulated sugar
- 1 Tbsp instant espresso powder
- 1/4 cup coffee liqueur or dark rum optional
Vanilla Cake:
- 2 1/4 cups all-purpose flour
- 2 1/4 tsp baking powder
- 3/4 tsp salt
- 3/4 cup unsalted butter room temperature
- 1 1/2 cup granulated sugar
- 3 large eggs room temperature
- 1 1/2 tsp vanilla extract
- 1 cup buttermilk (or any milk) room temperature
Mascarpone Frosting:
- 1 1/2 cups unsalted butter room temperature
- 2 cups mascarpone room temperature
- 4 cups powdered sugar
- 2 tsp vanilla extract
Assembly:
- unsweetened cocoa powder
- chocolate shavings
- lady fingers
Instructions
Coffee Simple Syrup:
- Bring sugar, water, and instant espresso powder to a boil in a small pot over med-high heat. Simmer for 1min. Remove from heat and stir in coffee liqueur or rum if desired. Set aside to cool.
Vanilla Cake:
- Preheat oven to 350F. Grease and flour two 8″ cake rounds and line with parchment.
- In a medium bowl, whisk flour, baking powder, and salt until well combined. Set aside.
- Using a stand mixer fitted with a paddle attachment, cream butter and sugar on med-high until pale and fluffy (approx 3mins). Reduce speed and add eggs one at a time fully incorporating after each addition. Add vanilla.
- Alternate adding flour mixture and buttermilk, beginning and ending with flour (3 additions of flour and 2 of milk). Fully incorporating after each addition.
- Bake for about 30-35mins or until a toothpick inserted into the center comes out mostly clean.
- Place cakes on wire rack to cool for 10mins then turn out onto wire rack. Cool completely.
Mascarpone Frosting:
- Beat butter and mascarpone until fluffy (2 mins). Add powdered sugar one cup at a time. Add vanilla and beat until fluffy (3 mins). Do not overmix.
Assembly:
- Cut each cake layer in half horizontally.
- Place one layer of cake on a cake stand or serving plate. Brush generously with about 4 Tbsp coffee syrup. Dust with cocoa powder if desired (I did).
- Top with approximately 3/4 cup of mascarpone buttercream and spread evenly.
- Repeat with remaining layers and crumb coat the cake. Chill for 20mins.
- Frost the cake with the remainder of the buttercream and smooth the sides and top.
- Dust top with cocoa powder and/or sprinkle with chocolate shavings, and press lady fingers into the sides if desired.


Ase says
Thank you so much for wonderful recipe!!
Will try.
The pan you suggested is 8inch by 2inch?
Then you cut in half making layers of 1 inch?
Which tool you use to cut the cakes?
Thanks!
Olivia says
Hi Ase! Yes, I cut each layer in half horizontally to get 4 layers total. This is the tool I use: http://amzn.to/2GkRfLS
Amber says
I know I’m a bit late on this, but after searching for tiramisu layer cake recipes online, I’m so glad one of my favourite bloggers has come up with the goods–it looks perfect.
I’ve also fallen victim to the cottage-cheese-SMB 🙁
I’ve also brought mine back to life by warming… taking a big scoop out, melting it, and beating it into the curdled mess. Definitely trying the hairdryer trick next time!
Olivia says
Hi Amber! Glad to know I’m not alone. The hair dryer has saved me in the kitchen more than once 😂
Maylen Ramirez says
Question: I am going to make this cake today & serve it tomorrow, where should I store it?
Olivia says
Hi Maylen! Store it in the fridge and take it out 2 hours or so before serving so it can come to room temperature.
Jessica says
Hi Olivia, I was curious if I could make the cake a day before and assemble the day of the party. It is my step dads birthday this week and we will be too busy setting up the party the day of to make the entire cake.
Olivia says
Hi Jessica! Totally! You could actually make the entire cake the day before and just store it in the fridge. Take out about 2-3 hours before serving. For sure though, the cake layers themselves can be baked a day ahead. Just cover them well in plastic wrap once cooled.
Debbie says
Question? When you put the syrup on top and then frost with the buttercream …isnt the top wet from the syrup causing he buttercream to not adhere? Could you poke through the cake and soak it that way with the flavor, maybe easier to frost
Olivia says
Hi Debbie! Since the cake layers are cut in half, the syrup soaks right into them so the buttercream adhere’s just fine 🙂
Kim Noggin says
Thank you so much Olivia for this delicious recipe. I made this cake for my cousin’s 21st b’day. It was a huge hit! Since I am also a lover of Baileys Irish cream I just had to make your coffee buttercream also from ‘Coffee and Baileys cake’. Best decision ever.
Olivia says
Hi Kim! I’m so glad you liked it! That coffee/baileys buttercream is one of my faves ever! As is this cake 🙂
Marsha says
Looks delicious! Will have to try.
Olivia says
I hope you like it Marsha!
Hakima says
I should probably invest in some 8 inch cake rounds. I have every other size. For some reason every time I am ready to buy an 8 inch round cake pan, they seem super flimsy. People love Wilton, but they’re just so cheaply made. My favorite pans that I’ve purchased are some brand I’ve never heard of from Tuesday Morning (a cute shop that sells things pretty cheap).
Anyway, that being said, I wanted to see if you’ve tried this in 9inch cake pans. I’ve done this before with different recipes, but wasn’t sure if this particular one will work?
Olivia says
Hi Hakima! Have you tried Fat Daddio’s pans? They are very sturdy and are a favourite of mine 🙂 http://amzn.to/2wXzyMp
This recipe will work in 9″ cake pans, but the layers will be a bit thinner so you may not be able to cut them in half. I would suggest maybe baking it in three 9″ cake pans (if you have 3), and making a 3 layer cake instead. Let me know how it turns out!
Hakima says
Yes! I do have 3 pans. Will definitely try that out instead of making it with 2 and cutting. And this way enough frosting to go around.
Also, I’ve already bought the lady fingers off Amazon and they arrived this weekend. I am making this for my husband’s 29th birthday on Wednesday. So excited!! Will definitely let you know how well it turns out.
Olivia says
Yay!! Good luck and let me know how you like it 🙂
Hakima says
Making it in 9inch pans turned out GREAT! It was absolutely delish and my husband LOVED it. We’re only 2 people, and we won’t finish an entire cake, so I took the rest to work and shared with my co-workers. They’re quite in love with it.
My only question is how do you make your cakes SO smooth?
Olivia says
Yay! So glad you guys liked it!! I use this tool on the sides of the cake to make the frosting smooth: http://amzn.to/2wYpymK. It works amazingly well!
Katya says
Is there any chance this cake would freeze? I’m needing/wanting a cake that will freeze for a couple of weeks and this one looks so delicious!
Olivia says
Hi Katya! This cake should freeze pretty well. Let me know how it turns out!
Kirsten says
Hello Olivia! I am also going to refrigerate my cake for a few days before I ice and decorate it and am wondering if you would suggest I put the coffee syrup on before or after?
Olivia says
Hi Kristen! I would put the coffee syrup on the layers just before you frost the whole cake. Since you’re not assembling the cake right away, I’d recommend freezing the cake layers (refrigerating will dry them out). I wrap mine tightly in plastic wrap and freeze until I’m ready to use them. Then just thaw for an hour or so. I hope that helps!
Suhail says
Hi,this cake look tasty . Can you write the measurmant in gr/ml .thank
Olivia says
Hi Suhail, it should be available now.
Cindy Rodriguez says
Gorgeous! It definitely has an art deco, old Hollywood look to it. Love the tip with the hair dryer and totally get the having your ingredients at room temperature. Who has the time, though, sometimes?!? I’m sure it tastes amazing!
Olivia says
I know! Seriously. I am notorious for forgetting to take my eggs out, but those can be quickly brought to room temp in some hot water. Butter though? Ugh.
Kathy says
Great recipe! I used 2-6 inch round pans and 2-6 inch square pans, in order to make 2 smaller cakes for 2 couples. There was plenty of batter to do this without having to double. The only tip I would pass on is, make sure you are VERY generous with the coffee syrup when you brush it on, mine was a little skimpy, but it was still a wonderful ! I made some quick ganache to add a little more flair to the top and I also brushed the ladyfingers with coffee syrup. Delicious. Thanks!
Olivia says
Hi Kathy! Thanks so much for your tips. I’m so glad you liked it!! 🙂
Courtney says
How long did the cakes bake using the 6 inch round pans? I am new to baking and wanted to use smaller pans, but am not sure about the “conversion” required. Thanks!
Olivia says
Hi Courtney! They will take about 35-40mins to bake or so. I hope you like it!
Tessa says
Wow! This is definitely on my list to try. Thank you! I too have had the cottage cheese curdled buttercream, I took a bowl full out, heated it briefly in the microwave and reincorporated it. Perfect end result!
Olivia says
Right?! It’s amazing that it can be saved. It’s a really easy buttercream to work with 🙂
Thea says
This looks delish! I’m not a cake baker so sorry for this question, does one brush the syrup on the cut side of the cakes or on the smoother side or does it matter? Thanks in advance!
Olivia says
Hi Thea! That’s a great question actually. It’s best to brush it on the cut side of the cake so that the coffee syrup can soak into the cake better.
Mindy says
Looks beautiful! I didn’t know that about warming the icing to save it- really appreciate the tip!
Olivia says
Thanks Mindy! Glad you found it helpful 🙂
Martha Rodriguez says
Gracias por compartir recetas tan espectaculares.
Me encantan y las disfruto muchísimo. Hice la torta moca y fue éxito total. Lo que sí he hecho es bajar la cantidad de azúcar. Aquí en Colombia nos piden bajar el dulce en las recetas de tortas. Esta de tiramisú si la hago creo que sólo le dajaria una taza de azúcar.
Feliz con sus recetas y vonsrjos. Gracias
Olivia says
Thank you Martha! I’m so glad you liked the Mocha Cake. I hope you like this one too! 🙂
Oksana says
Hi Olivia. I have a question about liquor or rum. I don’t have any of these at home. How can I substitute or omit them? Thank you
Olivia says
Hi Oksana! You can leave that out 🙂
Jerri Martin says
Hi Olivia,
This cake looks fantastic! My question is, do these cake layers rise to the top of the pans? I always use Fat Daddio’s 8×2 pans. My cakes never seem to rise the full 2″ so my layers look so skimpy when I torte them. Any advice?
Olivia says
Hi Jerri! Those are the exact pans I used! Fat Daddios 8×2. The cakes rose to the top for me, maybe a teeensy bit under, but enough to torte into what you see here 🙂
Jerri Martin says
Thank you Olivia for such a quick response, I gotta give this beauty a try!
Tam says
Hi Olivia, I am having trouble with the cakes rising. Do the pans need to be lined up the sides as well, or just the bottom?
Olivia says
Hi Tam! I only line the bottoms. The cakes don’t rise a huge amount, but they should rise. Is it possible that your baking powder is expired?
Rick Rodriguez says
Thanks for this version of Tiramisu Cake. I’ll have to give this a try. Love your blog and photos. It would be helpful if you also gave metric measurements because some of us, like me, are a little lazy to do the converting. 🙂
Olivia says
Hi Rick! Thanks so much. I’m actually working on getting a converter put in place for metric measurements! Stay tuned 🙂
Donna @ What the Dog Ate says
My first thought, before I read you post was, “I really like what she did with the ladyfingers. So creative.”
Olivia says
Hah! Thank you for that, Donna 🙂 I think the look has grown on me over time 🙂