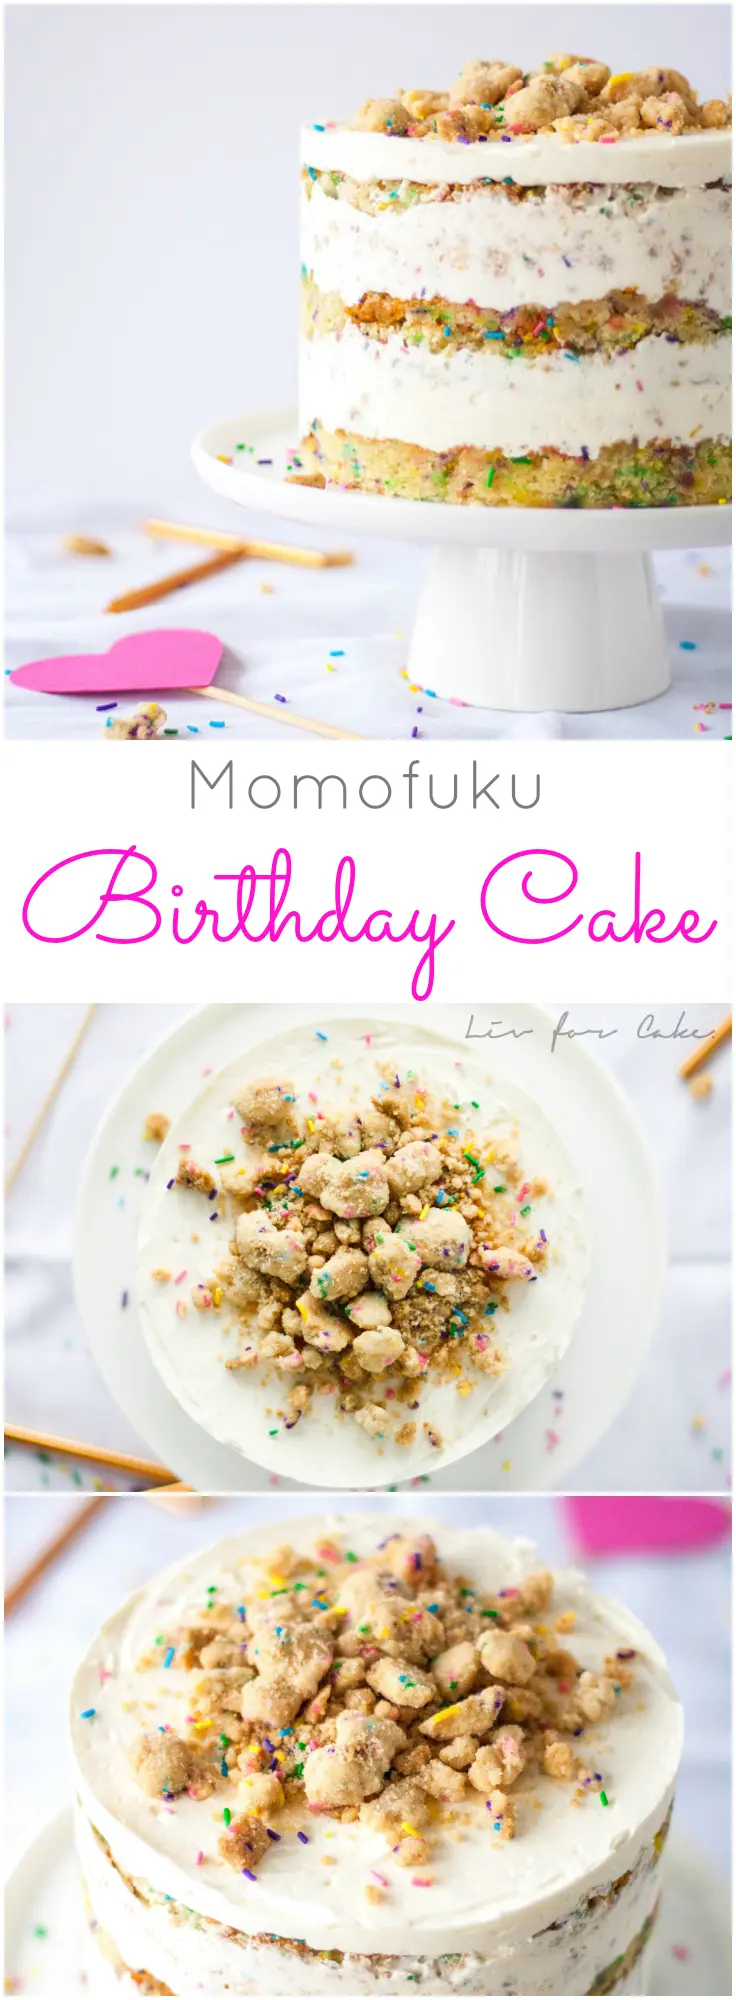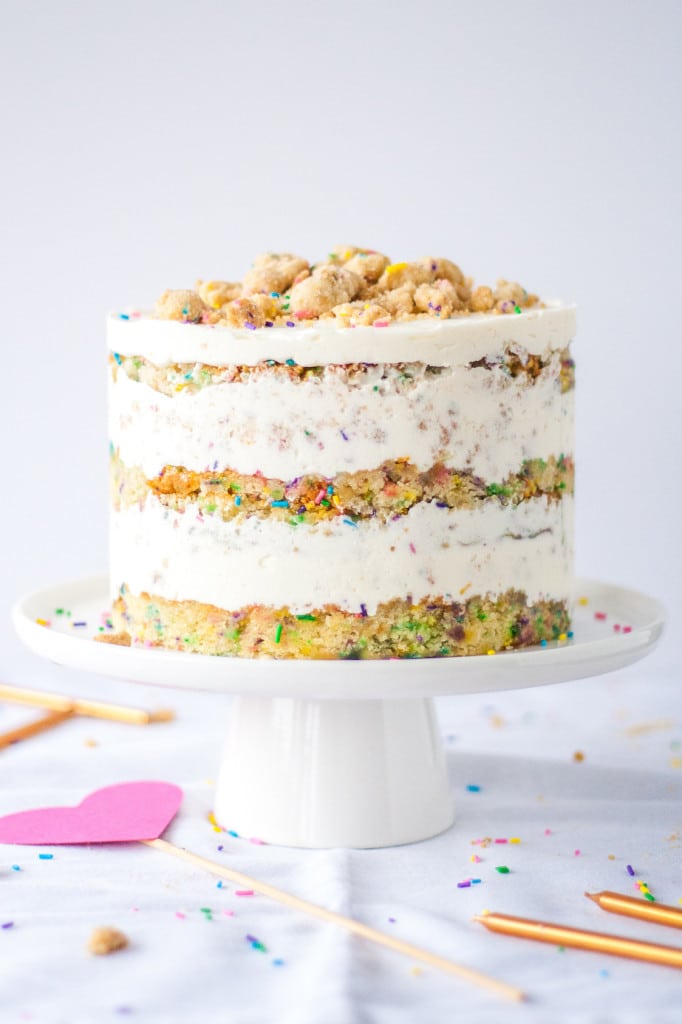
The Ultimate Birthday Cake. A sweet funfetti cake, topped with a cream cheese buttercream, and delicious cookie crumble.
To say that this cake was involved is an understatement. Not only did I have to purchase specific ingredients (cake flour, glucose, grapeseed oil, clear vanilla extract), I also had to buy new tools and equipment (quarter-sheet pan, 6″ cake ring, acetate). This was a project and I was totally up for it, especially since it was going to be for my husband’s birthday. I wanted it to be over the top and special.
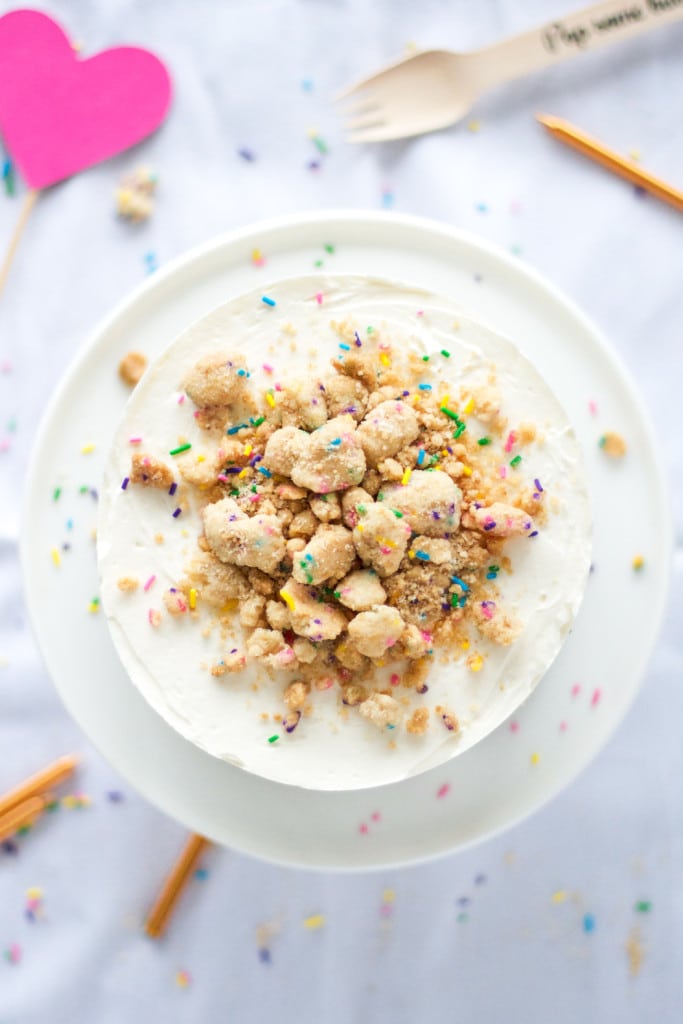
If you know anything about Momofuku recipes, you know they are kind of ridiculous and there are multiple separate components that need to be created for the final product. Many people fail at making them for one reason or another. I’d made their cookies before as a sort of first easy (lol) stab at a Momofuku recipe. I didn’t fail on those, but they were definitely not easy. This cake on the other hand, even though it looks almost perfect, had some pretty epic fails.
After I’d finished making it, I vented over email to my friend Nancy @ Gotta Get Baked, so she’s already heard a (less censored) version of this story, but here goes…
Ok seriously, this god damn cake. It was all going to perfectly fine. I paced myself, measured EVERYthing in advance for each component, and organized myself like never before. I was on point. The crumble was super easy, as was the frosting, both worked out perfectly. No issues.
Then I got to baking. The cake was a frikken disaster. I had cake all over the bottom of my oven and what was left in the pan sank like a ton of bricks after I took it out. Epic fail.
Round 2, I figure I must have messed something up in the mixing so I try again, with the same sheet pan. In hindsight I don’t know what I was thinking, but she said quarter-sheet and I had a quarter-sheet! Basically a repeat of the first cake, except this time I put another sheet pan under it to catch the drippings. There were a lot of drippings. Sigh.
BOTH cakes were a total fail. And why? Pan size. Again, I got totally screwed over by pan size. I’d been screwed over by it before here and here and I’d learned my lesson, so I wasn’t going to mess with changing up the pan size again. So, I specifically purchased a quarter-sheet pan as Christina Tosi’s recipe calls for. Well, did you know not all quarter sheet pans are the same size? Apparently. Even though mine specifically says “quarter-sheet pan” on the back of it, it is evidently not even close to the quarter-sheet pan they use at Momofuku. I finally discovered (post cake completion) that hers are 10×15″ where the one I bought is actually 9.5×12″. That is a HUGE difference! You think they’d specify pan size specifically in their recipes. That’s a pretty standard thing to do!
That was only part of the problem. The cake took forever to set, and I like to rotate my pans part way because my oven sucks. Well when I went to check this one after 30mins, I must have nudged it a bit too much, because it literally deflated in front of my eyes. Many expletives were thrown. To top it off, the second cake wasn’t baked enough because I relied on Christina Tosi’s cake testing instructions of “poke it” and “looks like the centre is set” instead of my trusted method of a wooden skewer. I ended up using mostly the first cake with one layer from the second. All the layers were much thinner than they should have been, but I was done at that point.
Assembly was a bit of a pain as well, but I won’t bother you with the boring details there. Mostly stupid mistakes on my part, and rushing things, and having a disaster of a kitchen. As soon as I stuck it into the freezer, I swore I’d never make another Momofuku recipe again. Ever. But then I tasted it and o.m.g. It’s honestly the BEST cake I have EVER had. No joke. The cake is sweet, but the frosting isn’t, and the cookie crumble with it all basically makes the cake. I’ll definitely make the frosting again, and different versions of the crumble for cakes in the future. I’m for sure taking a Momofuku break for a while though…
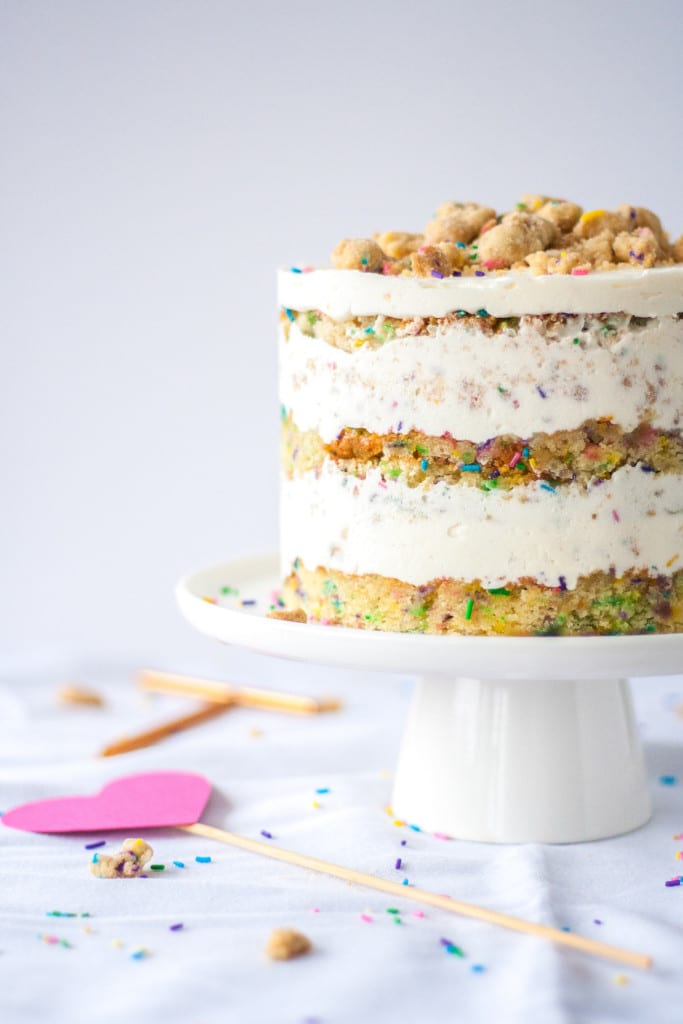
So there you have it. Another baker taken down by a Momofuku recipe. Ok maybe I’m exaggerating. Overall, I am happy with how it turned out and it IS delicious, but I could have done without the fails.
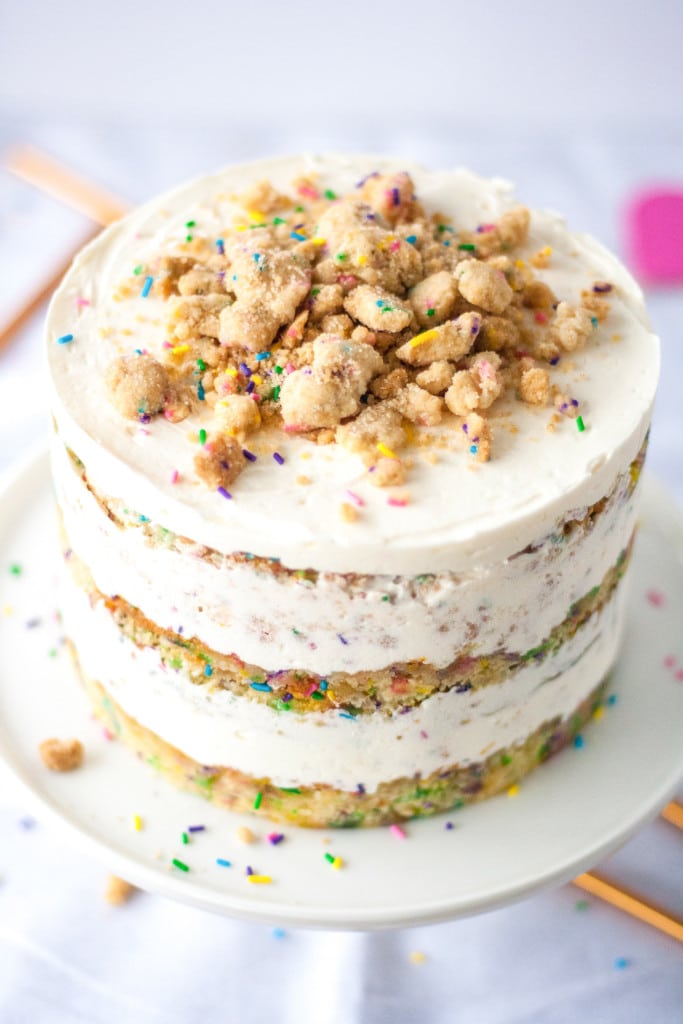
Here are a few key things about this recipe, should you attempt it on your own, along with some insider tips now that I’ve gone through it once:
- Clear Vanilla Extract – Use it! Initially I wasn’t going to bother with this and just use my regular stuff, but I’m so glad I did. Christina Tosi says to use it for flavour, but the biggest factor for me was color. I’d seen some pics of other bakers who didn’t use the clear stuff, and their frosting turned out kinda beige. Not the pretty stark white. So, use the clear stuff!
- Citric Acid – I couldn’t find this at my local grocer and didn’t want to hunt it down for just a “pinch” in a recipe so I used a bit of lemon juice instead. Worked perfectly fine.
- Frosting – I used 1.5x the recipe for frosting. In my research, some bloggers were saying to double the recipe, but I opted to do 1.5x and it was perfect. I had a tiny bit left over, but otherwise I think it was a great ratio, even with my super thin cake layers.
- Timing – I wouldn’t recommend trying to do this all in one day. It’s certainly doable, but for sanity’s sake, make the crumble and cake one day, then do the frosting and assembly the next day.
- Pan Size – For the love of all things baked and delicious, make sure your “quarter-sheet pan” is 10×15″ before you attempt this!! I’ve also thought about using three 6″ cake rounds and seeing how that would turn out. The layers might be a bit thicker and have more of a finished look on the outsides, but I’m sure it would taste just as delicious, and would likely be a lot easier to manage.
This cake is not for the faint of heart. It’s a ton of work, but the effort will be worth it in the end when you finally have a slice or two of this amazing cake!
Momofuku Birthday Cake
Ingredients
Crumble
- 100 g granulated sugar 1/2 cup
- 25 g light brown sugar 1 1/2 Tbsp (tightly packed)
- 90 g cake flour 3/4 cup
- 2 g baking powder 1/2 tsp
- 2 g kosher salt 1/2 tsp
- 20 g rainbow sprinkles 2 Tbsp
- 40 g grapeseed oil 1/4 cup
- 12 g clear vanilla extract 1 Tbsp
Cake
- 55 g unsalted butter room temperature (4 Tbsp, 1/2 stick)
- 60 g vegetable shortening 1/3 cup
- 250 g granulated sugar 1 1/4 cups
- 50 g light brown sugar (3 Tbsp tightly packed)
- 3 large eggs
- 110 g buttermilk 1/2 cup
- 65 g grapeseed oil 1/3 cup
- 8 g clear vanilla extract 2 tsps
- 245 g cake flour 2 cups
- 6 g baking powder 1 1/2 tsp
- 3 g kosher salt 3/4 tsp
- 50 g rainbow sprinkles 1/4 cup
- 25 g rainbow sprinkles for sprinkling 2 Tbsp
Frosting (1.5x the original recipe):
- 172.5 g unsalted butter at room temperature (1 1/2 sticks)
- 75 g vegetable shortening 1/4 cup + 1/8 cup
- 82.5 g cream cheese 3 oz
- 37.5 g glucose 1.5 Tbsp
- 27 g corn syrup 1.5 Tbsp
- 18 g clear vanilla extract 1.5 Tbsp
- 300 g powdered sugar sifted, 1 7/8 cups
- 3 g kosher salt 3/4 tsp
- .38 g baking powder pinch
- .38 g citric acid I used 1/4tsp lemon juice
Soak
- 55 g milk 1/4 cup
- 4 g clear vanilla extract 1 tsp
Instructions
Crumble:
- Preheat oven to 300F and line a baking sheet with parchment or a silpat.
- In the bowl of a stand mixer fitted with the paddle attachment, combine all dry ingredients (sugars, flour, baking powder, salt, sprinkles). Mix on low until well combined.
- Add oil and vanilla, mix again on low to distribute until small clusters form.
- Bake for 15mins.
- Cool completely before using on cake.
- Store in an airtight container for 1 week at room temperature or 1 month in the fridge or freezer.
Cake:
- Preheat oven to 350F and spray a quarter-sheet pan (10”x15”) cooking spray and line with parchment or a silpat.
- In a medium bowl, whisk together cake flour, baking powder, salt, and 50g (1/4 cup rainbow sprinkles). Set aside.
- In the bowl of a stand mixer fitted with the paddle attachment, combine butter, shortening, and sugars. Beat on med-high for 2-3mins. Scrape bowl if necessary.
- Add eggs one at a time, fully incorporating after each addition. Scrape bowl.
- Turn mixer to low and stream in buttermilk, oil, and vanilla. Increase mixer to med-high and beat for 4-6minutes until mixture is light, fluffy, and no streaks of fat or liquid remain. Scrape bowl.
- On low speed, add flour mixture and mix just until batter comes together, 30-60 secs.
- Spread cake batter in an even layer in the pan and sprinkle with remaining 25g (2 Tbsp) rainbow sprinkles.
- Bake for 30-35mins or until a cake tester comes out clean.
- Cool completely on a wire rack.
- The cooled cake can be stored in the fridge, wrapped in plastic wrap, for up to 5 days.
Frosting:
- In a medium bowl, sift together confectioners sugar, salt, and baking powder. Set aside.
- In the bowl of a stand mixer fitted with the paddle attachment, combine butter, shortening, and cream cheese. Beat on med-high for 2-3mins until the mixture is smooth and fluffy. Scrape bowl.
- Turn mixer to low and stream in glucose, corn syrup, and vanilla. Increase mixer to med-high and beat for 2-3mins until smooth and glossy white. Scrape bowl.
- Turn mixer to low and add in sugar mixture and citric acid (I used lemon juice). Once combined, turn mister to med-high and leaf for 2-3mins until white and smooth.
- Use immediately, or store it in an airtight container in the fridge for up to 1 week.
Soak:
- Whisk together the milk and vanilla in a small bowl or measuring cup.
Assembly:
- Cut acetate into two 3” high and 20” long strips.
- Place a piece of parchment or silpat onto the counter and invert cake onto it. Peel off parchment/silpat from bottom of the cake.
- Using the cake ring, stamp out 2 circles (start in the corners to be able to get 2 full ones). These will be your top and bottom layers. Stamp out 2 half circles from the remaining scraps.
- Clean cake ring and place in the center of your quarter-sheet pan lined with parchment or a silpat.
- Place 1 strip of acetate inside the cake ring to line it. **Make sure the cake ring is completely dry or you won’t be able to get it out of the ring after freezing!!**
- Place your less pretty full layer into the bottom. Dip a pastry brush into the soak and brush onto the cake layer.
- Using the back of a spoon, spread 1/5 of the frosting in an even layer over the cake.
- Sprinkle 1/3 of the crumble evenly over the frosting. Press down with the back of your hand to anchor them in place. (I reserved the chunkiest crumbs for the very top).
- Using the back of a spoon, spread 1/5 of the frosting in an even layer over the crumble.
- With your index finger, tuck the second strip of acetate between the cake ring and the top 1/4 inch of the first strip of acetate, so that you have a clear ring of acetate 5 to 6 inches tall – high enough to support the height of the finished cake.
- Place the two half circle cake pieces on top of the frosting layer and press in additional cake scraps to fill in the layer. Use the back of your hand to press the scraps together into a flat even layer.
- Repeat steps 6, 7, and 8.
- Place the remaining cake round onto the frosting and cover the top with remaining 1/5 frosting. Spread frosting evenly or a bit messier if you like.
- Top with remaining crumble — either around the edge or in the center, however you like.
- Place sheet pan into the freezer and freeze for a minimum of 12 hours. Cake will keep in the freezer for up to 2 weeks.
- At least 3 hours before serving, remove the cake from the freezer and using your fingers and thumbs, pop the cake out of the cake ring. Gently peel off the acetate and transfer cake to platter or stand.
- Let it defrost in the fridge or counter for a minimum of 3 hours (wrapped well in plastic, the cake can be refrigerated for up to 5 days).
Robin says
Another silly question. How tall are these cakes once constructed? Can’t find that info anywhere. I made the German chocolate Jimbo a year ago and it was perfect. But I forgot to measure how tall it was because I didn’t need to put it in a box for a Customer.
Olivia says
This particular one was about 6″ tall or so I think.
Robin says
Hi, I just looked up Momofuku Bday Cake. They have a link to the exact pan they use in their FAQ page. It’s 9.5” x 13” aluminum. After your advice, I’m afraid to buy this pan and not one that’s larger. So bizarre that they’d tell us the wrong size.
Olivia says
Hi Robin! If the recipe on their site uses the same amounts as this one here, I would definitely go with the 10×15 pan!
Robin says
Thank you! Will do!
Lauren Jacquemin says
For the frosting – is glucose powdered or liquid? Where can it be bought?
Olivia says
Hi Lauren! I used liquid. You can buy it on Amazon or in craft stores like Michaels. Wilton makes some.
Sarah says
I’ve been really curious about this cake for a long time and I’m glad you explained things so thoroughly. Do you know if the cake *must* be frozen and then thawed before eating or can it just be chilled in the fridge for like 24 hours? What does the freezing do that the fridge can’t? (There’s no way I could get a cake in my tiny freezer but I really want to try this recipe.)
Olivia says
Hi Sarah! Freezing the cake helps remove it from the ring mold. If it’s not frozen it’s more likely to fall apart when you try this. If you’re not using that though, there is no need!
Christina says
This is getting exciting! I finished the three layers of cake last night using two six inch cake pans. They’re close as proportional as eyeballing can get – I threw the rest of the batter in the fridge to sit while the first two layers were in the oven for 25-30 mins then let it sit on the counter for a little before I poured the final layer. Cake looks great! I’m making the crumble today and the icing and the assembling, tomorrow. I’m making this for my boyfriend’s 29th (and quarantined) birthday. Curious if anyone has any more tips for assembly or the rest? Should I slice the tops of my cake layers to get them close to flat as possible?
Also – subbed avocado oil for grapeseed if anyone is interested in that. Not sure how it tastes yet but I am sure it’s fine!
Olivia says
Hi Christina! Thanks for your tips. I can’t wait to hear how it turns out for you! Definitely get the layers as flat as possible, this will help immensely when stacking and help avoid disaster especially since the frosting is on the softer side.
Christina says
It turned out great! I cut off the tops a little to make it more flat. I didn’t seem to use all the milk mixture. I also didn’t have an acetate ring, so I had to frost without the form. I think I might’ve gone through icing quicker this way. I used every bit of the icing! I also used “regular” vanilla not clear – I couldn’t find it in stores and already have a large bottle. I don’t think it drastically made a difference. This cake is good but strange how it all works out; the cake is dense and the icing is definitely on the softer side. I really hated my crumbles – I made two batches. Mostly because I looked up the video where Christina Tosi shows how she makes this, and her crumbles look near perfect. So I was comparing…
Long story short – you can do this recipe with 6″ pans, without the acetate ring, and and sub some of the ingredients for an awesome cake!
Olivia says
Yay! So happy to hear it turned out 🙂 I def didn’t use all the milk either, but that’s often the case with a soak/syrup. Thanks so much for your tips! <3
Diana McFeters says
Wow, and yum. I am not a novice baker, and this cake still threw a few curve balls. But so worth it! I decided to make this for my son’s 20th birthday. With closures from COVID19 I was not able to obtain some supplies so had to adjust. Instead of the sheet pan I used two 8 inch rounds. I got distracted cleaning the kitchen so my first batch was a bit overdone. Yes, cleaning! In my defense my housekeeper has not been here in over a month (COVID19). Well I cleaned the cooktop only to realize the tile behind also needed attention, and then the cupboards, mold around the rim of the sink, the the sink drainers, then what IS THAT under the drainers!) Anyway, you get the picture. Second batch curdled after adding the buttermilk (which was actually milk with vinegar because, yup, no buttermilk to be found in the stores). In my hurry hadn’t let the ingredients come to room temperature. Decided to add the oil and see if it would come together. Nope. On to batch 3. Mixed the milk with the oil and vanilla, and slowly added to the mix. Success! Watched like a hawk and didn’t burn the cakes.
For the icing didn’t have glucose so subbed 2 tsp corn syrup per tablespoon glucose.
Oh, for the cake had to make my own cake flour with AP flour and cornstarch. Worked fine. Yup, no cake flour in the store.
Turns out the overdone cake had nice carmelized edges that was great with the extra icing!
We haven eaten the cake yet, but having tasted all the components can’t imagine it is anything less than devine!
Thanks for bringing us another great cake Olivia!
Olivia says
Hi Diana! LOL I am so with you on the cleaning. I get that way too. One thing leads to another and I often don’t finish cleaning the first before starting on the second. I’m so glad you loved the components of this cake and I hope you love the finished product just as much. Happy birthday to your son!
Daddy-fuku says
3/4 tsp Salt was a bit much for the icing, I would go for 1/4tsp next time. I enjoyed the saltiness, but was more overt than merely flavor enhancer.
Olivia says
Hi Daddy-fuku! Thanks for your feedback. I hope you liked the cake! 🙂
Maggie says
I’m a novice baker. Good cake overall but like many, I went straight into the recipe without reading the bakers comments. Flat as a pancake. Kinda sad but if I try it again, will use a more suited tray.
Olivia says
Hi Maggie! This cake was a challenge for sure. I hope you give it a try again!
Jennifer says
Thank you for this incredible recipe! I’m planning on baking this soon and I’m loading all of the necessary ingredients and supplies into my cart but I’m having trouble finding a suitable replacement for the cake flour that you linked to. Unfortunately, Bob’s Red Mill discontinued their cake flour. Do you have a recommendation for a new flour that you’ve been using lately perhaps?
I would very much appreciate your recommendation. Thank you and have a wonderful day!
Olivia says
Hi Jennifer! I hope you love this one, it is a delicious cake! Any brand of cake flour will work as long as it’s not “self-raising”. Where are you located? I used Robin Hood flour here in Canada but King Arthur Flour is a great one in the states.
Erin says
About to test out your recipe…so happy I stumbled upon it first before trying the regular milkbar recipe!
2 questions- what kind of milk do you use for the soak? and what type/ percent % cream cheese?
Thank you!!!
Olivia says
Hi Erin! You can use any kind of milk you like — I used 2%. For the cream cheese, I’m not sure on % but I would use full-fat brick cream cheese – not tub and not low fat.
Kristin says
Hi Liv,
I’m going to attempt this cake for my daughters first birthday. I’m having a hard time finding glucose, do you think it would work to use clear corn syrup instead?
Thanks!
Olivia says
Hi Kristin! I think corn syrup will be fine!
Karla says
OMG! Reading your article made me feel so much better and not quite so stupid. I just made one of momofuku’s cakes (Lemon Berry Crunch Cake) for this Thanksgiving and had a similar experience.
Everything was going fine, all elements working wonderfully until the bloody cake. Nothing like making a double batch of the cake and having it come out flat as a pancake. Quite a hit to the self esteem – I know I”m a decent cook and baker – have made plenty of complicated showstopper recipes, what the heck is up with this cake at 2am on Thanksgiving morning as I’m running out of ingredients, swearing so much the dog’s ears are up… and getting a little better cake the 2nd time around but it’s still less than an inch thick? In my case it was also the pan size – I was using too large a sheet pan. Pretty sure I’m going to use 8″ rounds next time and sacrifice the perfect cut edges look. Thanks for your honest and helpful review of this recipe.
(Mine did turn out, fyi, and got tons of kudos so it all worked out. Tasted great, too. Just took an amazing amount of time and effort.)
Olivia says
Hi Karla! Glad you can commiserate — 2am omg! I admire your perseverance. I may have settled for a store bought cake at that time! LOL I agree the cakes are totally delicious, but so much effort that I haven’t attempted another one since!
Patrick says
I’ve been following your recipes for a while now, and just got to know that you live in Vancouver too… This is the first recipe of yours that I used and I’m about to bake another cake for work tonight.
Olivia says
Hi Patrick! So happy to “meet” a fellow Vancouverite 🙂 I hope your coworkers realize how lucky they are to get homemade cakes brought to them 🙂
Carlin says
Aww im from Vancouver, too!
Olivia says
Hi Calin! Always nice to meet locals! 😀
Ellison says
I am leaving an “in general” comment. I was completely OBSESSED with Milkbar and the Momofuku bakery. I laughed while reading your diatribe of trials and tribulations because that is what the whole concept is momofukedup. I went to NYC last weekend, with my daughter who is equally obsessed, and our only goal was to taste a milkbar cake. We get to the bakery (Is it really a bakery? No it is not.)and all they have are the stupid prepackaged cookies and frozen yogurt. Womp womp womp. We took a menu and left. Such an epic let down. So I feel ya! I am sure this cake was a monster!
Olivia says
Hi Ellison! Bummer about your experience at Milk Bar! I’ve never been there myself and am surprised to hear that. I would have thought there’d be cakes lining every shelf!
Amelia says
Honestly I am super frustrated right now. I am not a novice baker – and I’m the type who would never use a “box” mix but actually I am considering doing it tomorrow so I can somehow salvage my plans for my niece’s birthday cake. I followed this recipe to the T. The colors are nothing like in your photos. The “sprinkles” all seemed to have dissolved into the cake. Its not like I used some weird brand of sprinkles, I went to a national grocery store chain and got the type likely to be purchased by anyone else that would attempt to make this cake. Same goes for the cake flour, clear vanilla, white sugar ect. Also the crumb of the cake is heavy, not light at all; it is yellow and not white like in the photos. I shopped for all of the exact ingredients, went to three different stores to find them all. The cake is heavy, yellow and has no confetti. Tomorrow I am going to try again with a box mix.
Olivia says
Hi Amelia! So sorry to hear you’re having troubles with this one. I completely understand how you feel — it put me through the wringer too! It sounds like the sprinkles you are using are the round nonpareils that are notorious for bleeding in the batter. I would use either confetti sprinkles or the longer jimmies. I’ve had success with both of those. My cake is quite yellow too, not white (the frosting should be white though if you used clear vanilla) and was a bit on the denser side. It’s not a light and fluffy cake. I hope your next attempt goes better!
Lena says
Thank u so much!!! I did everything tonight exactly like ur recipe says! Im so glad u adjusted more icing because it was definitely perfect for me! I ate the scrapes and The freakin cake is amazing!!!! And the icing was perfect! I cant wait to eat it all together!!
Olivia says
Hi Lena! So happy to hear that you found this all helpful! I’m sure you will love it 😀
Karli says
For the frosting, what does “steam in glucose..” mean? Also, will i be ok making the frosting with a hand mixer with regular whisk attachment rather than paddle?
Thanks!
Olivia says
Hi Karli! Oops, that should have read “stream in”. Your hand mixer should work just fine!
Marcela says
Wow… I actually just wanna say hi. I was reading your recipe about the cinnamon crunch toast cake and that led me to read this blog post. Although I am sorry that you had to go trough this pain, your story was very entertaining! :O) and your cake looks very delish! I had to google this whole thing about the Milk Bar Bakery, and no offense to them but your “take on their cake” looks more appetizing.
Olivia says
Hi Marcela! Thank you for the sweet comment! I’m glad you found the post entertaining 🙂 I hope you try this recipe!
Carla says
I am so excited to give this a try but have only been able to track down an 11×15 inch pan (in Australia) – do you think this will work ok? I was hoping it might just result in a bit of a thicker cake? Thanks 🙂
Olivia says
Hi Carla! I think it will be fine, but it will actually be a bit thinner — the pan required is 10×15. Be sure to reduce the baking time if needed!
Carla says
Thank you! Finding the right pans is proving more difficult than expected & I am trying to avoid buying new ones
I need a fairly large cake so was considering using my 24cm pans (around 9.5 inch) in which case I’d need to double the recipe
I was wondering, is the biggest issue experienced with differing pan sizes the batter overflowing? In which case, how much do you recommend filling the pans? Half way, or three quarters?
Thanks! 🙂
Olivia says
Hi Carla! Yes, it was the batter overflowing! I think if you double the recipe and use the 24cms pans though should be fine. I recommend filling no more than 2/3rds full. Let me know how it turns out!
Carla says
So I cooked the batter in 3 x 24cm tins and I think it was a success. I filled them around 2/3 full (my tins are only 3.5cm high). I put one in first to see how it went and it rose to the top of the tin but didn’t overflow. I forgot the proper method for checking “doneness” and put a skewer in which made it sink a little. With the other two I used the prescribed method but it’s hard to tell whether they are cooked. Is it naturally a very soft/delicate cake? They all came out of their tins fine but do feel like they could break very easily (probably also due to the thickness)
I didn’t time the cooking but it was somewhere around half an hour
The recipe says the cakes are fine in the fridge up to 4 days but do you know if they freeze ok? I want to make my cake 5 layers and didn’t want to attempt a double batch straight up 🙂
Olivia says
Hi Carla! If I recall correctly, it is more of a delicate cake and it should freeze perfectly fine!
Ryo says
Hey! I just did my first attempt at making this birthday cake and the recipe was very easy to follow along! However, the sponge cake did not rise as much as I was hoping for. I didn’t overmix and the baking powder is not expired or bad. Are there any tips for getting it to rise?
Thank you!!
Olivia says
Hi Ryo! It doesn’t rise a ton, but should rise some. Did you bake it in the same pan as per the recipe? The only thing I really know to cause flat dense cakes is expired raising agents or overmixing once the flour is added.
Liza says
Thanks for the info. I ended up hating the flavor of the clear vanilla flavoring. There was a chemical taste that I am super sensitive to. For instance I can’t stand the taste of artificial sweeteners.
Olivia says
Hi Liza! The clear vanilla is not to everyone’s taste for sure.
Sosse says
Hello,
Tried this recipe today and honestly wasn’t as bad as I thought! Only issue I had was that the cake didn’t really rise as much as I thought it would. Any idea why? I followed ingredients and I tray thins to a T and I have a pretty good oven
Olivia says
Hi Sosse!The cakes don’t rise a ton, but they should rise. Have you tested your baking powder to make sure it’s not expired? Also be careful not to overmix the cake batter as this can cause a denser, shorter cake.
Sabrina says
I made the birthday cake today with my sister. I bought the 10×15 sheet pan. Mine is two inches deep. It took me about 2.5 hours to make. Your recipe was very easy to follow and I appreciate the tips with pan size etc. The cake is delicious! I had some left over pieces and decided to make more birthday cake soak for it. The Cale was a tiny bit on the dry side. Since I added more milk to the left over pieces and like it better, I think I would almost double the birthday soak for a moister cake. The cake is a sponge like cake that can handle more soak. Thank you Liv For Cakes!
Olivia says
Hi Sabrina! Thanks so much for your feedback! I’m glad you found all my tips useful 🙂
Kimm says
I have been so intimidated by the Milk Cookbook since I received it for Christmas!! I was like you, Liv, and made some cookies first. They were delicious. I have read just about the whole cookbook from start to finish trying to get my head around it. You are right about so many components to all the recipes that it has scared me off quite frankly. I also don’t really want to purchase extra equipment. After reading your blog and all he comments, I’m ready to give it a try. I’m going to use cake pans and frost and stack like a regular cake. The crumble sounds awesome and I want to use them for other cakes for sure. Thx for all the tips and for all the comments on fails and successes. I’ll let you know how it goes when I decide to bake it!! Here’s to trying new things!!
Olivia says
Hi Kimm! I’m so glad you’re going to give it a try! I honestly think that the cake pans and stacking as a regular cake will take away a lot of the work/stress and it will be just as delicious. I can’t wait to hear how it goes!
Shana says
Okay, I am back to report about baking the cake in round pans. It works well! I baked the cake in my 6″ x 3″ round pans. Based on the fact that there are scraps when you make the cake in the sheet pan, I opted to have some extra batter and just made a few mini cupcakes out of it (samples — yum). I only have two pans, so the first round, I put 300g of batter in each pan, and they came out about 1.5″ high. This was significantly taller than how it comes out in the sheet pan, so for the third layer I only used 240g of batter and it came out 1.25″ high, which I think is slightly better for a 3 layer cake. I would advise 25-30 min of bake time for the 240g layers. Watch it carefully and stick to using a toothpick to test for doneness, because it came out even lighter and fluffier than it has for me in the sheet pan, which made it quite challenging to use Tosi’s poke test. I froze the layers because they are so tender I’m afraid to stack and decorate them even at room temp.
Olivia says
Hi Shana! Thanks for reporting back! I’m sure this will be helpful to those that want to try it with round pans instead 🙂
Shana says
About the pan size…it specifically says in the front section of the Milkbar cookbook that her quarter sheet pans are 10×13. Perhaps the depth of your Nordicware pan is shallower than whatever commercial brand Tosi uses? I don’t own a quarter sheet pan, so I use my Silverwood adjustable size cake pan (it’s 12x12x4 with dividers, they have it on Amazon, pricey but worth it) when I make her cakes and adjust it to be 11×12 (so it’s 132 square inches versus 130). Using a 10×15 inch pan will most certainly result in a thinner cake than is intended. I get great results with the Silverwood pan, and the bonus is that it’s 4″ deep, so I’ve never had an overflow problem.
I’ve heard other people complain about the overflow with her cakes. She directly addresses it in the book: take it slow! You have to really beat the you-know-what out of the wet ingredients to homogenize it. Not in this recipe, but in other of the cake recipes she warns about the potential for overflow if you don’t mix the wet ingredients well enough. I find it easier to get everything to combine when I beat the butter, sugar and eggs until fully incorporated and lighter in color (2-3 min on high) before adding the buttermilk and oil. Once you have really homogenized the butter and eggs, the buttermilk and oil emulsifies right into it and thickens up quite quickly. Oddly, sometimes for me it doesn’t thicken up quite as much as she describes (especially the chocolate cake for some reason), but the cake still comes out great!
Can you tell I’ve read the whole book and baked the cakes multiple times!? Lol. I’m about to try this recipe in 6″ round pans. I’ll let you know how it goes!
Olivia says
Hi Shana! Thanks for the detailed input. The book I have states that her quarter sheet pans are 10×15, but it only states that at the beginning of the book, and to be honest, I often don’t read those parts! And even if I did I’m likely to forget. Since there is such a variation in quarter sheet pans on the market, it would have been best for her to list the specific pan size in each recipe — this wouldn’t have been that hard to do! It certainly would have saved me and others some frustration 🙂 Thankfully the cake was delicious and totally worth the effort.
Shana says
Weird that our books have different sizes! I would say that maybe you have an older copy of the book or something? BUT, good gravy! Would you believe that my All About Cake book by Tosi compares the quarter sheet they use to a 9×13″ jelly roll pan!? So we have three books with three different sizes! Not exactly precision, is it!? I completely agree that listing the pan size in the recipe would be helpful.
Kristen says
Hello! I’m in the early stages of making this cake and just wondering…do I need to cover with plastic wrap when I stick it in the freezer?? Thanks!
Olivia says
Hi Kristen! I didn’t cover mine.
Chris Garrison says
Liv, I just bought Christina Tossi’s new cookbook. She has the recipe for making this ‘birthday cake’ (and other MilkBar cakes) in sheet cake form. I have spent 2 weeks gathering all the necessary ingredients, have spent a lot of money and do not want to mess up. But alas, I have hit a snag. No where can I find anything but low-fat buttermilk and I live in a major city and went to 4 stores. Please tell me the low fat will work!
Olivia says
Hi Chris! I think the low-fat buttermilk will work just fine. Let me know how it turns out!
Shana says
Chirs, you’ve probably already made the cake, but this information may come in handy later. Buttermilk is naturally low-fat. That’s the only way they sell it. It’s so annoying that they feel the need to label it “low-fat,” but that is the ingredient you are looking for. I have made many of Tosi’s (and other recipes) with it. Where I live, I can also only get it in a quart size. However, it freezes really well. I have several ziploc bags of pre-portioned and frozen buttermilk in my freezer that I defrost and use to bake regularly.
colleen says
Wondering if this recipe could be made in 2 8 inch cake pans?
Olivia says
Hi Colleen! I haven’t tried it myself but it should work ok. Converting pan sizes is always tricky. Here’s a site I use as a guideline: http://www.joyofbaking.com/PanSizes.html
Kate T says
Hi Liv! First of all, love your blog. I’m on day 2 of assembling these components. Weirdly my crumb didn’t come together in big clumps (even on the second try), and it was getting too wet adding more oil. I’ve now got two batches of pretty measly-looking crumb. Any suggestions?
Olivia says
Hi Kate! Strange about the crumble! Did you make any substitutions? Did it just remain powdery? If you try it again, I would add the oil in slowly and stop when it starts to clump. Are you using a stand mixer to make it?
Maeve says
This happened to me too! I found that the rarely used melon scooper was my hero and I made many little balls but left a lot of the small crunchies too.
Jennifer says
I made the Milk Bar Birthday Cake this weekend for my brother’s birthday. I read through all of your post several times to get it right. I actually thought this cake was quite easy overall. Not having to worry about frosted sides helped a lot! I used a 10×15 pan on your recommendation but then the cake seemed too thin. It did rise so I don’t think that was the problem. I just can’t figure it out based on watching other videos and reading posts from people that used a 10×13. Every individual component is super delicious, but once I put it all together it was way too sweet. I think after tackling many other Liv for Cake cakes with a SMB, our taste buds couldn’t handle it. Liv, thanks again for breaking down the recipe and for all of the helpful tips!
Olivia says
Haha I know what you mean! It is a very sweet cake for sure — can’t have too much of it! I’m glad you tackled it though and thanks for your input!!
Fatima says
Hi i really want to attempt this recipe. I have found everything except for the cake pan in that size. I live in Australia and can only find a smaller size pan. Where did you purchase yours?
Olivia says
Hi Fatima! I bought mine at a local discount store. Are you able to order from Amazon at all? https://amzn.to/2Qb0XEf
Tash says
Hey liv, I love love loveeee your recipes pictures and
Explanation. 😊 but I had a question about the
Ring size for assembly ?
Is it a 6 inch cake ring or 8 ?
Olivia says
Hi Tash! I used a 6″
Gema says
Hi, I was wondering how your crumb is not darkened? I made a batch and the bottom side is darker. I used clear extract and it was on parchment paper in the top rack of the oven.
Thanks for your help!
Olivia says
Hi Gema! Is it possible your oven runs a bit hot? How long did you bake for?
Karolina says
Hey! I would like to try this recipe as well but as I was reading it through there is no way I can find some of those ingredients in Greece, such as vegetable shortening, clear vanilla extract, corn syrup etc. Is there any way I could replace those ingredients with something similar? I read online that vegetable shortening is basically just fat whereas butter has also 20% water. Is it even worth trying to make this recipe by replacing some of the ingredients? Maybe I will try and let you know how it goes.
Olivia says
Hi Karolina! I would replace as follows:
Shortening with butter
Clear vanilla with regular vanilla
Corn syrup & glucose – not critical, I would leave out
The changes will mostly affect the color of your frosting — it won’t be a pure white, but more yellow. I don’t think it will have too much of an impact on taste. Let me know if you try it!
Haylie says
I am getting jazzed up to make this for my husband’s 30th birthday! Where did you find the glucose? Is it a syrup or a powder? All I have found is Wilton’s syrup!
Loved reading this and learning from you before I set out on this venture myself!
Olivia says
Hi Haylie! The glucose is a syrup, I actually found it at Michaels, Wilton brand https://amzn.to/2K9UdTr. I’m excited that you’re going to try this one! It was totally worth the effort 🙂
Sharon Bruhn says
I made the chocolate malt version of this cake and my layers were really dense, I figured it would be more fluffy. That said, the chocolate one is incredible and so rich! I’m trying this one for my hisband’s birthday next weekend, thanks for the tips! I was also thinking about using round cake pans and then cutting out the circles from those rather than the sheet pan.
Olivia says
Hi Sharon! I’m not sure what the chocolate malt version is, but I don’t think the layers should be dense if it’s the same kind of recipe! Round cake pans would for sure be easier — I would do that next time. Let me know how it turns out!
Rav says
Hi Olivia I am baking this cake for my mom on mother’s day this is a little short notice but on Bon Appetit it says to use the 9 x 13 pan and it has the same cooking time and amount of ingredients. So should I use the 10 x 15 or the 9 x 13. And you have experience with the 10 x 15 so could you tell me any tips about the cake baking? Thank You
Olivia says
Hi Rav! Sorry for the delayed reply. I hope it worked out for you! I would use the 10×15 in pan and follow the recipe and times as written.
Kendra says
I saw a TV show discussing this cake, and immediately got to work finding a recipe for it! This recipe was wonderful! I really enjoy baking, and have a decent amount of experience doing so. That being said it may not be a ‘beginner’ recipe, but it’s a manageable recipe (albeit time consuming) if your comfortable in the kitchen. Just to note, I didn’t have the recommended items on hand (clear vanilla, citric acid, and no acetate paper). Ingredients wise, the cake didn’t suffer! It was great! But I would recommend getting the right materials 😉 Thanks for the share, my husband and guests loved it!
Olivia says
Hi Kendra! So glad you loved this one, it’s amazing!! And glad to know it worked well without those few things 🙂
Mightysprite says
I find your comment about the pan size to be very interesting (and a good warning) and I’m just about to purchase a new quarter sheet pan for this purpose, however, it’s confusing to me that Tosi says (according to your commenters) she uses a 10″x13″ pan and then other bloggers have not made any comments using generic “quarter sheet pans” for their birthday cake attempts, which according to my Amazon and general web research is 9.5″ x 13″.
Olivia says
Hi there! Definitely buy the 10×15 size pan for this. I’m not sure why no one else ran into the issue, but my quarter sheet pan from Nordic Ware was much smaller than I needed for this cake! I think it’s always better to call out actual dimensions 🙂
Kelly says
I used this pan and it worked out perfectly!Nordic Ware Natural Aluminum Commercial Baker’s Jelly Roll Baking Sheet https://www.amazon.com/dp/B00INRW7GC/ref=cm_sw_r_cp_api_QmlXBb609KA97
Nooreen says
I have never left a review on a recipe before, but you deserve it for all of the helpful tips that you gave! All of the struggles you faced helped set us up for success! My cake turned out perfect! I made the crumble 3 days in advance, the cake one day in advance, and frosted and assembled the day I was serving to avoid being stressed.
I did end up doing a few things differently. I doubled the amount of corn syrup instead of buying glucose syrup for such a small amount in the recipe. I also used parchment paper to line my cake ring instead of acetate. Worked like a charm!
Also, with the leftover cake scraps, I made birthday cake truffles using the momofuku recipe. They turned out amazing and I would recommend that you put your scraps to good use and make the truffles!
Thank you again! 🙂
Olivia says
Hi Nooreen! So happy to hear that my fails were helpful, haha! This cake is a challenge for sure, but so worth it. So glad you liked it too!
elisa sanchez says
Hi Olivia:
I just finished making the cake and looks awesome but for some reason my cake is only 3.5” high. I used a jelly roll pan 10×15” do you think I should go smaller.
Thanks
Olivia says
Hi ELisa! Do you mean the finished cake is only that tall? If so, I think maybe your sponge didn’t rise as much as it should have. A 10×15″ pan is the correct size to use.
Dawn Davis says
Have you ever made cupcakes with the batter?
If so, how full should we fill the liners.
Thanks
Dawn
Olivia says
Hi Dawn! I have not, but I wouldn’t fill the liners more than 2/3rds full.
Lesley says
I am about to try the cake recipe. I’ll probably do the rest tomorrow. I was re-reading the recipe before starting, and couldn’t figure out how in the world I would even get 2 full 6 inch squares out of the regular sized quarter sheet pan. Now I have to decide if I want to 1.5x the recipe for the half sheet pan or just do 6 inch pans. I kind of like the non-crusted edges you get with the cutouts.
Olivia says
Hi Lesley! I know it doesn’t seem like it, but you will be able to get enough cut outs as long as you use the correct size of sheet pan (not all quarter sheet pans are the same!! — see post for more details). This is a delicious recipe. I hope you like it!
Kiesha says
Might I ask what the texture of the cake is like? I was reading the recipe and a 1/2 cup of milk seems like a small amount for 2 cups of flour. But 3 eggs also seems like a lot for that flour amount also. I prefer my cakes on the lighter/fluffier side, so some tweaking maybe in order. Thank you in advance!
Olivia says
Hi Kiesha! It’s been so long that I honestly can’t totally remember. AND I had two fails at the cake when I baked it but still ended up using those pieces. I don’t think it was super light and fluffy though, but it was AMAZING. Even despite the failed cake layers – lol.
Kiesha says
Thank you! Going to give it a try. Your cake was gorgeous!
Olivia says
Thank you!! Good luck, and be patient! It takes forever but is worth it. Be sure to read through my post for tips!
liz says
I love this post! THE PAN SIZE! I tackled the Milkbar B-day cake too and had 3 fails!! I salvaged rounds from all three bakes to make a four layer cake that was stunning. I did find the frosting too salty for my taste and will .5 the called for amount next time. Also, my cake came out very dense/moist (almost tasted undercooked despite baking it ages!) with a merengue layer on top. Any ideas why this would have happened every time? I’ve had the real thing and it was much fluffier.
I’d determined to make my own funfetti recipe next time because the cake caused me such grief. Maybe I’ll give it another go in the regular pans! Thanks for the laughs! Glad I’m not the only baker that struggled!
Olivia says
Hi Liz! I think a lot of people struggle with this recipe, so we are not alone! It’s an undertaking for sure, but was totally worth it for the taste 🙂 Super bizarre about your cake texture! Did you beat the batter (pre-flour) for the times indicated? I can’t totally remember the consistency of mine, but pretty sure it wasn’t that 😐
Lindsay says
Hi Olivia! I just finished making this cake for the third time (I think it’s my favorite cake ever:)). I made it for my daughters birthday again but have a question for you about defrosting the cake from the freezer.
So we’re having her party tomorrow morning at the park so the cake will be sitting outside probably an hour or 2 before we actually cut into it. Would you recommend taking it straight from freezer to the park and just let it defrost while outside? Or should I remove from freezer and put in the refrigerator a few hours before heading to the park? I just don’t want the icing to start melting bc it looks like it will be around 80 degrees at the park. It would definitely be easiest to just take it straight from freezer to the park (for ease of traveling with it in the car), but also don’t want it still frozen! Thoughts??
Thanks so much!!!
Olivia says
Hi Lindsay! I want to say that 2 hours at that temperature *should* be good enough to defrost it. It’s not a huge cake, after all. Assuming you just make a 6″ one as per the recipe?
Worst case, if it’s still not completely thawed by the time you want to serve it, cut it into slices and let them sit for 20mins or so until properly thawed.
Let me know what you end up doing and how it turns out!
Lindsay says
Thank you SO much for your quick response! I made the 6 inch so totally agree with your thoughts – I just needed a second opinion from a baker:)
Will let you know how it turns out!
Jennifer says
Hi there!
SO if I am using cake pans and not using cake rings, do I still need to freeze the cake??
Olivia says
Hi Jennifer! You only need to freeze the cake if you’re using acetate to keep the sides perfectly flat. If you’re stacking it like a normal cake, there is no need to freeze.
Viola says
I’ve run into this before with published recipes of famous bakery products. Prime example is the published recipe for Magnolia Bakery banana pudding. I’ve had it and there’s no way the published recipe makes what I’ve had at the bakery! Just like this, there has to be all sorts of place and baker and ingredient specific stuff they leave out to make it as general as possible. I’m super glad I found this post though as I know for a fact I own “quarter sheet pans” but they are NOT 10×15! And I wanted to try this cake! So, thanks!
Olivia says
Hi Viola! I know, it can be so frustrating! I hope this cake turns out for you, it’s definitely worth all of the effort!
Helen Brand says
From looking at the finished product, you’d never know the headaches you went through to make it happen. Your cake looks gorgeous! Regarding the pan size, in Christine’s cookbook, Milk, she states that the quarter sheet pan she uses for this recipe is 10″ X 13″. Amazon is a good resource for these as they aren’t easily found elsewhere.
Olivia says
Hi Helen! Thanks for the tips 🙂
Chera says
hi Olivia, I was just wondering, I purchased a 15×10 inch pan, but it is called a jelly rolling pan. it looks kind of shallow. what is the ideal depth of the pan to use for this cake? I don’t want my layers to be way too thin. making this for my boyfriend’s birthday so I really want it to taste & look amazing. yours looks perfect!
Olivia says
Hi Chera! The pan I have is also called a Jelly Roll pan and it’s about 1.5″ deep. I never actually baked mine in that pan as I didn’t realize the mistake until too late, so I just used scraps of both of my failed batches. I’m sure it would be fine though. The layers in this cake are fairly thin! The quarter-sheet pan I used was about the same depth so if my pan was a bit larger (which the jelly roll one is) it wouldn’t have spilled over. I hope that helps! Let me know how it turns out 🙂
Chera says
Hi again, thanks for the reply. my pan is only 1 inch deep so I’m a little worried. what do you think? also would parachement paper work as a substitute for acetate? I can’t find acetate anywhere. thanks again!!!
Olivia says
I feel like you should be ok with that height of pan, but I never actually baked it in the right size one so I can’t be sure :\.
You can try it with parchment paper, but I think it will be challenging. Acetate nice and firm and basically what it does is it extends the height of your cake ring so you can build a tall cake inside it.
Do you have any 6″ cake pans? If so, and in order to avoid potential pan and lack of acetate issues, I would recommend baking the cake batter up in three 6″ cake pans and then just stacking and frosting it like a normal cake. It might not have the pristine flat sides but it will taste just as delicious!
I only recommend going that route because the cake is challenging enough even with the right equipment ;). Oh also – check out an office supply store for acetate. I’ve never checked myself, but someone recommended it to me when I was having a hard time finding some. And maybe amazon?
Dev says
Thank you so much for letting us know that we need a 10 x 15 in pan, which it is hard to find one that is actually 10 x 15 in. I am going to make this cake for myself for my birthday so you have saved me so much stress. I haven’t read the previous comments but most hardware/home improvement stores with a canning section have citric acid. I got mine at Ace Hardware.
Olivia says
Hi Dev! Oh good tip about the citric acid, I’ll have to check. Good luck with this cake! Let me know how it goes :).
jessica says
Hi, I actually was planning on making this cake, however i have run into a few problems.. I can’t find the correct pan that is necessary for this recipe, and i don’t have any 6″ pans. I do have some 8″ pans, would that work? Could i use 3 8″ pans instead of 3 6″ ones? I also wanted to ask if adding the glucose was necessary? Thank you
Olivia says
Hi Jessica! If you use three 8″ pans make sure you double the recipe. Also, for the glucose, just substitute some more corn syrup.
Erin says
Do you still have to line with parchment paper if cooking in the 6″ round pans?
Olivia says
Hi Erin! Yes, I would line the bottoms with parchment to help ensure quick and easy release.
Kathy says
Hi 🙂
I’m attempting to make this cake for my niece’s 18th birthday but I have a few questions…
I want to make 2 tiers, 9″ and 6″, how many cake recipes should I make?
Also, is there a substitution for glucose?
And most important question, how do you think this cake would taste minus the crumbs? She just wants a vanilla cake with vanilla frosting.
Thanks!
Olivia says
Hi Kathy! You’d want to at least double the recipe for the 9″ tier. I haven’t adapted this one to a 9″, so I can’t say for sure, but maybe even 2.5x since the layers are fairly thin. For the glucose, just sub in more corn syrup. And I think the cake would still be delicious without the crumbs, but they are, by far, the BEST part of the cake! The flavour and texture is amazing. You could always just add the crumbs into the 6″ layer? So then people can choose and you can try both versions! I hope that helps. Let me know if you have any more questions!
Liz says
This cake looks life-changing and I am so looking forward to making it! I’m just confused as to why the freezing and cake ring are necessary – couldn’t you just assemble the cake on a cake board, put the soak on each layer as directed, and then frost as you would with any other cake? Wouldn’t placing the finished cake in the fridge for a few hours to let the flavors meld together serve the same purpose as the freezing? But maybe I’m missing something here 🙂 Thanks!
Olivia says
Hi Liz! The freezing and cake ring are not crucial, but they do give a cleaner finished look (and it’s typical for Momofuku recipes). Since the middle layer is made up of cake halves and crumbs, the ring helps it maintain some structure when assembling. The freezing is only necessary if you use a ring — it helps make the cake easier to remove from the ring. Next time I make this cake, I would use three 6″ cake rounds and frost as a normal cake — it’s easier and would give the same delicious result! I hope you try this one, it truly is one of the best!
Anders says
Hello there.
Your cake looks perfect.
Are the dimensions you mention for the correct sheet pan size the internal or external dimensions?
Thanks a bundle
Olivia says
Hi Anders! It would be the internal dimensions.
Ivy says
Oh wow….Your post is frightening me but I will attempt it! I think I will use 3 6″ cake pans and see what happens. I can only hope it looks and tastes as pretty as yours!
Olivia says
Hi Ivy! I think using the 6″ pans will make it easier overall. You will love this cake!
Lindsay says
HI there! So one question — I just made it an am about to pop it in the freezer and hope it tastes as yummy as it looks:) But, I do have quite a bit of the actual cake leftover – is that normal? I noticed in your notes it says the height of the cake should be about 5-6 inches tall – mine is about 4.5 inches… Should I have just maybe doubled the middle layer with the extra cake? I had two halves that filled the middle…. Let me know what you recommend (and if I did something wrong!
And I just realized I forgot the milk soak on the second layer (womp womp) — this is just a practice run before my daughters birthday next wknd so am making notes to not mess it up again ha.
Thanks a ton.
Olivia says
So exciting!! I’m trying to remember my leftover cake situation…. I had SO much because I had 2 fails and just salvaged pieces from both cakes to make the 3 layers. I think as long as the two halves fit the middle you’re good. I know my two halves didn’t quite fill it so I had to patch the gap with some scraps. You could always cram more cake scraps in there to make a thicker layer, but I don’t think it’s uncommon to have some leftover. Personally I like even looking layers so I think what you have is fine :). How much do you have left? Enough for another layer?? No shame in eating those scraps while the rest of the cake is chilling ;).
Lindsay says
I am making a practice cake now and I am SO glad I read your blog beforehand — I ordered the smaller cake pan before I read your blog and then ordered the 10×15 after reading… and as I’m watching this one rise it would have definitely overflowed! Thank you thank you thank you!! Now crossing my fingers everything turns out:)
Olivia says
Hi Lindsay! So glad you found this post helpful! Seriously, pan size is a killer, I’m glad you found a 10×15! I hope it works out for you. You’ll love this cake, it’s seriously a delicious recipe and worth all of the hard work!
Susan says
Hi Olivia!
First of all, thank you SO much Olivia for mentioning the pan dimensions. I just ordered a 9×12 assuming I’d be fine with it, and I’m so glad I read your story! Anyway, I’m wondering where you managed to find the 10×15 cake pan…I’ve looked on Amazon and Walmart and Target and everything seems to be the dreaded “9×12” size!
I plan on making this next week for Valentine’s Day/my boyfriend’s birthday. It’s partly selfish because I know how good this thing is and I can’t wait to eat it! 🙂
Thanks again!
Susan
Olivia says
Hi Susan! I believe the pan I used with that size was actually called a jelly roll pan. You can try this one here: http://amzn.to/2GZChuF, but if you search amazon for jelly roll pan you’ll see a few other options 🙂
Lindsay says
Hi Olivia, I’m going to try to tackle this for my daughters first birthday … Planning to make one ahead just to be on the safe side:) Could you share where you got your cake stand? I’m looking for something similar! Or maybe just what size yours is?
Thanks so much!
Olivia says
Hi Lindsay! So exciting that you’re going to try this! It’s a delicious recipe. I got my cake stand at a discount housewares store called Homesense. It’s 8″ on the top and works perfectly for a 6″ cake. Let me know how it goes :).
Lindsay says
Thank you so much for your quick response!! Will let you know how it goes! 🙂
Samantha says
Is the cooking time for the cake incredibly long for anyone else? I just baked it for 22 minutes (at a lower temp), and it’s still overdone. (I’ve tried twice now.) also, is the texture of the cake light and fluffy? Not t for me! It’s almost like a sugar cookie, and the batter rose only as high as the to of the sheet pan.
Olivia says
Hi Samantha! That’s really bizarre…the only thing I can think is that maybe your baking powder is expired and therefore the cake didn’t rise? Though it should only rise to the top of the sheet pan, not higher. Why did you bake it at a lower temp?
Nick says
I only had to cook for 25 minutes, but I just attributed that to my crap oven. My cake definitely rose, though, about doubled in size.
Laurel says
Hi Olivia,
Just wanted to say thank you for this blog post. I’ve been wanting to make the Momofuku Milk Bar Birthday Cake for a while now and I never would have survived the process without your helpful tips! I used three 6″ cake pans because that’s what I had, and the cake turned out really well . All of your cakes and reipies look incredible. I can’t wait to make more of them. Thanks for the inspiration 🙂
Olivia says
Hi Laurel! I’m so glad you found these tips helpful and that your cake was a success! It’s still one of my favourite tasting cakes to date :). Glad to know it turned out well with the 6″ round pans!
Andrea says
I googled “momofuku birthday cake fail” after having the same experience with cake overflowing in my oven… the pan size appears to be the culprit. Thank you so much for this post! Fail, fail better….
Olivia says
Hi Andrea! So glad to hear I’m not alone 🙂 I hope you found it helpful!
Jesser says
OK, so I made this for my daughter’s 9th birthday and I thought I’d share my experiences. We have yet to cut into it, but from the little samples of the pieces I’ve had (for QC purposes, of course!) it’s delicious.
My big deviation was to make the cakes in 3 6″ pans instead of on the sheet. This worked awesome, EXCEPT it leaves the edges darker and less pretty. The 5 9-year-olds I’m serving will surely not give a hoot, but it’s not exactly food-porn perfect. I also could not locate acetate locally (where do you find this stuff?!?!) and I refused to shell out $30-40 for a ton of it off Amazon, so again, not food-porn perfect.
Can’t wait to sample it tonight. I really appreciate all these detailed instructions and you sharing your trials and tribulations! It was super valuable to me.
Olivia says
Thanks so much Jess! I am so glad you found the instructions (and fails :)) helpful! the 3 6″ cake rounds is totally the way I would go next time. I am sure it will taste JUST as amazing :).
As for acetate, it’s not the easiest to find!! I found some in a gourmet food store here in Vancouver, but I remember someone recommending I check an office supply store, like Staples. That’s where I’d check next time!
I hope everyone loves the cake! It’s still one of my faves 🙂
Taylor says
Hi! Thank you so much for posting! Would you recommend trying this cake in a trifle bowl? I was thinking about making it in rounds and layering it in a trifle bowl so I could avoid any potential mistakes during assembly? Wanted to get your advice/thoughts?
Thanks!
Olivia says
Hi Taylor! I actually think that would work perfectly fine! Great idea :).
Axel's Momma says
Wow- thanks for the tip about the size of the pan! I’m going to attempt this baby for my son’s 4th bday party! I want to make 2 tiers, 8 inch & 6 inch- so have to figure out how to increase the recipe to do the larger bottom tiers. Any thought (other than yes I am nuts- when I showed my hubbie a picture of my plan he said with love & sarcasm “Gosh honey, can’t you find a cake that takes a bit more effort.”)
Olivia says
LOL, too funny. This cake is worth the effort! You may be cursing it while you’re making it, but it WILL taste delicious. Two-tiers though, that is epic! I’m gonna want to see a pic ;).
For the 8″ tier, you’ll want to double everything. Or , if you want to do both tiers all at once, then 3x the entire recipe amounts listed here. You’ll need a rather large sheet pan to bake the cake if you go that route though! Or 3 half sheet pans, I suppose :).
For ease, you could use round cake pans instead of a sheet pan. That would skip the step of cutting the cakes out, but wouldn’t leave as rustic edges. Another way to make things a bit easier is to just stack the cakes and frost them rather than placing them in an acetate lined cake ring. The latter gives a cleaner finish, but is a bit more time consuming.
Hope that helps! Please let me know if you have any more questions :).
Connie says
holy dedication – you went all out with getting new equipment! hope your husband liked it!
Olivia says
I knoooow, I went a little crazy. He LOVED the cake, and it truly was one of the best I’ve ever had. I have another Momofuku cake on my radar now that I’ve had some down time from this one!
Kaye says
Thank you for your post and detailed “issues.” I’m also happy to know what size quarter sheet to get for the future! I had the same problems with one of her cakes and was never going to bake one again. You have me hope! I used 6 inch pans and all worked out but not as pretty since I don’t have the acetate. (yet)
I encourage bakers to take the time to make this cake. It’s so good!
Olivia says
Thanks Kaye!! I agree, it was totally worth the effort. It’s one of the BEST cakes I’ve ever had. I will make it again, but next time I would probably use 6″ pans like you did, just for ease :).
Alejandra says
Hi Olivia! WOW! Hats off to you for pulling off this amazing cake! I love baking so…I will sure try and make it! I hope it turns out well 🙂 I just have one question…what cake ring size did you use? I LOVE your blog! Thanks for sharing!
Olivia says
Hi Alejandra! I’m so glad you’re going to try this! It tastes AMAZING. I used a 6″ cake ring for it. Let me know how it turns out!!
heather @french press says
one look at this gorgeous cake and I instantly wanted to make it for my daughters 13th birthday, but then I read your hilarious “fails” and now I’m not so sure I could handle it 🙂 but goodness it is gorgeous
Olivia says
Thank you Heather! The cake was quite an undertaking and I curse every minute of it, but it tastes so, soooo good!
Sara // Dear Skim says
Holy smokes! I just found your blog, but dang — this is some dedication to cake. I have to admit, I laughed throughout the entire post. Your re-telling of the process was brilliant, haha. I don’t know if I would’ve stuck with it! But apparently patience and love of a craft can yield amazing results. The cake looks beautiful, delicious, and I am supremely jealous that I can’t snag a slice through the screen.
Olivia says
Thanks so much Sara! I’m so glad you enjoyed my ranting and that it made you laugh! I was hoping people would find amusement in my failures :D.
Janice @Kitchen Heals Soul says
Beautiful! I started making these Milk Bar cakes in 2012 (I think, or maybe even a little before that) and I LOVE assembling them. It’s my favourite part. It can be tricky because smoothing frosting over layers of crumbs is tough, but I just LOVE it. I wish I worked there and had the task of building the layer cakes all day long. Seriously! Is that weird?
Anyways, for your first attempt, I think it turned out perfectly 🙂
Olivia says
Lol Janice! Too funny. Assembling the cake was definitely my least favourite part, but I was well past done with it by that point. I may give it a try another time, when I have a properly sized sheet pan to start with :).
Claudia | The Brick Kitchen says
Just found your blog through this post and must say that it is beautiful – I love your photos. As for this cake, despite all the stress making it, the end product looks absolutely amazing! I have definitely been tempted to try some of Christina Tosi’s recipes but have not found time to do all the preparation yet…when I do, your adaptations will be very helpful! The infamous crack pie is also on the list to try.
Olivia says
Thanks Claudia!! 🙂 Funny you mention the crack pie, it was on my list before the birthday cake. It’s been on my mind the past few days, so much for the Momofuku break! I might simplify the crust on that one though, hah.
Holly @ Revamperate says
I just stumbled across your blog recently and I absolutely love it! Your recipes and food photography are really amazing 🙂
Olivia says
Thanks so much Holly!! 😀
[email protected] says
OMG girl such an amazing job you have done!! Looks stunning! Pinning!!
Olivia says
Thanks Ami!! 😀
[email protected] Baking in Pyjamas says
Wow! What a cake to tackle, I’m not sure If I’d go to those great lengths to make this wonderful cake. You did an awesome job, you’d never know how much trouble you’d encountered. I’m sure your husband was very pleased with his birthday cake.
Olivia says
Thanks Laura! That’s so nice of you to say. I honestly doubt I would go through the trouble to make this again, but I have some shortcuts I would try next time :).
Jenna says
I will never attempt this. You’re practically a saint. I probably would’ve thrown cake at the walls after the first fail. It looks amazing!! Good job, girlfriend 🙂
Olivia says
Lol, thanks Jenna! Trust me, I thought about throwing it at the wall, or off my 23rd floor balcony.
Erin @ Platings and Pairings says
I’m not sure that I’m up for the challenge, but this has got to be the most AMAZING cake I have ever seen!!! Plus, I love that it’s vanilla, not chocolate!!!
Olivia says
Thanks Erin! I love it too and am glad I stuck through it. If I ever do it again it would have to be for a very special occasion!
Thalia @ butter and brioche says
As a massive momofuku fan this is definitely a cake I would love. I have never attempted a momofuku cake recipe before but after seeing this post I definitely am inspired too!
Olivia says
I’m sure you would knock it out of the park Thalia! 🙂
June @ How to Philosophize with Cake says
Ah I feel you, Momofuku cakes are tough! I absolutely love their birthday cake recipe, but have had some fails myself…can totally relate! I usually just make my own substitutions though, like using 6 inch pans or corn syrup instead of glucose or frosting the sides or whatever. Kudos for staying true to the recipe! Looks like the finished product is amazing 🙂
Olivia says
Thanks June! I think next time I would definitely try the 6″ pans. Would be so much easier and still the same great taste. I am grateful for discovering the crumble though, that thing is killer and I’ll definitely be making that again for future cakes!
Alex M. says
I hope someone reads this comment, cause I really could use some help.
I’m going to attempt to make this cake for my boyfriend’s birthday since he’s a big momofuku’s fan, but I have some questions and I hope someone can help me.
I’ve been looking for the pan but I can’t find it! I found a 6″ cake pan, would it work for this recipe? Also if I use it, I’d have to bake 3 cakes individually so I’m not really sure about the time, has someone use the 6″ pan? Instead of the quarter sheet pan??
Olivia says
Hi Alex! I have used 6″ cake pans often, just not for this recipe. It should work no problem, just be sure to divide the batter evenly between the 3 pans. As for baking time, I would start checking at 15mins. If the cakes are still jiggly, give it more time. Ideally you’d have 3 separate 6″ cake pans and bake them at the same time so the batter doesn’t sit out for so long. Let me know how it goes!