

Transform a campfire classic with these Peanut Butter S’mores Cookies! Soft & chewy sandwich cookies with a rich chocolate ganache and toasted marshmallow fluff.

This post has been sponsored by Silpat®. Thank you for supporting the brands I love – they help make Liv for Cake possible! All opinions expressed here are my own.
It is peak summer here, and I am 100% in summer mode. After a crazy long, cold, and wet Fall/Winter/Spring (for real) we have had over three weeks of consistently hot, sunny weather that doesn’t seem to be going away anytime soon. Truthfully, Summer is not my favorite season. I am a Fall girl through and through, but I figure I may as well embrace it and enjoy the nice weather while we have it!
For me, summer is synonymous with camping. When I was growing up in the prairies, summers were hot, filled with long sunny days and weekend camping trips with my family. It was the BEST. My sister and I still have some of our best childhood memories from those days. The Peanut Butter S’mores Cookies I bring you today are inspired by all things summer and camping!


The lovely folks over at Silpat® reached out to me to try another one of their products: the Silpat® Perfect Cookie Mat.
If you’ve never used silicone mats before, let me tell you, you are missing out! Get some into your baking arsenal asap and you will never look back. I use them for anything and everything I’d bake on a sheet pan. They most often get used for cookies (of course), but also for things like roasting nuts, making streusel, galettes, etc. Basically anything that you’d use parchment for. Sure parchment works well too, but I love that the mats are reusable, and I find that things cook more evenly when I use them.
Silpat® mats specifically are made of fiberglass mesh and the highest quality food grade silicone, which provides consistent heat distribution and promotes even baking and browning. Plus, there is no need to grease them — cookies will slide right off after baking. Cleanup is a breeze, too. I usually just wipe mine down, but you can hand wash them. The mats really are a game changer.
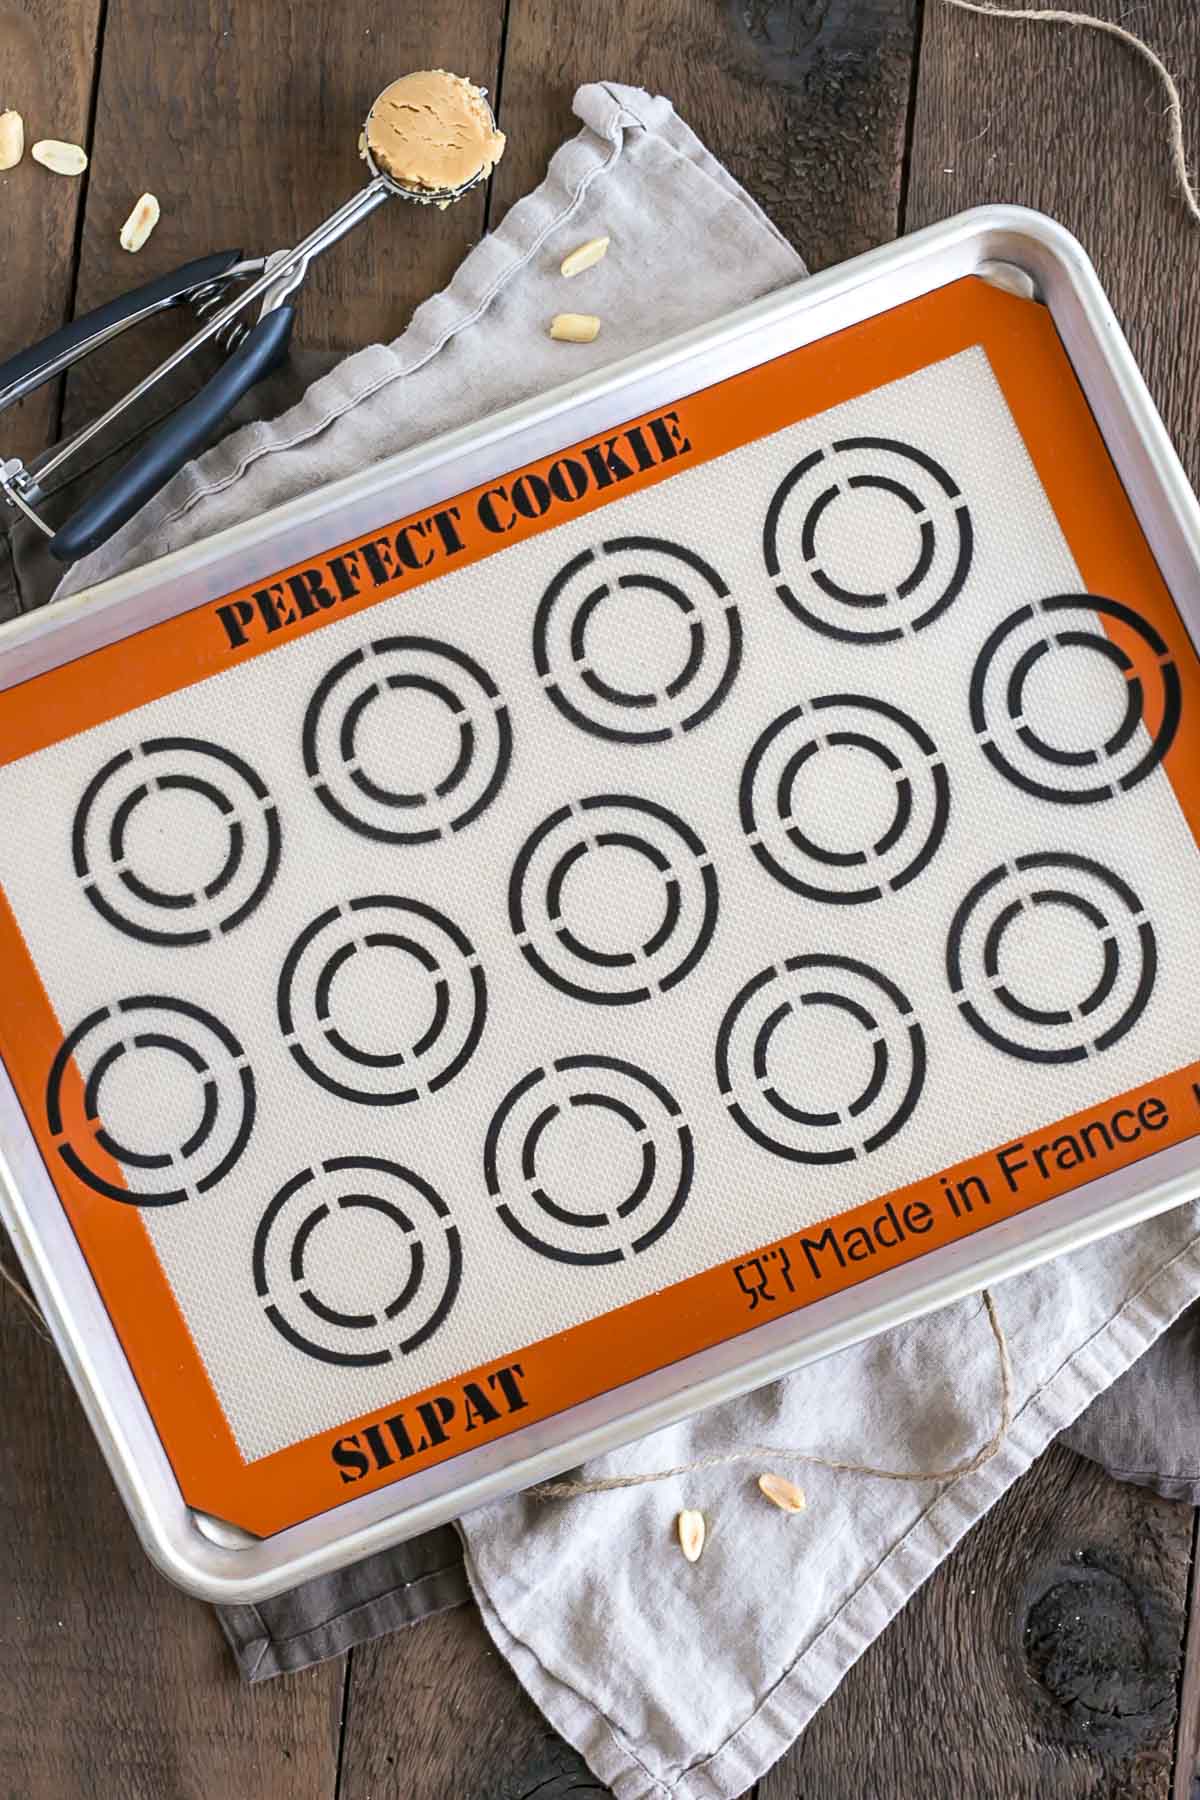
The Silpat® Perfect Cookie Mat is designed specifically with cookie baking enthusiasts in mind. I love that this mat has evenly spaced guides to indicate where you should place your cookies. If you’re like me and 1) you don’t know how many cookies to fit onto a sheet, and 2) are anal and want them spaced perfectly, you will love this mat!!

A medium sized cookie scoop works best here. Just place your perfectly scooped balls of dough into the inner circle and bake. I recommend using a cookie scoop (especially for sandwich cookies like these) so that your cookies are nice, round, even, and easy to match up. If you don’t have a cookie scoop, you can use a measuring spoon or regular spoon. Just make sure to round each ball of dough so it bakes up evenly.
The outer circle on the mat shows you the size of your final baked cookie. I usually chill my cookie dough so that the cookies don’t spread too much, but I didn’t here because I wanted to test the accuracy of the guide circles.

As you can see, they came out pretty perfect! This mat would also be great for making macarons. You can use either the small or large circles as a template when you pipe them out! Much easier than placing a parchment template under the mat, which is what I used to do.
Really, you can’t go wrong with any Silpat® products, but if you bake cookies often, you should seriously consider adding the Silpat® Perfect Cookie Mat to your baking toolkit.

I wanted to bake up something special and new on this mat, and with Summer reminding me of camping, I went with a s’mores theme. But not just any old s’mores cookies… Peanut Butter S’mores Cookies! These delicious sandwich cookies consist of chewy peanut butter cookies, rich chocolate ganache, and homemade marshmallow fluff. They are amazing! The peanut butter cookies are a great alternative to the traditional graham cracker.

In case you don’t have access to a campfire, or want an alternative to the traditional s’more, you can’t go wrong with these s’mores cookies.
Tips for these Peanut Butter S’mores Cookies:
- For ease, you can use store-bought chocolate spread and marshmallow fluff. Note though that the store-bought marshmallow fluff tends to be on the runny side. This is not necessarily a bad thing, but they won’t look exactly as pictured.
- I recommend using a cookie scoop so that your cookies are even.
- If you’re a s’mores lover, make sure to check out my S’mores Cookie Cups, S’mores Cake, S’mores Macarons, or S’mores Baked Alaska!

Peanut Butter S’mores Cookies
Ingredients
Peanut Butter Cookies:
- 1 1/4 cups all-purpose flour
- 1/2 tsp baking soda
- 1/4 tsp sea salt
- 3/4 cup peanut butter smooth, not natural
- 1/2 cup unsalted butter room temperature
- 1/2 cup granulated sugar
- 1/2 cup light brown sugar packed
- 1 large egg room temperature
- 1 tsp vanilla extract
Chocolate Ganache:
- 4 oz semi-sweet chocolate chips
- 2 oz heavy cream
Marshmallow Fluff:
- 1/3 cup water
- 3/4 cup granulated sugar
- 3/4 cup light corn syrup
- 3 large egg whites
- 1/2 tsp cream of tartar
- 1 tsp vanilla extract
Instructions
Peanut Butter Cookies
- Preheat oven to 350F and line two cookie sheets with Silpat® Perfect Cookie mats.
- Whisk together flour, baking soda, and salt, set aside.
- Beat butter & peanut butter until smooth. Add sugars and beat on med-high until pale and fluffy (approx. 2-3mins). Reduce speed and add egg and vanilla. Beat until combined.
- Add flour mixture and mix until just combined.
- Using a medium cookie scoop (1 1/2 Tbsp), portion dough into balls and place on inner circle of Silpat® Perfect Cookie mats.
- Bake one cookie sheet at a time in the center of the oven until cookies are lightly browned on edges (approx. 10-12 mins).
- Remove from oven and let cool for 5mins before transferring to a cooling rack to cool completely.
Chocolate Ganache:
- Place chocolate chips and cream into a microwave safe bowl. Stir to combine. Microwave for 30 seconds, stir. Microwave in 10 second intervals, stirring in between, until ganache is smooth and silky. Set aside to cool completely and thicken before using.*
Marshmallow Fluff:
- Place water, sugar, and corn syrup in a medium saucepan. Stir to combine.
- Insert a candy thermometer into the pot and heat over medium-high. Do not stir from this point on as crystals will form.
- Ensure mixer bowl and whisk are completely grease free.**
- Place egg whites and cream of tartar in the bowl of a stand mixer.
- When the sugar syrup reaches about 225°F, start whipping the egg whites to soft peaks. Approx 3-4mins.
- When the whites are ready, the sugar syrup should be at 240°F. Remove from the heat, turn mixer to medium and very slowly and carefully pour the sugar syrup into the whites in a thin, steady stream.***
- Once all of the syrup is in, set mixer to medium/high and continue whipping. The whites will deflate at first, but they will thicken and fluff up.
- Continue to whip for 7-8 minutes, or until the mixture is thick and glossy. Add in vanilla and whip until the fluff has cooled.
Assembly:
- Spread chocolate ganache on one cookie and pipe marshmallow fluff on another. I used a piping bag fitted with an Ateco 808 tip, but you could also just spread this on.
- Carefully toast the marshmallow using a kitchen torch and sandwich the two cookies together.
Notes
** If there is even a speck of grease (or egg yolk) the meringue will not whip. I wipe everything down with lemon juice before adding the egg whites.
*** The sweet spot for this is getting the stream right between the whisk and the sides of the bowl, so the syrup doesn’t get splashed by the whisk. You may have some marshmallow fluff left over which you can store in an airtight container in the freezer and use it at a later date for S’mores Macarons, S’mores Cookie Cups, or good old Rice Krispie Treats.


JB says
I want to make these gluten free, can I use equal amount of gluten free flour instead of all-purpose flour?
Olivia says
Hi JB! Yes, that should work fine as long as it’s a proper all-purpose GF flour.
Pauline says
Hi! I’m a big fan of your desserts and your meringue is so *chef’s kiss*! Question: how would you store the leftover assembled S’more cookies? Will they keep well refrigerated? Thanks!
Olivia says
Hi Pauline! Thank you! They should be fine at room temperature for a couple days but otherwise I would refrigerate.
Jamie says
Hi, for the cookie portion of the recipe it says to add the “eggs one at a time”. But the recipe only calls for one egg. Is it correct?
Olivia says
Ahh, good catch! I had initially planned a bigger batch and forgot to update the instructions. It’s updated now!
Jamie says
I made these today but I used Speculoos instead of PB. I am glad it was actually one egg, because that’s what I went with! I had some spreading issues even after chilling quite a while. I speculate it’s the Speculoos 😂
Samantha @MyKitchenLove says
These cookies sound SO good! I love my Silpat mat and I’ve been coveting their cookie mat for some time now. This post makes me want to jump the gun and buy it stat!!!
Olivia says
Thanks so much Sam! This mat is amazing, totally worth adding to your baking tools! xo
Arman @ thebigmansworld says
You are the queen of S’mores in desserts- This is no different and look SO good. They came out so perfect too, thanks so much for the Silpat cookie mat recommendation!
Olivia says
Ahh thanks Arman! <3 Love that mat!
debi at Life Currents says
These look so good. We often have s’mores makings around the house. I’d love to try this recipe. Funny story: we drove through central California in 115 degree F weather with a bag of marshmallows in the car recently. When we unpacked the bag, all the marshmallows were melted inside! Wow it was hot!
Olivia says
That is crazy!! Wow. Easiest s’mores ever? Haha
Nancy says
I can’t wait to make these!! I love using peanut butter cups instead of plain chocolate in my s’mores!!
Olivia says
That is SUCH a good idea. I am totally trying that next time!!