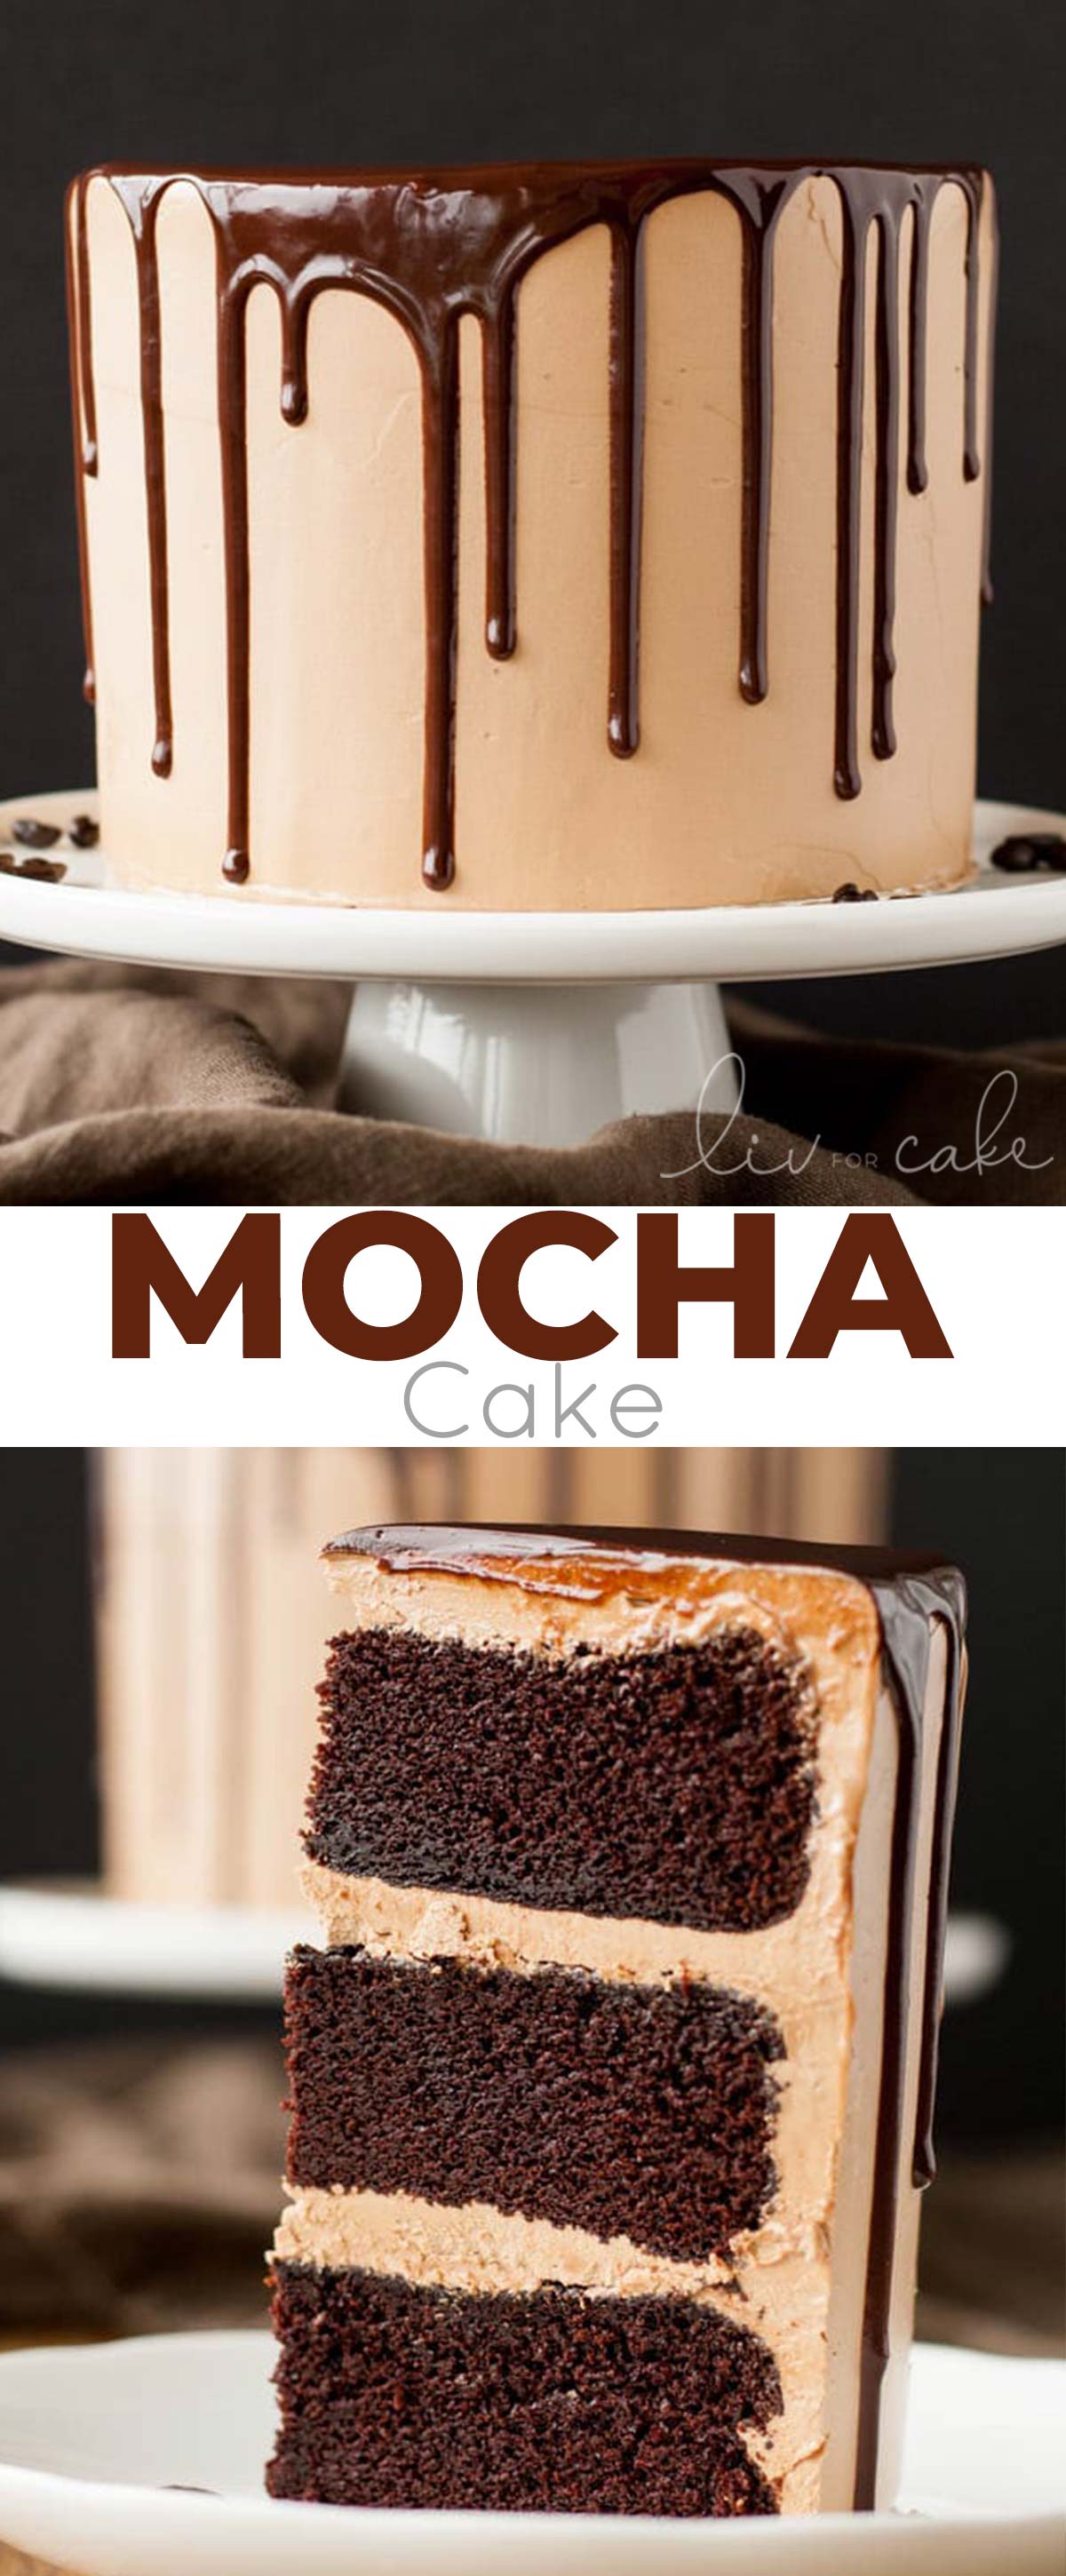
This Chocolate Mocha Cake is the ultimate indulgence. A rich dark chocolate cake with a silky mocha Swiss meringue buttercream.
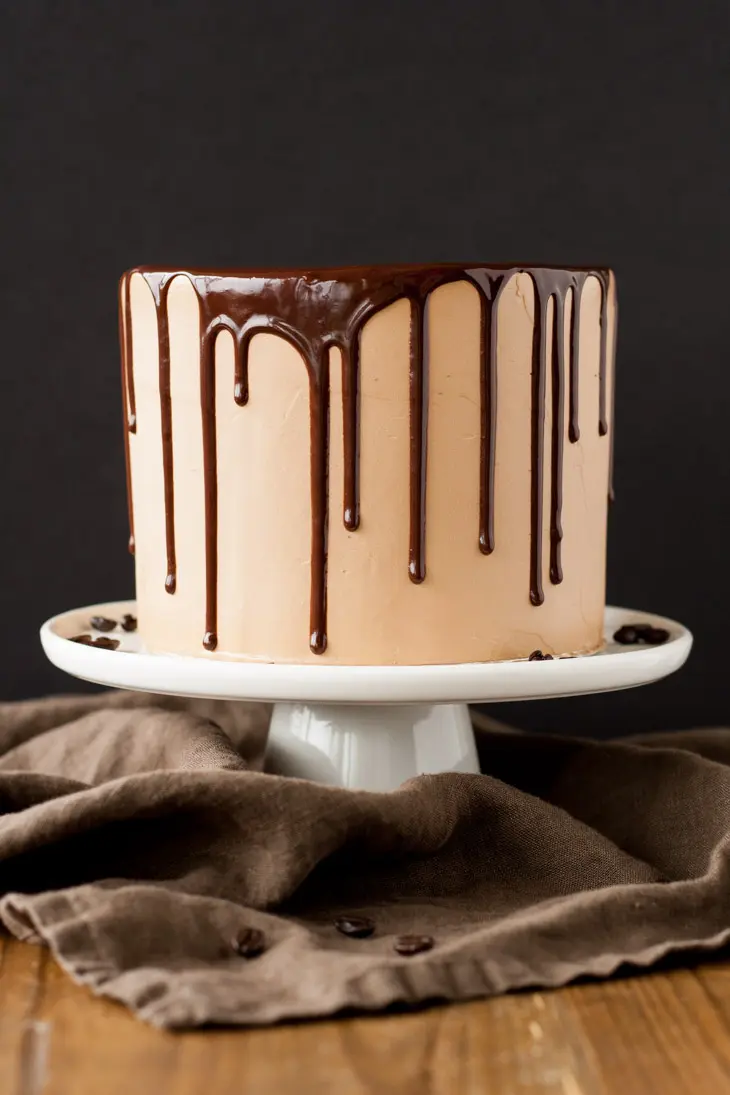
This cake right here? It’s amazing. I mean, it knocked the Momofuku Birthday Cake right out of the #1 spot, and that was a damn good cake.
This Chocolate Mocha Cake is seriously. SO. GOOD.
Rich dark chocolate cake and a silky Mocha Swiss Meringue buttercream, topped with a dreamy chocolate ganache. Does it get any better? I don’t think so.
If you’ve been following Liv for Cake for a while, you know this is one of my oldest (and one of my favorite) recipes. If you haven’t tried it, you NEED to. You will not regret it.
The frosting is my favorite thing ever — you’ll be eating that with a spoon and thanking me later.
How to make this Mocha Cake
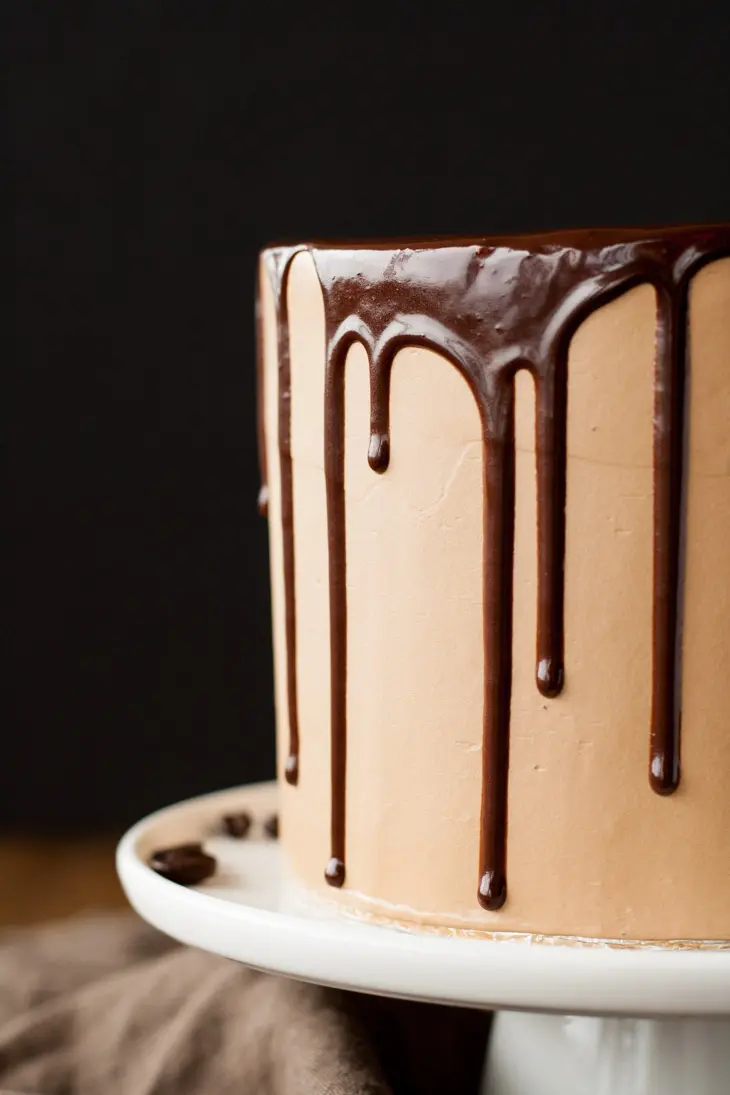
For the cake layers, I used my very favorite Chocolate Cake recipe modified slightly for the 6″ pans and I used hot coffee instead of hot water in the cake batter. You can’t really taste the coffee, maybe only slightly, but it does help the chocolate flavor stand out.
I like to use Dutch-process cocoa powder as it’s richer in flavor, but any regular cocoa powder will work just fine.
Mocha Buttercream
THIS, people, is honestly the best thing you’ll ever eat. Silky Swiss meringue buttercream with espresso and chocolate. It is pure heaven!
The recipe calls for instant espresso powder (not granules). This is a very fine powder and should dissolve perfectly into the buttercream.
Some people were having the issue of flecks of espresso powder in their buttercream because it didn’t dissolve fully. This may be due to the brand of espresso powder used. This is the brand I use and it works really well. However, I’ve updated the recipe to include dissolving the espresso powder first in 1 tsp of hot water. It’s optional though.
Can I use Regular Espresso Or regular Coffee?
No, you must use instant coffee that dissolves completely in water.
You could use regular instant coffee vs instant espresso powder, but you’d want to make it quite strong to match the flavor. I haven’t experimented with this myself, but it would really be totally fine. You can add more or less to your liking.
How to do a Drip Cake
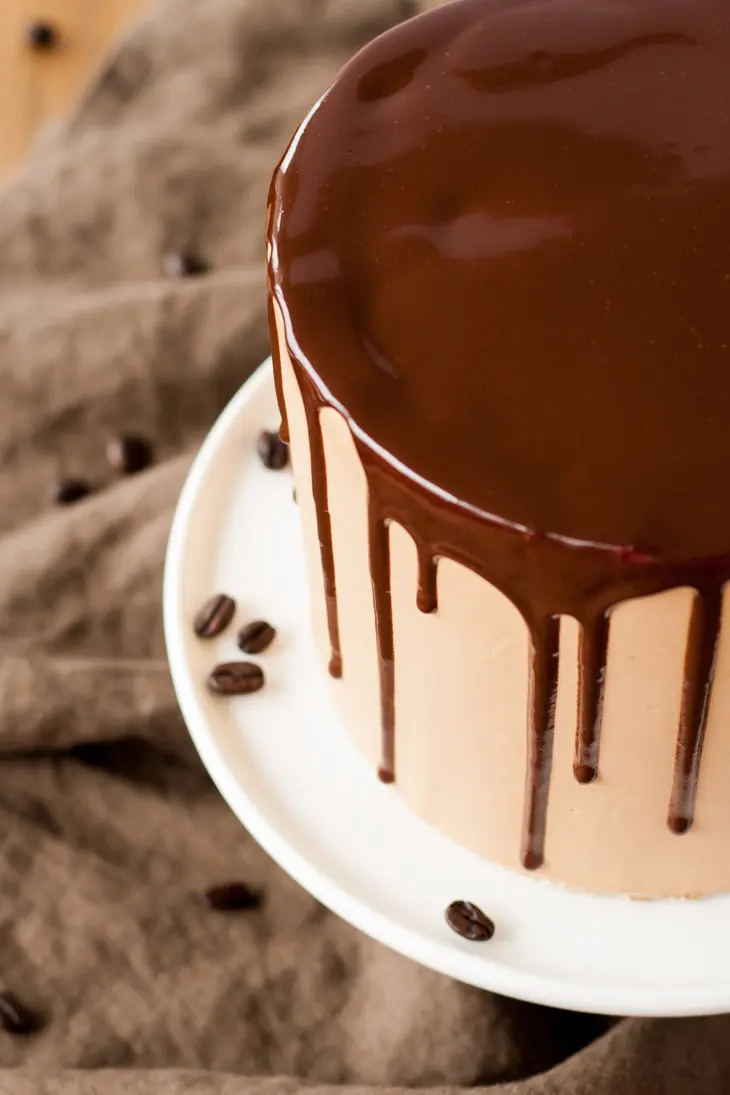
I kept the cake decorating simple, as I wanted to do the drippy ganache technique. It’s surprisingly easy (I swear!), the key thing is to get your ganache to the right consistency which may require some trial and error.
Step #1 is to frost the cake evenly and smooth the sides and top. This is probably the most time intensive part if you want to get it perfect (which, obviously, I do).
I used a small offset spatula to roughly frost the cake and then a bench scraper to smooth everything out. This is the part that took the most time.
I had to patch some areas here and there, so it took a while to get it perfect. It really helps if you have a turntable to do this on, so that you can spin it while holding the bench scraper at an angle.
You don’t have to shell out a lot of money on a turntable, but I do not recommend getting a plastic one. They’re not super stable and don’t spin smoothly.
To get those smooth sides, you need a smooth spin! I use a lazy susan from Ikea that works great.
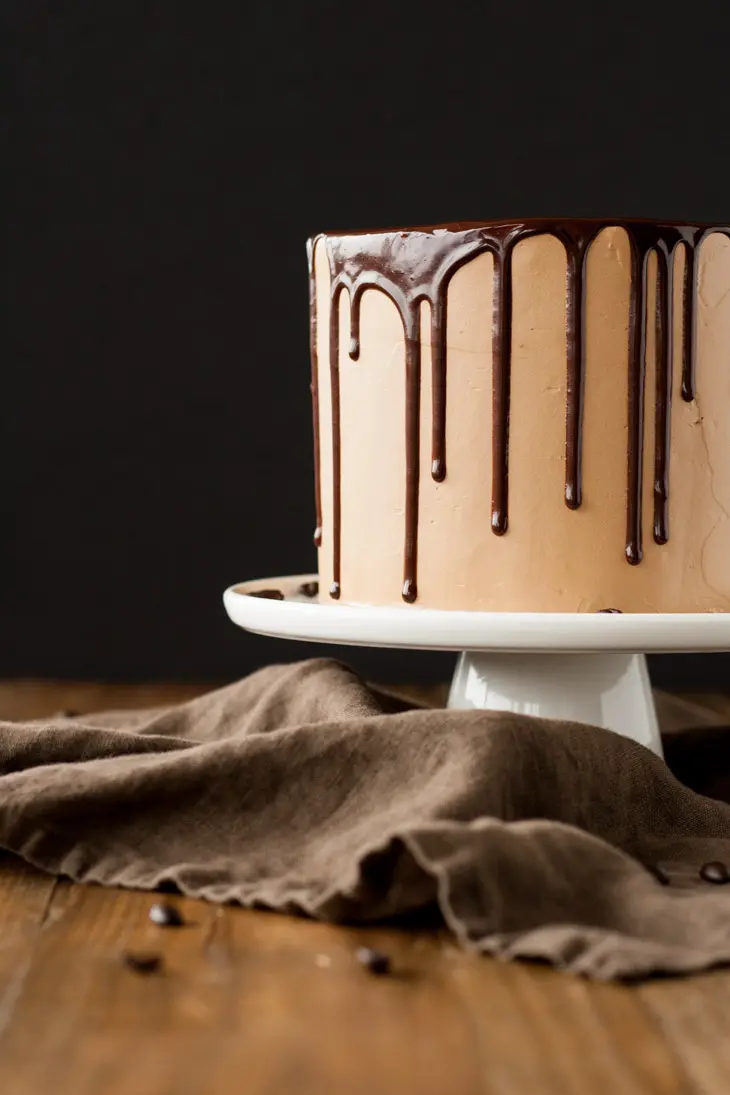
Once I got the top and sides mostly perfect, I popped the whole thing in the fridge and made the ganache.
Once the ganache cooled and thickened slightly, I took out the cold cake and used a teaspoon to drop dollops of ganache along the edges and let it drop down the sides.
I added more/less on certain areas to vary the drips a bit. You can also just pour a bunch of ganache on the top and use your offset spatula to nudge it over the sides, but I wanted a bit more control over the drips, and my research said that the spoon technique was a good approach.
I was worried that the ganache would harden quickly on the cold cake, but I had plenty of time to work with it. Once the drips were good, I poured a bit of ganache on the top to fill that in, and smoothed it with a small offset spatula.
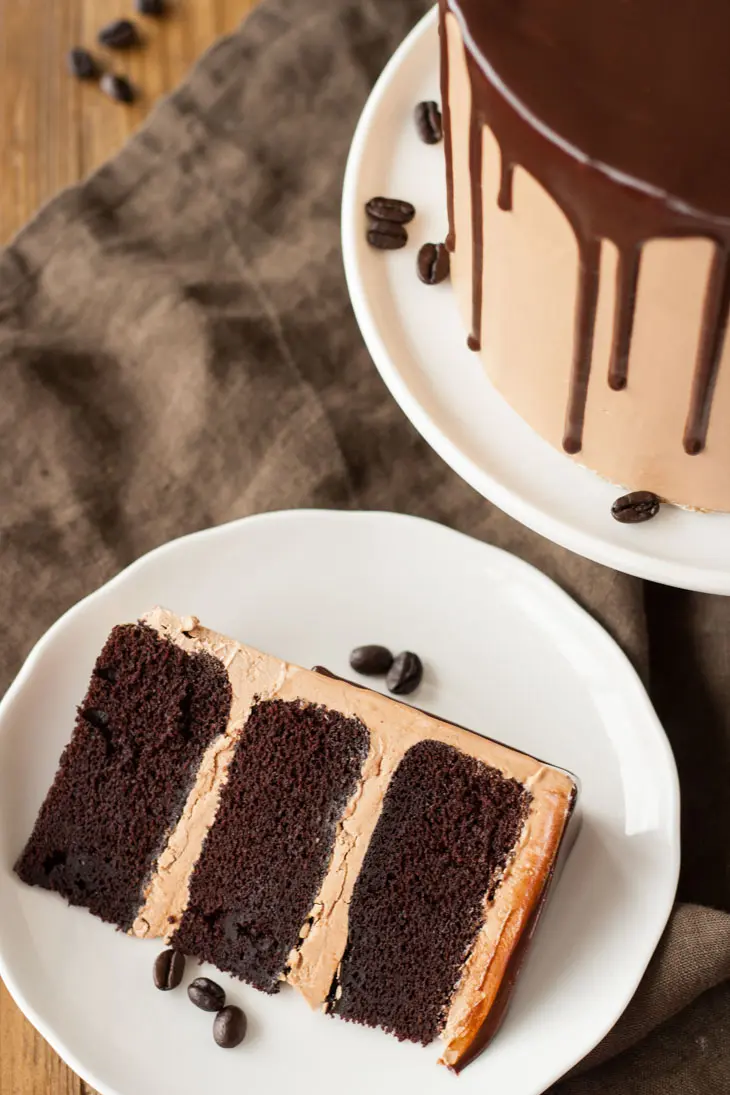
This Swiss meringue buttercream gets very firm in the fridge (like butter does), so you’ll want to leave the cake out for a couple hours before serving so that it can soften up.
When I took photos and cut the cake, it was still hard, so you can see that it’s not totally silky smooth between the layers.
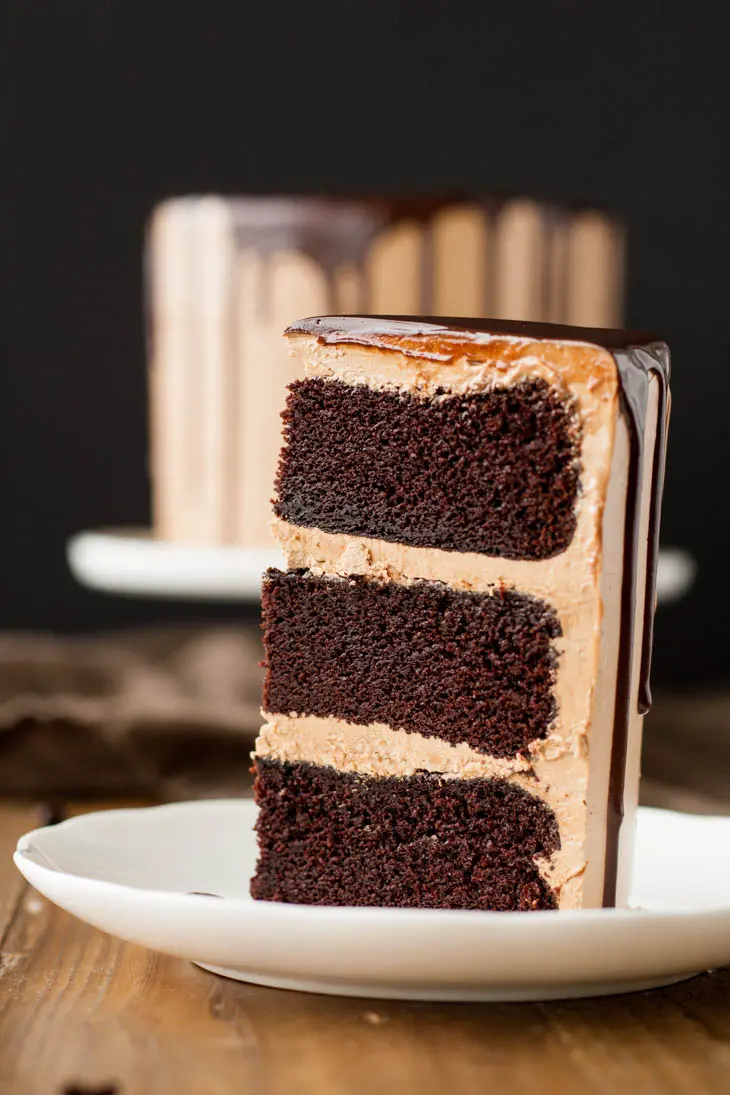
This Chocolate Mocha Cake is insanely good. Like, ridiculous. It is my all-time favorite cake!
I mean, just LOOK at that piece! The cake is dense, moist, and ultra chocolatey. The buttercream is silky, smooth, and has the BEST mocha flavor ever.
You will not be disappointed with this cake. I promise!
More Coffee Flavored Cake recipes
- White Chocolate Mocha Cake
- Kahlua Cake With Mocha Buttercream
- Vanilla Latte Cake
- Gingerbread Latte Cake
- Eggnog Latte Cake
- Pumpkin Spice Latte Cake
Notes & tips for this Chocolate Mocha Cake
- The recipe as-is will also work in two 8″ pans. For three 8″ pans, 1.5x the recipe.
- To make cupcakes, all you need to do is reduce the baking time — start checking at 15mins or so.
- You can use regular cocoa powder if you don’t have Dutch-process.
- For the frosting, the coffee you use must be instant. See post for more details.
- For the ganache, I let mine set overnight (with plastic wrap placed directly on the surface). It will be too thick at this point, so I microwave it for 10 secs and stir it until it’s the right consistency.
- The drip technique works best on a chilled cake so that the drips set quickly.
- Be sure to check my Swiss Meringue Buttercream post for tips and troubleshooting.
- Learn how to keep your cakes moist using Simple Syrup.
- To help ensure your cake layers bake up nice and flat, check out my How to Bake Flat Cake Layers post!
Mocha Cake
Ingredients
Chocolate Cake:
- 1 1/2 cups all-purpose flour
- 1 1/2 cups granulated sugar
- 3/4 cup Dutch-processed cocoa powder sifted
- 1 1/2 tsp baking soda
- 1 tsp baking powder
- 1 tsp salt
- 1/4 cup vegetable oil
- 3/4 cup buttermilk
- 3/4 cup strong brewed coffee hot
- 2 large eggs
- 2 tsp vanilla extract
Mocha Buttercream:
- 3 large egg whites
- 1 cup granulated sugar
- 1 1/2 cups unsalted butter room temperature, cubed
- 1 tsp vanilla extract
- 1 Tbsp instant espresso powder dissolved in 1 tsp hot water, cooled
- 3 oz dark chocolate chopped, melted, and cooled
Ganache Drip:
- 3 oz dark chocolate
- 3 oz heavy whipping cream
Instructions
Chocolate Cake:
- Preheat oven to 350F, grease three 6″ round baking pans and dust with cocoa powder. Line bottoms with parchment.
- Place all dry ingredients into the bowl of a stand mixer fitted with a paddle attachment. Stir to combine.
- In a medium bowl whisk all wet ingredients (pour coffee in slowly as not to cook the eggs if very hot).
- Add wet ingredients to dry and mix on medium for 2-3 mins. Batter will be very thin.
- Pour evenly into prepared pans. I used a kitchen scale to ensure the batter is evenly distributed.
- Bake until a cake tester comes out mostly clean. A total of 30-35mins.
Mocha Buttercream:
- Place egg whites and sugar into the bowl of a stand mixer, whisk until combined.*
- Place bowl over a pot with 1-2" of simmering water and stir constantly with a whisk until the mixture is hot and no longer grainy to the touch or reads 160F on a candy thermometer (about 3mins).
- Place bowl on your stand mixer and whisk on med-high until the meringue is stiff and cooled (the bowl is no longer warm to the touch (approx. 5-10mins))
- Switch to paddle attachment (optional). Slowly add cubed butter and mix until smooth.
- Add vanilla, melted chocolate, and espresso powder. Whip until smooth.**
Ganache Drip:
- Finely chop chocolate and place into a bowl. Bring cream just barely to a simmer and pour over chopped chocolate. Cover with plastic wrap and let stand 2 mins. Stir gently with a spatula until combined and smooth. Allow to cool and thicken slightly before using on cake.***
Assembly:
- Place one layer of cake on a cake stand or serving plate. Top with approximately 2/3 cup of frosting and spread evenly. Repeat with remaining layers and apply a thin coat of frosting all over the cake. Chill for 20mins.
- Frost and smooth the sides. Chill for 20mins.
- Using a small spoon, place dollops of ganache around the top edges of the cooled cake, allowing some to drip down. Fill in the top of the cake with more ganache and spread evenly with an offset spatula.
Notes
** The buttercream may look like it’s curdled at some point. Keep mixing until it is completely smooth.
*** You can make the ganache in advance and let it set overnight (with plastic wrap placed directly on the surface). It will be too thick at this point, so I microwave it for 5-10 secs and stir it until it’s the right consistency.
Originally published Aug 23, 2015




Adriana says
Hello! I just made a batch of the buttercream, and I must say it truly tastes amazing. I did add some more coffee to it, I’m colombian you see… we like our coffee strong lol. I’m having a little trouble with it though. After frosting my cake, and chilling it before dripping the ganache, the buttercream is turned into two different shades. Any idea on why this happened? Thank you, and your drippy ganache has to be one of the best ones I’ve seen! I would be great if you had a tutorial on your technique!
Olivia says
Hi Adriana! I don’t blame you for adding more coffee, I might do that next time as well! Hmm, I’m confused at why the buttercream turned two different shades. I assume you whipped it quite well? Was it coffee powder that you added to it or actual coffee?
For the drippy ganache, I plan to do a tutorial at some point, but I basically used the technique here:
http://thecakeblog.com/2016/01/drippy-ganache-cake.html
I used a teaspoon to drip it along the sides and then filled in the top. My ganache is thinner than the one shown at the link above though. Hope that helps!
Adriana says
Thanks for the quick reply! I did whip it well, but I did use some water to disolve the powder coffee. Also to get it smooth I had to refrigerate it and then use the bench scraper on it again because I was unhappy with how it was.. maybe that was it? having two temperatures? Anyways it turned out great and everybody loved it 🙂
Great video too!!!!
Olivia says
Oh! The streaks could have been caused by the water, possibly. But I actually think it was the bench scraper thing. I’ve had the same thing happen when I tried to smooth a cake that was already chilled, it streaked :(. It’s like the outer layer got darker when chilled and when I tried to smooth it again, some of that came off and revealed the lighter underneath. I’m glad everyone loved it, that’s the most important part :).
Jen says
Thank you so much for sharing such a delicious recipe Olivia! It tasted really good! I do have one question. The first time I made the mocha frosting the consistency came out perfectly fine but the second time I made it the consistency of the frosting was a little too thin for me to frost a cake. Do you have any idea why this might have happened? Did I not whip enough at the end?
Olivia says
Hi Jen! I’m so glad you loved this cake! For the frosting, it could be a number of factors — Grease in the bowl could cause it to not whip up, but it would pretty much be soup, so you’d notice that something was off. The meringue needs to be stiff. Not whipping long enough could also be a culprit or adding the butter while the meringue was still warm – that would melt the butter and cause it to be too thin. Did you try refrigerating the thin frosting? If that wouldn’t firm it up, I’d assume there was something wrong with the meringue portion :\.
Janeen says
5 stars
Olivia says
😀 😀 😀
Janeen says
Made it…..ate it……LOVED It!
This is The best Mocha Choc Cake EVER!,,???
Olivia says
Yay! Thanks Janeen! So glad you liked it, it’s definitely a fave! <3
Grace says
I don’t have a mixer so I’m going to attempt this all manually by hand! is there anything i should do differently??
Olivia says
Hi Grace! The cake itself will be no problem done by hand, but the buttercream will be tricky. Do you have a hand mixer? If so, that should work fine! I would not attempt to hand whip the buttercream with a whisk. Let me know how it turns out 🙂
melissa says
i gotta say, this recipe of yours is perfect! i tried it and it turned out so well.
Olivia says
It’s SO good, right?? So glad you liked it!
Jacquie says
Hi Olivia, well the cake was a hit! And YES it is sooooo good. My ganache didn’t drip as well as I had hoped but did not affect the taste 😀 I’ll try to send you a picture of mine. I thought that your recipe detailed everything very clearly and easy to follow. The mocha flavour in the buttercream icing is delicious
Olivia says
Thank you Jacquie!! That buttercream is the best thing ever, I literally eat it with a spoon. I’m so glad the cake was a hit and that you loved it :). I would love to see a picture!!
Liz says
Is it possible to make the frosting in stages, like whip up the basic buttercream but wait to add the melted chocolate and vanilla? I am going out of town this afternoon but getting as much done before I leave (which is when I’m stopping at the store to get the chocolate). Or should I just wait to do it all later? (My m-i-l does not have a stand mixer…)
Olivia says
Hi Liz! Be sure to whip the basic buttercream up really well, past the curdle point (which it will do). Does she have a hand mixer? Your plan *should* work as long as you can really whip everything together once you add it all in. Let me know how it turns out!!
Jacquie says
I forgot to ask, have you ever made panettone?
Olivia says
No! I actually don’t think I’ve even had it before, but I was literally looking at it in the store the other day thinking I needed to try it. Might be on the list for next year’s holiday baking! 😀
Jacquie says
We are in southern Ontario, enjoying spring like weather ! I have my panettone in the one right now, it looks good so I will see what the taste is like tomorrow. My father in law is Italian. My husband is looking forward to the mocha cake though. I will definitely let you know how it turns out.
Olivia says
Awesome, have a great Christmas!!
Jacquie says
Thanks Olivia’s you have a blessed Christmas as well.
Jacquie says
Hi Olivia,
I came across your recipe yesterday and plan to make it for Christmas Day. I am making it with the 3 -8″ pans, doubling the recipe. Will it fit in the 8″ pans that are just regular height cake pans (about 1 1/2″ high)?
This cake looks really delicious and am looking forward to making it let alone tasting it.
Olivia says
Hi Jacquie! I’ve made this recipe before (doubled) in 3-8″ pans but they were 2″ high. I worry that they will overflow your 1 1/2″ ones. The batter is thin but rises quite a bit, so I would only fill them half full or so. I would recommend maybe making a few cupcakes with the extra batter?
Jacquie says
Thanks Olivia! I actually bought 8″ pans 3″ high as well, doubting that the 1 1/2 high might not work. I didn’t want to chance it being that all the stores would be closed Christmas Day.
I was reading some of your blog when you were at pastry school. It sounds like you had a lot of fun and learned a lot along the way. My Opa was a baker in Holland and opened his own wholesale bakery after they immigrated to Canada. So I and along with my sisters and some nieces have inherited the “baking bug”.
Olivia says
Ahh, your 3″ high pans will be perfect!! Let me know how it turns out :D.
So cool that your grandpa was a baker! Baking for the holidays is my favourite thing ever. Where are you guys in Canada?
Sibgha says
Is i want to make this cake for two 8 inch pans, should i double the recipe or add half more to this recipe?
Thanks
Olivia says
Hi Sibgha! The recipe should work as is for two 8″ pans, no need to make any changes!
Ioana says
Thanks!!!!!””
Vidollia Ho says
Hi Olivia…
I have made this cake few weeks ago. It tasted amazing. Thank You for the great recipe. It is really highly recommended for mocha cake lovers. I cannot wait to try other recipes from you.
Olivia says
Thank you for your feedback Vidollia! I am so glad you liked it :D. Please let me know what other recipes you end up trying!
Tina Batoriink says
I’d like to make this as two 9-inch layers. Would I need to change the timing, do you think? I’m downsizing and don’t want to buy more cake pans!
Olivia says
Hi Tina! If you’re keeping the recipe amounts as is, the layers would be thinner in two 9″ pans, so you’d have to reduce the baking time. I would check it after 20mins and see how they’re doing, then keep testing every 5 mins until a toothpick comes out mostly clean.
Diana says
What did you mean when you said 3/4 cup of strong coffee(hot)? I’m trying to make it and I got a little confused!?
Olivia says
Hi Diana, sorry I should clarify — brew some coffee, but make it stronger than you normally would and add this to the batter while it’s still hot. Hope that helps!
Spela says
How much grams is in a cup ?
Olivia says
It depends what you’re weighing. Here are some resources where you can convert certain ingredients:
http://dish.allrecipes.com/cup-to-gram-conversions/
http://www.traditionaloven.com/conversions_of_measures/butter_converter.html
The latter one links to butter specifically, but there are other ingredients listed on the right.
Hope that helps!
Karen @ Karen's Kitchen Stories says
Oh my gosh! That is just stunning!!! You are so talented! I could never get such perfect drips!!
Olivia says
Thank you Karen! The drips were actually a lot easier than they look! 😉
Emily @ Bad Girl Baking says
Wow, this looks absolutely fabulous. Will certainly be giving this a try at the weekend.
Olivia says
Yay! I hope you love it :).
ChiChi says
This cake is just amazing. Love it!!
Olivia says
Thanks ChiChi! 🙂
jacquee | i sugar coat it! says
This looks spectacular, Olivia! Some of my fave flavors. I am a big fan of drippy ganache cakes – I actually have one coming up this week that I made a while back!
Olivia says
Thanks so much Jacquee! I can’t wait to see yours! 🙂