• Home
  • About
    • About Olivia
    • The Pastry Diaries
    • Privacy & Disclosure
  • eBooks
  • Recipes
    • Cakes
      • Birthday Cakes
      • Bundt Cakes
      • Chocolate Cakes
      • Christmas Cakes
      • Classic Cakes
      • Drip Cakes
      • Easter Cakes
      • Fruity Cakes
      • Halloween Cakes
      • Naked Cakes
      • Thanksgiving Cakes
      • Valentine’s Cakes
      • Vanilla Cakes
    • Cookie Cups
    • Cookies
    • Frostings & Fillings
    • Holiday Desserts
  • Shop
  • Tutorials

Subscribe for the latest recipes:

Liv for Cake

Classic Cake Recipes with a Modern Twist

  • Home
  • About
    • About Olivia
    • The Pastry Diaries
    • Privacy & Disclosure
  • eBooks
  • Recipes
    • Cakes
      • Birthday Cakes
      • Bundt Cakes
      • Chocolate Cakes
      • Christmas Cakes
      • Classic Cakes
      • Drip Cakes
      • Easter Cakes
      • Fruity Cakes
      • Halloween Cakes
      • Naked Cakes
      • Thanksgiving Cakes
      • Valentine’s Cakes
      • Vanilla Cakes
    • Cookie Cups
    • Cookies
    • Frostings & Fillings
    • Holiday Desserts
  • Shop
  • Tutorials

Home » Cakes » Brown Butter Cake

Brown Butter Cake

By Olivia, 107 Comments

This post may contain affiliate links. Please see my full Disclosure Policy for details.
Jump to Recipe

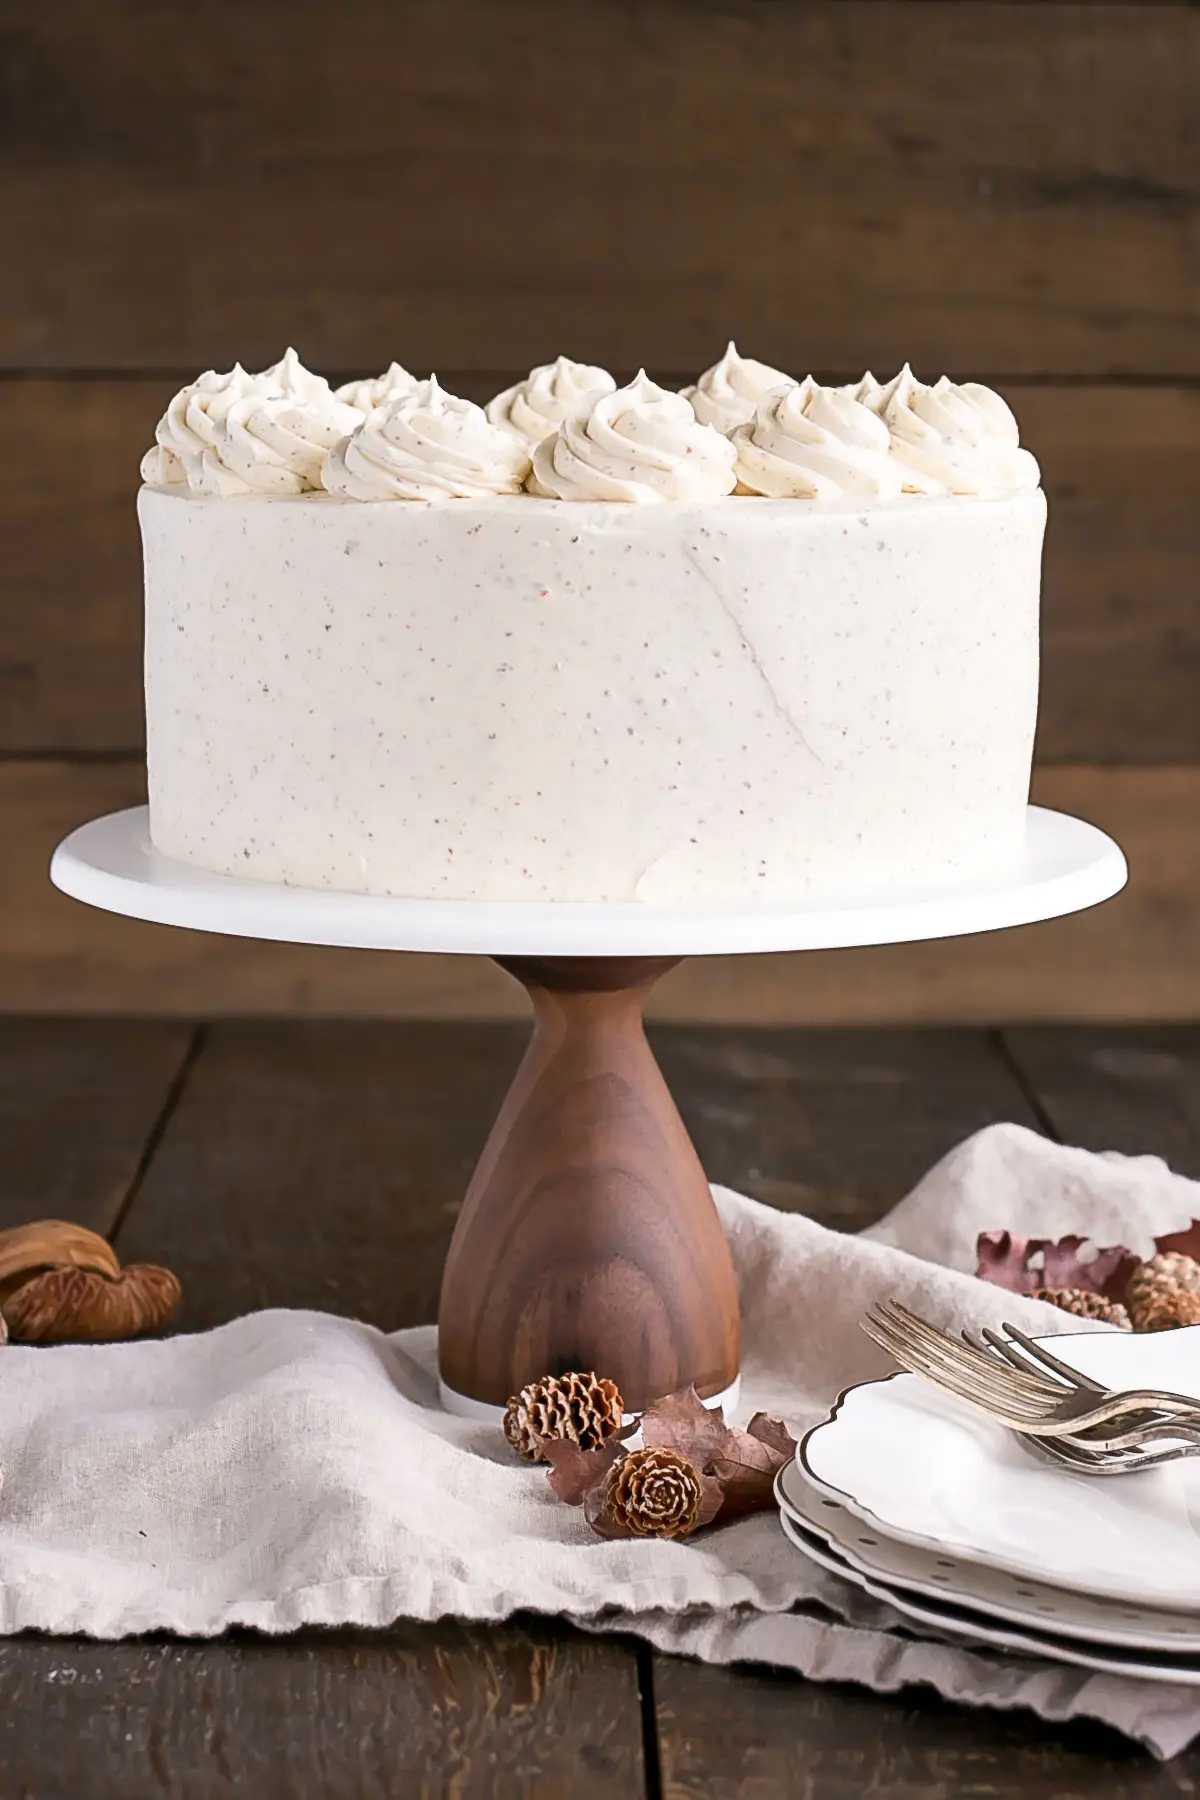
Take classic vanilla cake to the next level with this Brown Butter Cake! A simple change for an intense nutty flavour.

A cake sitting on top of a table

This was my first time baking with brown butter and, quite frankly, I don’t know what took me so long!! Who knew that such a simple (and easy) change could have such an amazing impact on flavour. I specifically went brown butter all out (in the cake and frosting) because I really wanted the flavour to stand on it’s own. That being said, it would work wonderfully paired with almost any other flavour combination.

If you’ve never made brown butter, or even heard of it, let me give you a little overview.
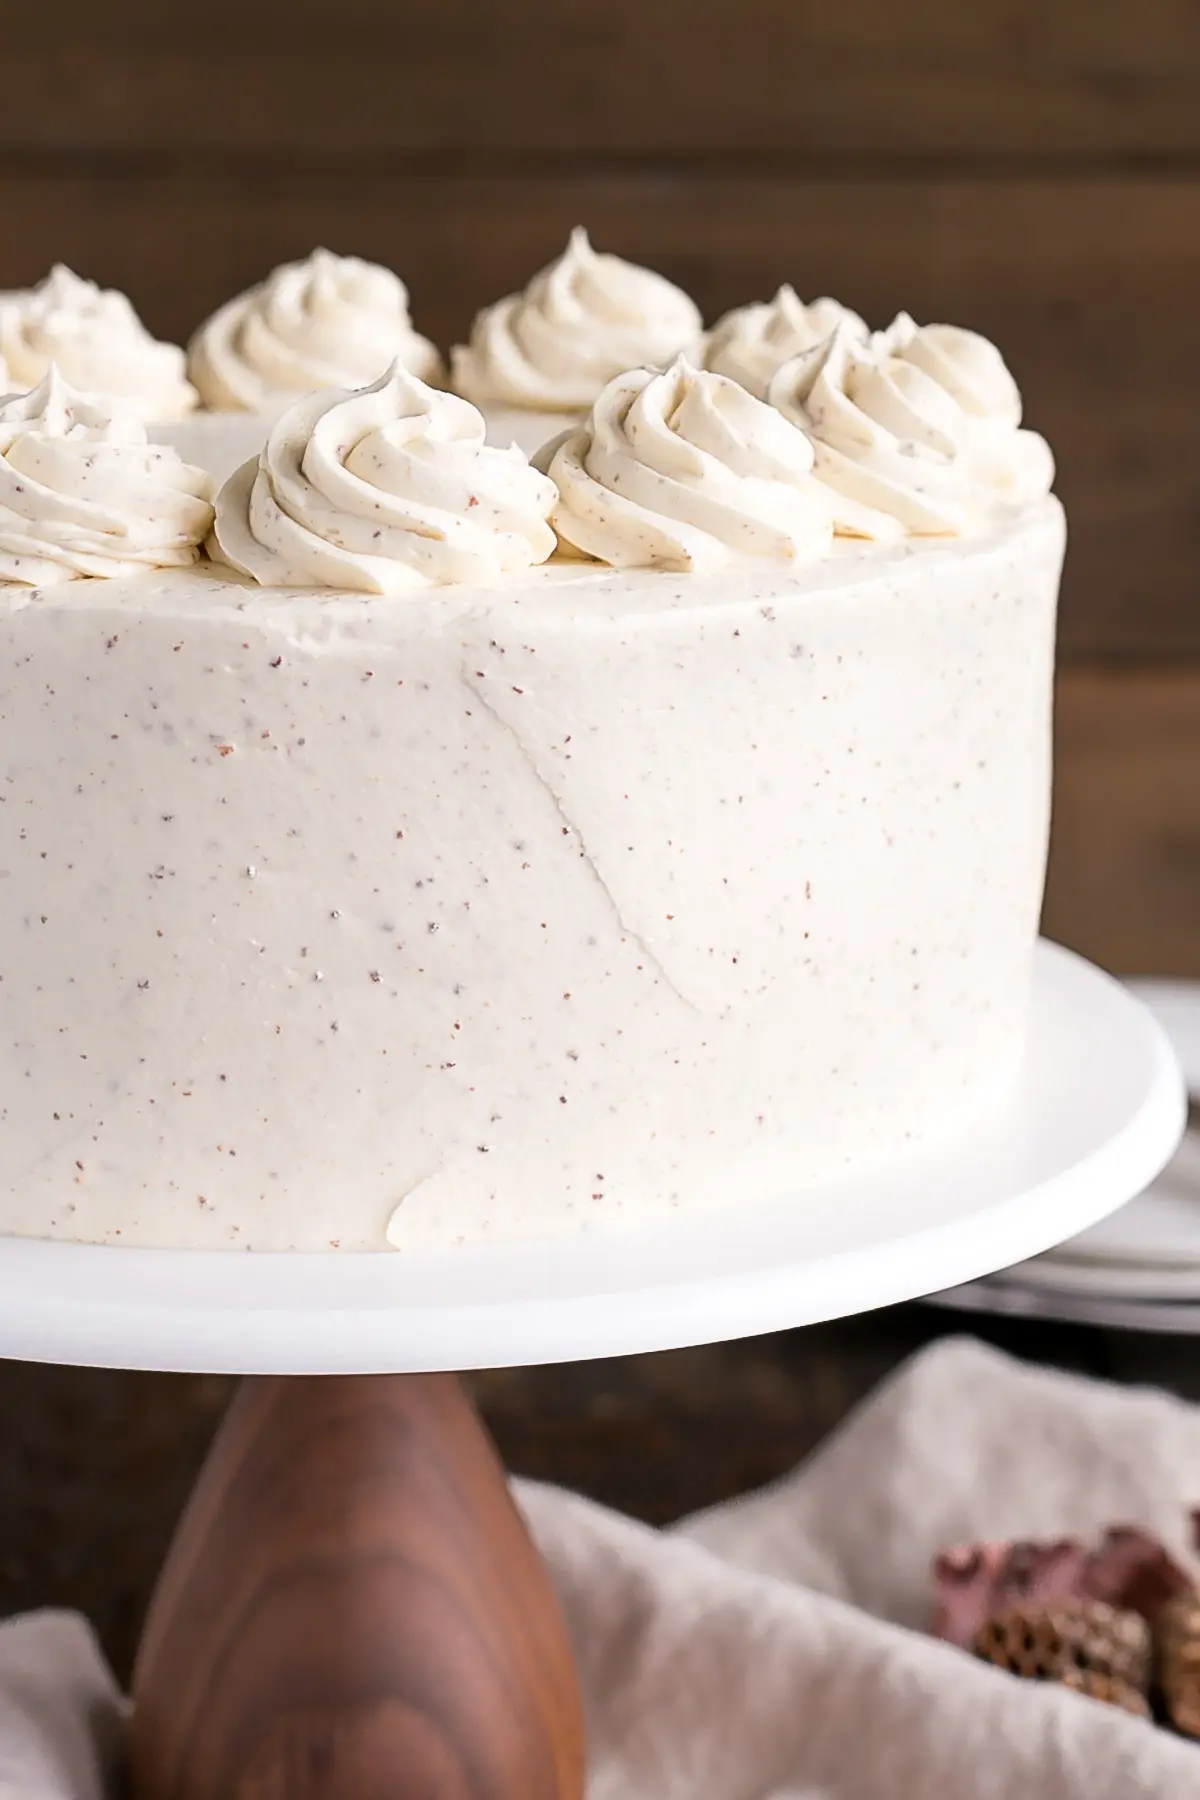
Close up of the cake

What is Brown Butter?

Brown butter (or beurre noisette) is butter that is cooked until the milk solids turn brown. When you’re cooking the butter, it will separate into fat and milk solids. The longer you cook it, the darker the milk solids will become. Note that it doesn’t take a lot of time for the solids to go from brown to black (aka burnt) so you really need to watch it when you’re cooking.

The Ultimate Cake Collection

Over 50 of my very favorite cake recipes all in one place! From Classic Cakes to Holiday favorites and everything in between.

Get your copy today!

How do you make Brown Butter?

To make brown butter, you place the butter in a light colored pan and cook it over med-low heat. The light pan is important (white or stainless steel) so that you can see the color of the butter. You won’t be able to tell if it’s in a dark teflon or casto iron pan, so make sure to use something light.
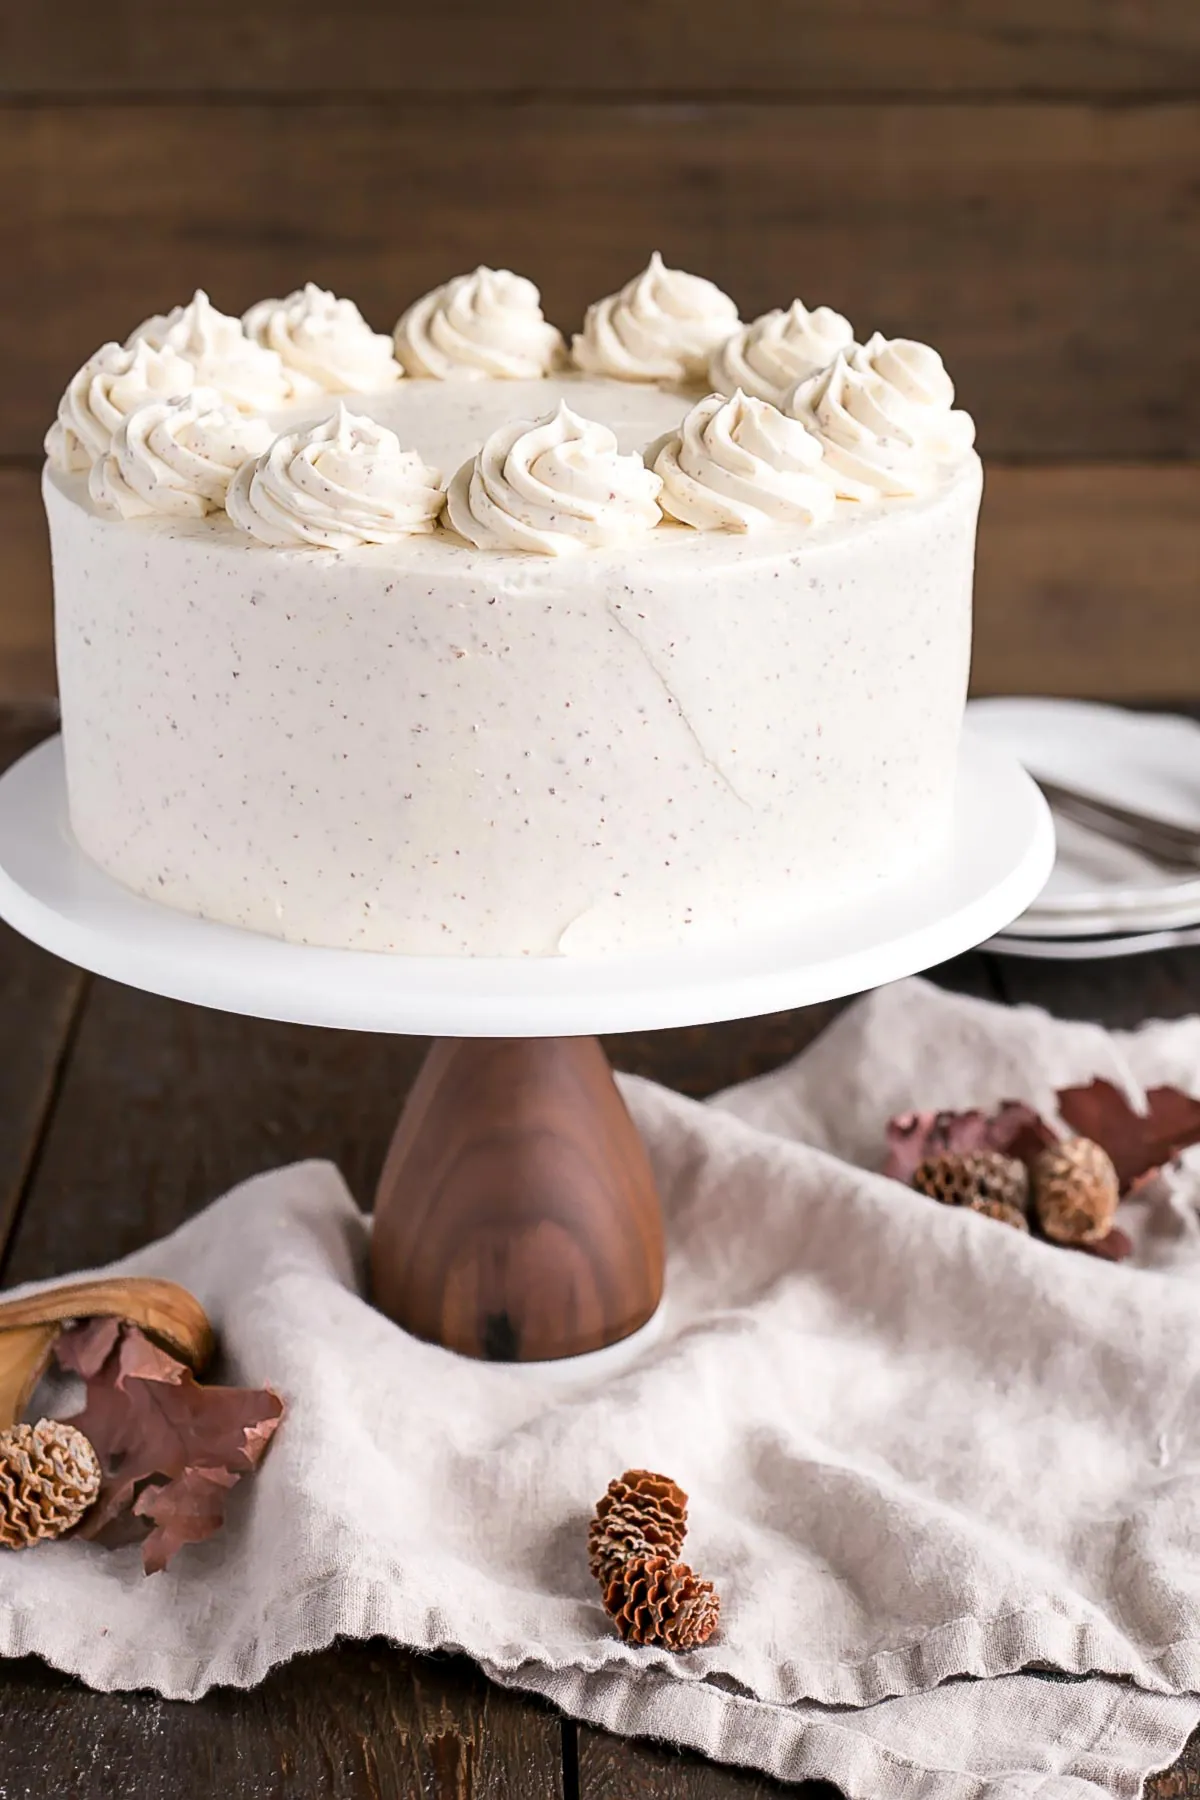
A cake sitting on top of a table

The butter will foam up a lot when it’s cooking, which can make it difficult to see the color of the solids, so I would stir it often or scrape some of the foam to the side to see how the solids were doing.

When the butter is reaching the right point or browning, it will also start to smell differently (amazingly!!). Most people say that it smells nutty (hence the beurre “noisette”) , but to me it smelled almost caramel-like. It smelled delicious, at any rate.
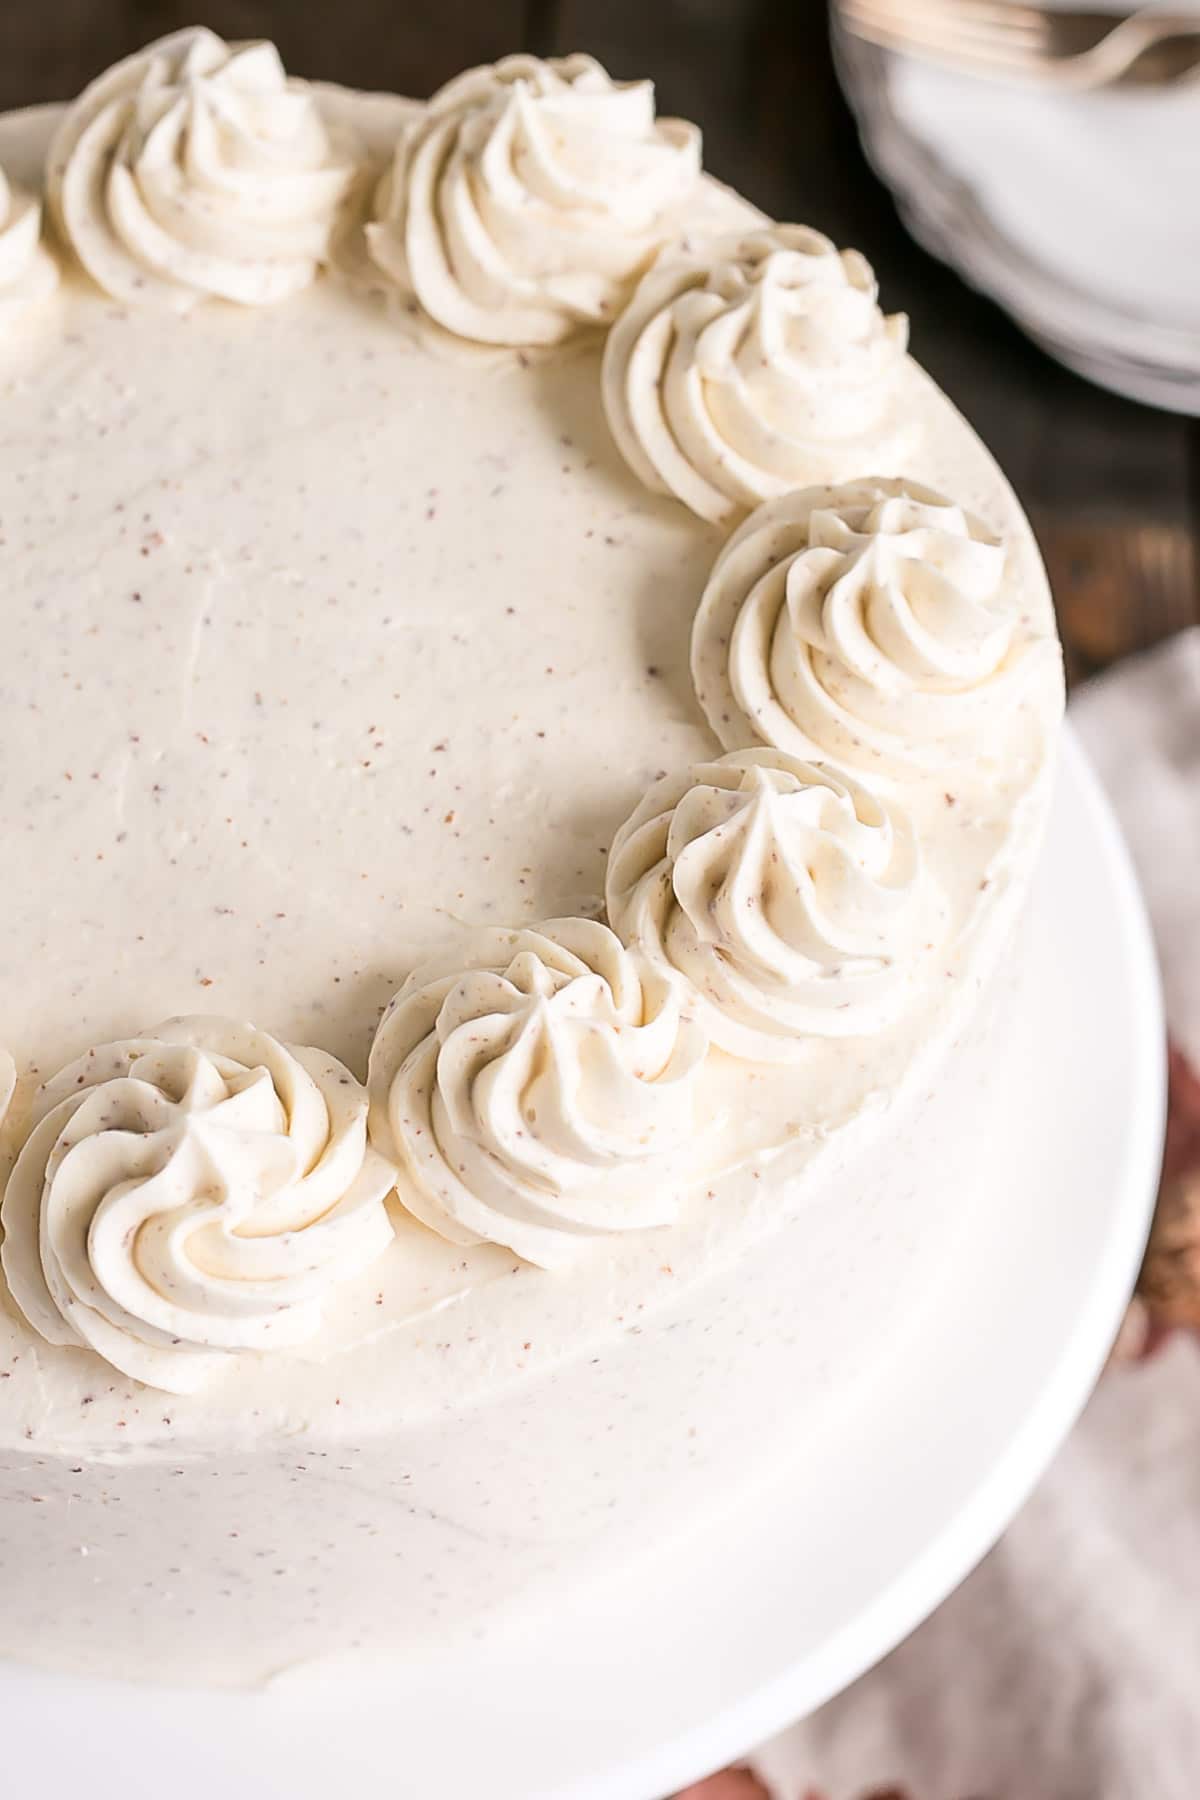
A close up of the top of the cake

Once the butter is properly browned, remove it from heat immediately and transfer it to a heatproof bowl (I used a large measuring cup for ease for the next step). Make sure to scrape in all of those delicious brown bits as that’s where the flavour is!

Since we’re using it in the cake and frosting, you need to divide the brown butter. Once the butter is slightly cooled, give it a good stir to jostle the brown bits and separate it into two 3/4 cup portions. You may have a bit left over which you can save to use as a sauce on steamed veggies or a variety of meat dishes.

You need the butter to be solid and at room temperature before using it in the cake and frosting. I popped mine in the fridge overnight and then placed it on the counter for a few hours in the morning to come to room temperature.
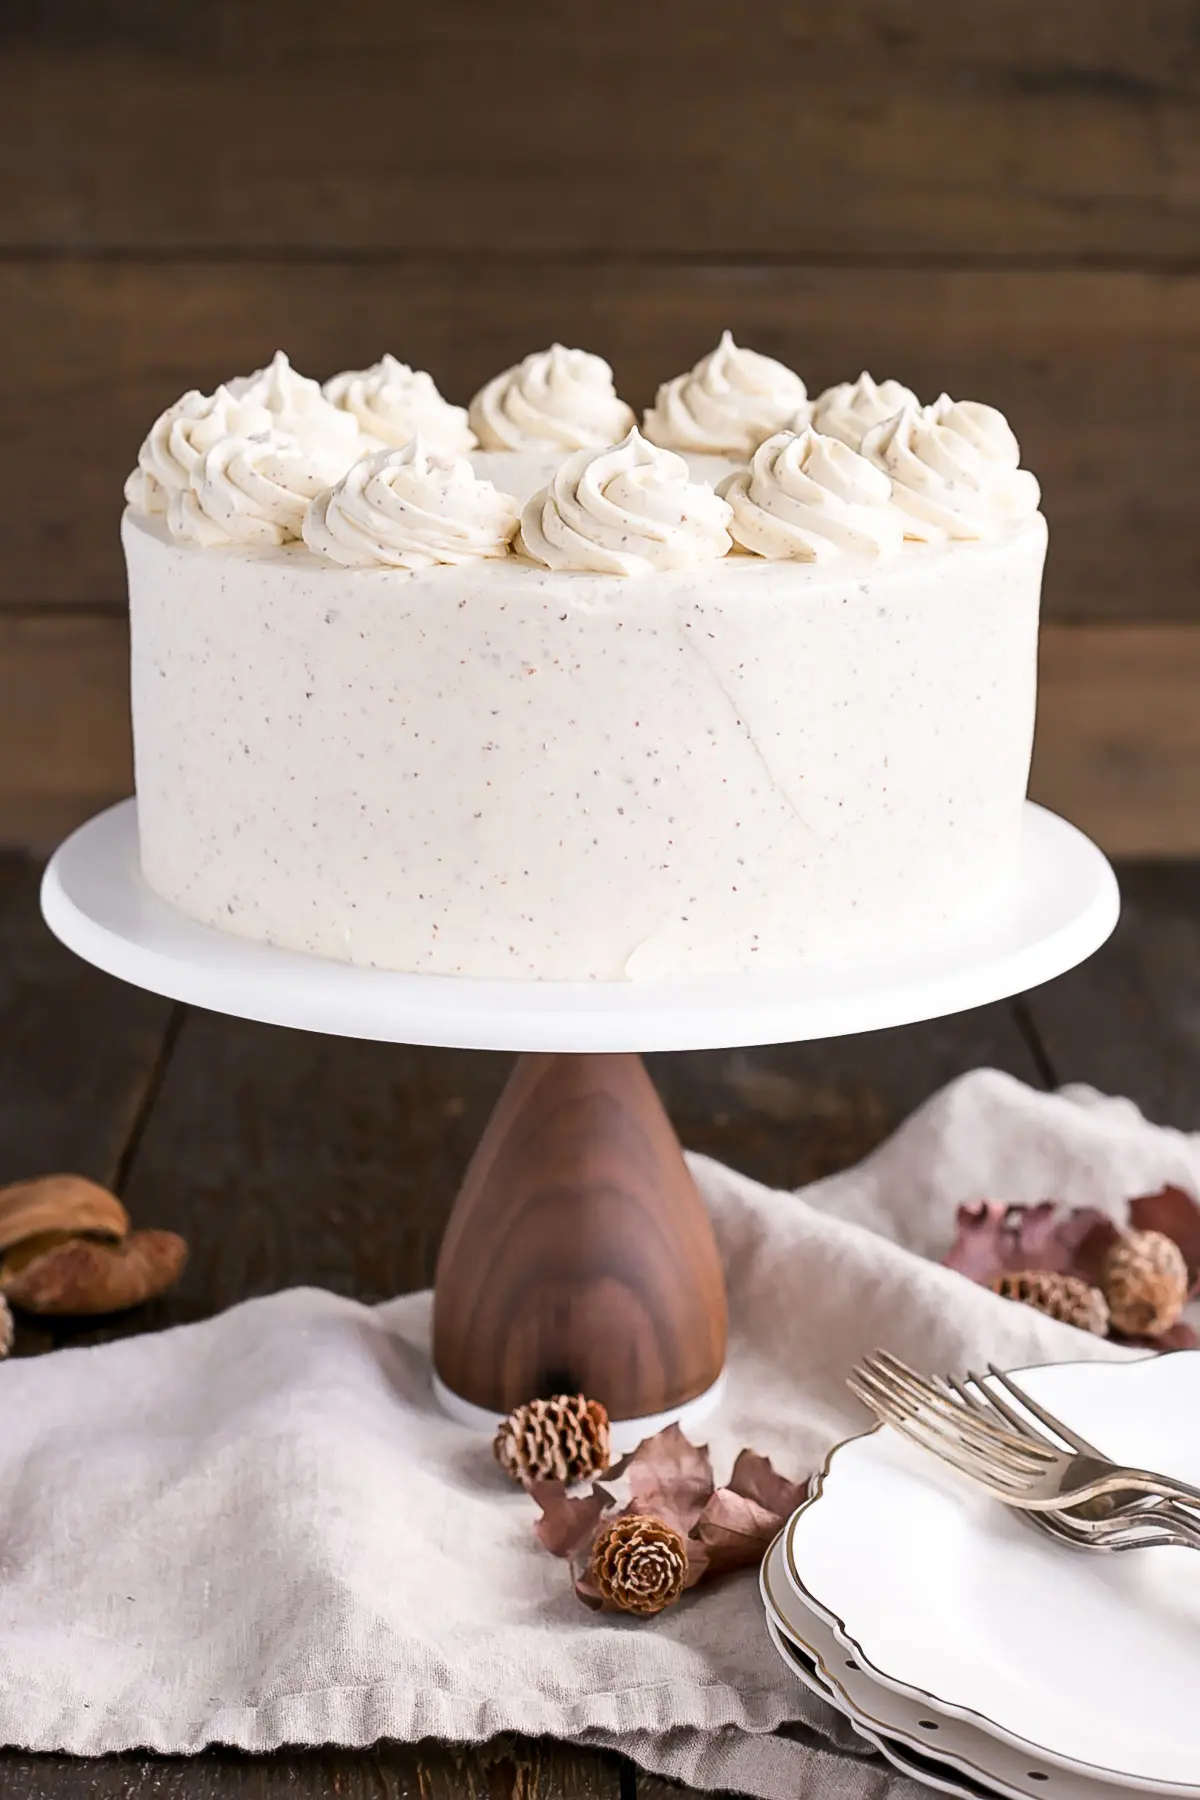
Cake on a cake stand on a wooden table

The flavour of this Brown Butter Cake is truly amazing. To be honest, doing the brown butter in both cake and frosting was a bit of a test. I wanted to see if it would really make a difference in the flavour, and wow, did it ever! This is such a simple change but it really does make for a unique nutty, buttery, caramelly, delicious cake!
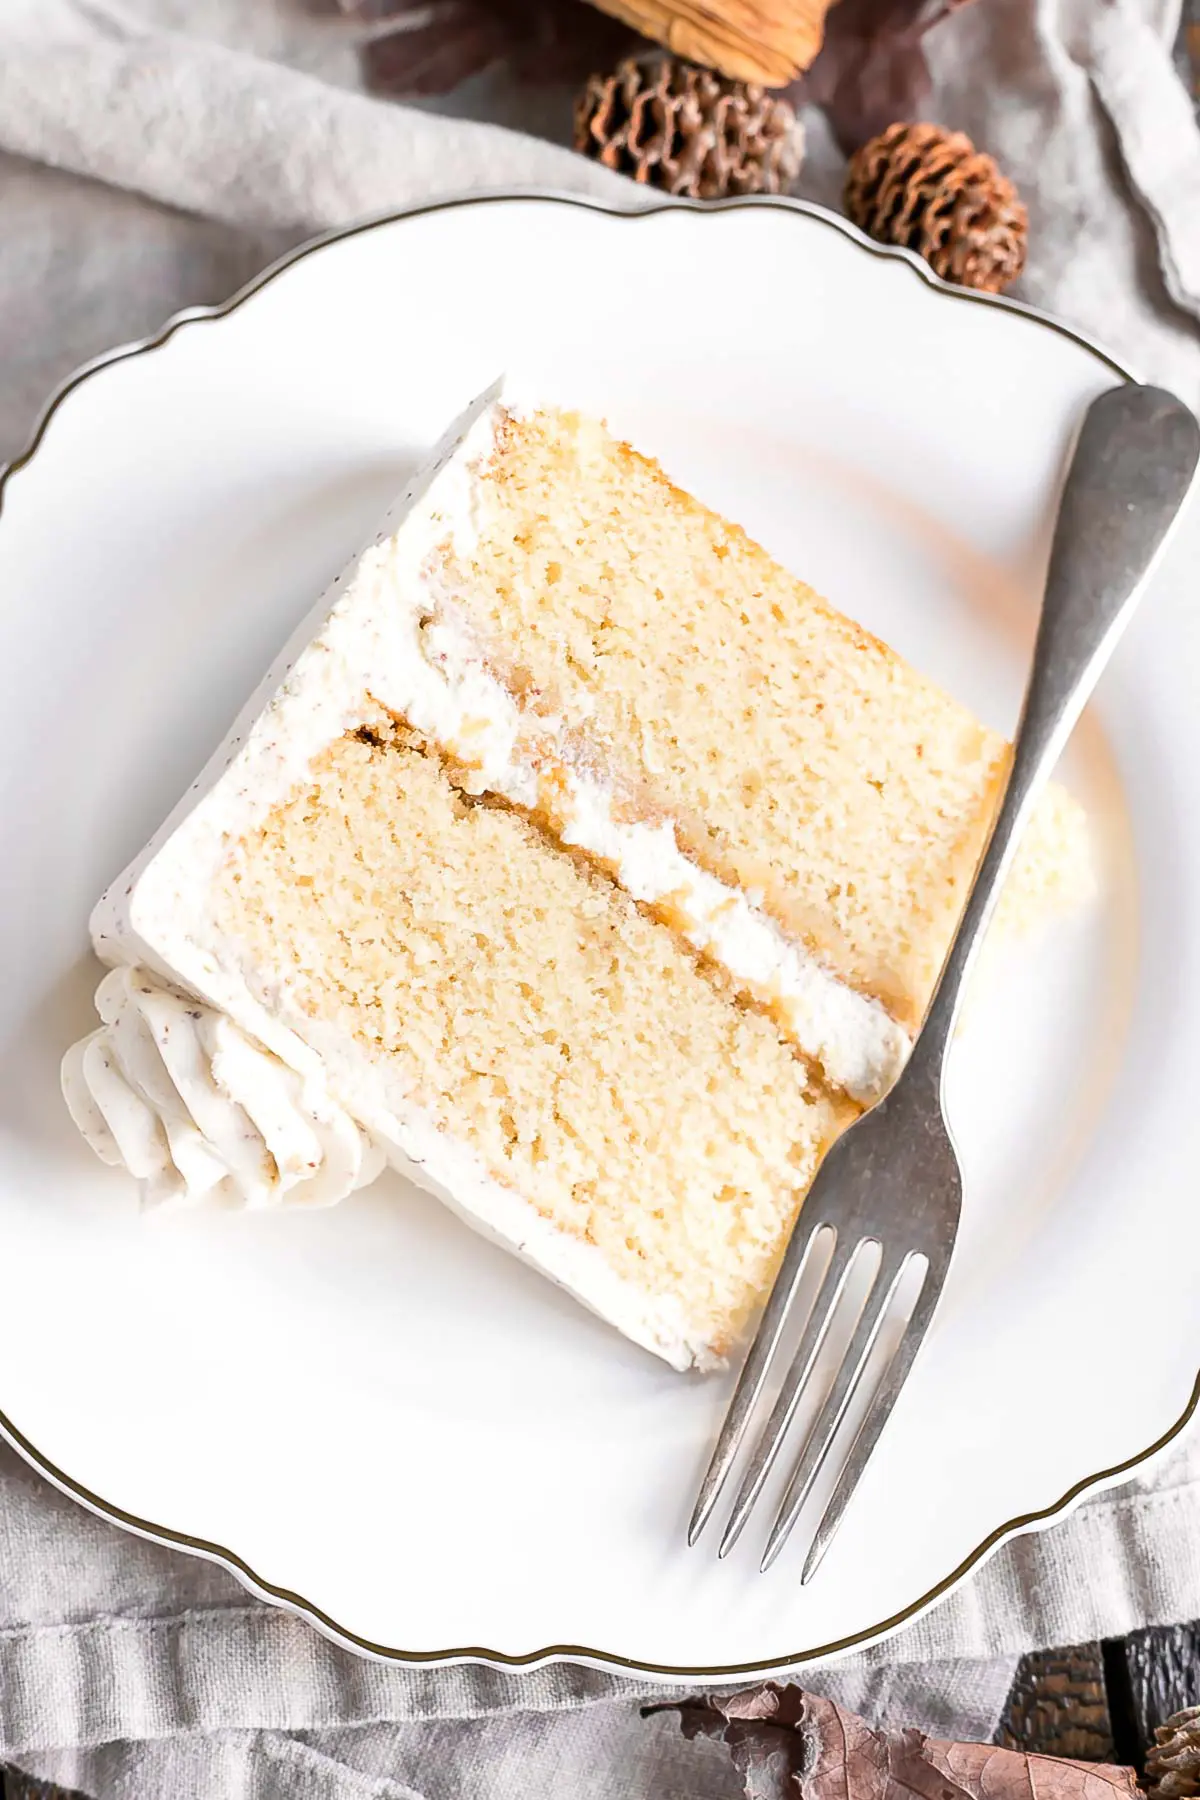
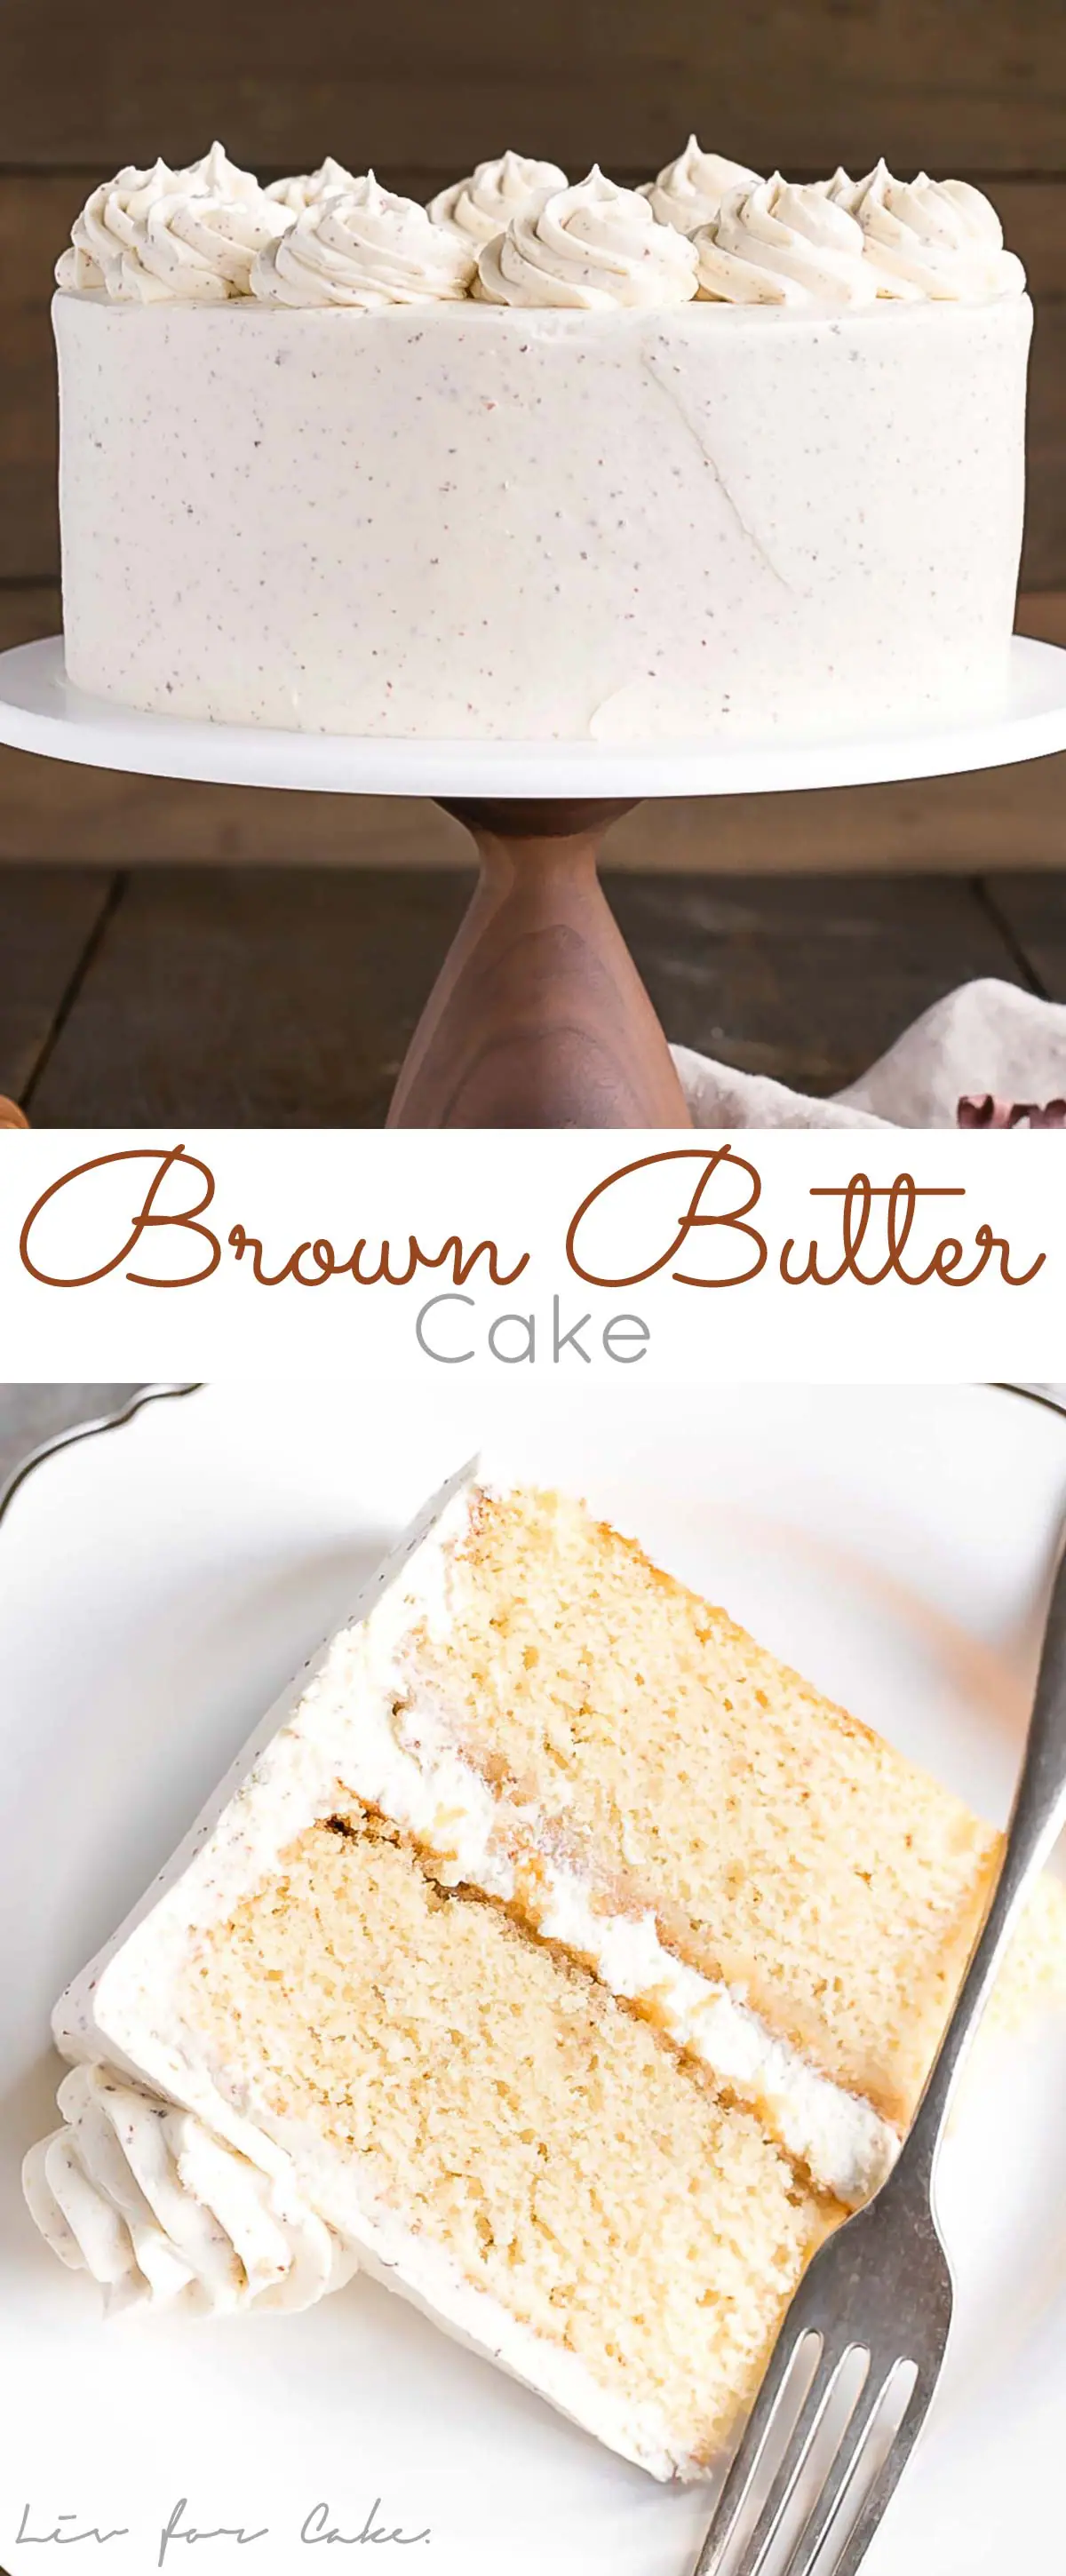
A piece of cake on a plate

Tips for this Brown Butter Cake:

  • Use a light colored pan to brown the butter so that you can actually see it getting brown. I used stainless steel.
  • The butter will go from brown to burnt very fast, so work quickly to get it off the heat and transferred to a heatproof bowl or measuring cup.
  • Allow the butter to cool and completely solidify before using in the recipes.
  • Be sure to check my Swiss Meringue Buttercream post for tips and troubleshooting.
  • To help ensure your cake layers bake up nice and flat, see my Flat Top Cakes post.
 

A cake sitting on top of a table
Print Rate
4.91 from 21 votes

Brown Butter Cake

Take classic vanilla cake to the next level with this Brown Butter Cake! A simple change for an intense nutty flavour.
Course Dessert
Cuisine Cake
Prep Time 2 hours
Cook Time 45 minutes
Total Time 2 hours 45 minutes
Servings 12
Calories 761kcal
Author Olivia

Ingredients

Brown Butter:

  • 2 cups unsalted butter *

Brown Butter Cake:

  • 2 1/4 cups all-purpose flour
  • 2 tsp baking powder
  • 3/4 tsp salt
  • 3/4 cup brown butter room temperature, solid
  • 1 cup granulated sugar
  • 1/2 cup light brown sugar packed
  • 3 large eggs room temperature
  • 1 1/2 tsp vanilla
  • 1 cup milk room temperature

Brown Butter Swiss Meringue Buttercream:

  • 6 large egg whites
  • 2 cups granulated sugar
  • 1 1/2 cups unsalted butter room temperature, cubed
  • 3/4 cup brown butter room temperature, solid
  • 1 tsp vanilla
US Customary - Metric

Instructions

Brown Butter:

  • Place 2 cups butter into a large, shallow, light colored saucepan. Cook over med-low heat, stirring frequently until the butter starts to brown and smell nutty.**
  • Immediately transfer to bowl or large measuring cup. Be sure to scrape in the brown bits. Measure out two separate 3/4 cup portions into separate containers for the cake and frosting respectively. Let cool to room temperature and solidify.***

Brown Butter Cake:

  • Preheat oven to 350F. Grease and flour two 8" cake rounds and line with parchment.
  • In a medium bowl, whisk flour, baking powder, and salt until well combined. Set aside.
  • Using a stand mixer fitted with a paddle attachment, cream browned butter and sugars on med-high until pale and fluffy (approx 3mins). Reduce speed and add eggs one at a time fully incorporating after each addition. Add vanilla.
  • Alternate adding flour mixture and milk, beginning and ending with flour (3 additions of flour and 2 of milk). Fully incorporating after each addition.
  • Bake for 45mins or until a toothpick inserted into the center comes out mostly clean.
  • Place cakes on wire rack to cool for 10mins then turn out onto wire rack and cool completely.

Brown Butter Swiss Meringue Buttercream:

  • Place egg whites and sugar into the bowl of a stand mixer, whisk until combined.****
  • Place bowl over a double boiler on the stove and whisk constantly until the mixture is hot and no longer grainy to the touch (approx. 3mins). Or registers 160F on a candy thermometer.
  • Place bowl on your stand mixer and whisk on med-high until the meringue is stiff and cooled (the bowl is no longer warm to the touch (approx. 5-10mins)).
  • Switch to paddle attachment. Slowly add all of the regular butter and then the browned butter 1 Tbsp at a time and mix until smooth.*****
  • Add vanilla and whip until smooth.

Assembly:

  • Place one layer of cake on a cake stand or serving plate. Top with 1 cup buttercream and spread evenly.
  • Place second cake layer on top and apply a thin coat of frosting all over to crumb coat. Chill for 20mins.
  • Frost & smooth the top and sides of the cake. Pipe rosettes on top using a 1M tip if desired.

Recipes You May Like

  • A bundt cake on a white cake stand sitting on top of a wooden table.
    Rum & Eggnog Bundt Cake
  • A decorated cake on a cake stand
    Banana Chocolate Chip Cake with Peanut Butter Frosting
  • Biscoff cake on a cake stand.
    Biscoff Cake (Cookie Butter Cake)
  • A cake sitting on top of a table
    Peanut Butter & Jelly Cake

Notes

*2 cups butter is more than you will need, but I always like to make more than less as some evaporates. Any extra can be used as a sauce for meant or vegetables.
** Be careful not to burn it. It will go from brown to black very quickly.
***  Once the butter is at room temperature, you can place it in the fridge to speed up the solidifying process. Be sure to bring it to room temperature before using in the cake and frosting recipes.
**** Ensure there is NO trace of egg yolks in your whites and that your mixer bowl and whisk is completely grease free or your meringue won't stiffen.
***** The buttercream may look like it's curdled at some point. Keep mixing until it is completely smooth.
NOTE: The Brown Butter Swiss Meringue buttercream recipe has been revised to add in more regular butter. The original recipe was browning 3 cups of butter and using 3/4 of that for the cake and 1 1/2 cups for the frosting.
The frosting was:
6 whites
1 1/2 cups sugar
1 1/2 cups brown butter
1 tsp vanilla
Calories: 761kcalCarbohydrates: 78gProtein: 6gFat: 48gSaturated Fat: 29gCholesterol: 170mgSodium: 406mgPotassium: 203mgSugar: 60gVitamin A: 1520IUCalcium: 92mgIron: 1.5mg
The nutritional information and metric conversions are calculated automatically. I cannot guarantee the accuracy of this data. If this important to you, please verify with your favourite nutrition calculator and/or metric conversion tool.

cake photo collage

Learn How to Bake the Perfect Cake!

Tips, techniques, and troubleshooting to help ensure your cakes come out perfect every single time!

Get your copy today!

Hungry for more?

Join our Baking community on Facebook!
Follow Liv for Cake on Facebook, Instagram, Pinterest, and Twitter
Or sign up to get free recipes by email!

Subscribe for the latest recipes

October 29, 2017

Comments

    Leave a Reply Cancel reply

    Your email address will not be published. Required fields are marked *

    Recipe Rating


  1. jojo says

    November 23, 2020 at 3:41 PM

    hi I see that the butter has been revised, please clarify…..how much brown butter for meringue cream or is it regular
    butter

    Reply
    • Olivia says

      November 23, 2020 at 5:14 PM

      Hi Jojo! For the buttercream, it’s 1 1/2 cups unsalted butter and 3/4 cup brown butter.

      Reply
  2. Sana says

    October 21, 2020 at 7:08 PM

    Hi,

    Can I make the brown butter swiss meringue buttercream in advance?

    Reply
    • Olivia says

      October 23, 2020 at 3:33 PM

      Hi Sana! Yes, place in an airtight container and refrigerate for 1 week for freeze for 3 months. Bring to room temperature and rewhip before using.

      Reply
  3. Sarah says

    April 26, 2020 at 9:09 AM

    3 stars
    The flavor is great, but wow…this cake is super dry. I pulled it after 35 minutes, as soon as a toothpick pulled out clean. I’m thinking maybe the recipe needs an adjustment..,more fat?

    Reply
    • Olivia says

      April 26, 2020 at 4:20 PM

      Hi Sarah! The cake should not be dry. It sounds like it was overbaked if the toothpick pulled out clean — ideally, it should have a few crumbs on it still. Every oven is different and some run hotter than others which would make it bake faster. You can always add a bit of simple syrup to the cake later to add back more moisture.

      Reply
  4. Stacey says

    April 8, 2020 at 1:50 PM

    5 stars
    Hello, I am wondering if you can tell me how much batter this yields. I need 5 cups of batter to fill my sports ball cake mold. Thank you!

    Reply
  5. Brianna says

    March 5, 2020 at 9:22 AM

    Hello! I had a question. Is it possible to make this cake a 3 layer cake? If so do you know what the new measurements would be based on other cakes you have made, i am having trouble figuring out how to measure it for 3 layers. Thanks!

    Reply
    • Olivia says

      March 7, 2020 at 2:43 AM

      Hi Brianna! For a 3-layer 8″ cake I would change the Servings to 16 and use those amounts. The layers will be slightly thinner, but those are the amounts I use for all of my 3-layer 8″ cakes 🙂

      Reply
  6. Shawn says

    February 22, 2020 at 5:02 PM

    Can I use this recipe for cupcakes? Do you have a sense of how many it would make? I also read somewhere that since some liquid does evaporate when you brown butter it’s a good idea to add an extra tablespoon of milk. What do you think?

    Reply
    • Olivia says

      February 23, 2020 at 12:46 PM

      Hi Shawn! For sure, it should make about 18-24 depending on size. All you need to do is reduce the baking time — start checking at 15mins or so. I haven’t tried adding milk and I don’t think the recipe needs it, but you can give it a go if you like 🙂

      Reply
  7. deb says

    February 15, 2020 at 1:51 PM

    I cooked this cake for 35 minutes in two 8 inch pans and it was more than done. Your recipe says 45 min. Way too long but the cake smells wonderful.

    Reply
    • Olivia says

      February 15, 2020 at 3:24 PM

      Hi Deb! Baking times are just a guideline and every oven is different. Perhaps yours gets hotter than mine at 350. Darker pans also cause cakes to bake quicker and I use even bake strips which increases the baking time. Thanks for the feedback! I hope you love the cake 🙂

      Reply
  8. Heather Callister says

    December 16, 2019 at 10:03 AM

    5 stars
    Hey Olivia! I made this 3 times. I’m the one who lives at high altitude in Salt Lake City, UT that played around with the apple Crisp Cake recipe. The first attempt with milk came out dry.

    The winner that works at high altitude is this one: Bake at 350 degrees for 31-33 minutes. Use unbleached flour. Subtract 1 Tablespoon of sugar. Use dark brown sugar instead of light brown. (It caramelizes better for whatever reason). Use buttermilk instead of regular milk. Add 1 Tablespoon of water. It was perfectly level and moist!

    Can I also post this one my website too and give reference to your original recipe? That’s when I can get my website revamped! 😂

    Reply
    • Olivia says

      December 16, 2019 at 3:43 PM

      Hi Heather! I remember, thanks for all the testing and feedback — I’m sure it’s hugely helpful to people at high altitude. And yes, you can post your tweaked recipe on your site with a link to mine as inspo 🙂

      Reply
      • Heather Callister says

        December 16, 2019 at 8:08 PM

        Thanks! 👍

        Reply
        • Heather Callister says

          January 31, 2020 at 4:00 PM

          Hey! As promised, I linked your recipe with my tweaked one. Here it is! https://www.sugarspiceadvice.com/2020/01/30/brown-butter-cake/

          Reply
          • Olivia says

            February 1, 2020 at 10:33 AM

            Awesome!! I will check it out 🙂

  9. Amanda Arreola says

    November 26, 2019 at 11:01 PM

    5 stars
    Going to be making this tomorrow. Looking for more of a caramel cake so I will be substituting most of the white sugar with brown. And hoping for the best!!

    Reply
    • Olivia says

      November 27, 2019 at 9:11 AM

      Hi Amanda! I think that will work fine! Let me know how you like it 🙂

      Reply
  10. Eve says

    November 25, 2019 at 12:47 PM

    Thank you so much!! I love all your recipes 😊

    Reply
  11. Eve says

    November 24, 2019 at 9:27 PM

    Hi Olivia,
    I want to add pecans to the cake. Do I have to change the ingredients measurements?

    Reply
    • Olivia says

      November 25, 2019 at 10:07 AM

      Hi Eve! I wouldn’t change anything — just add about 1 cup of chopped pecans that are tossed in flour. Fold them in at the very end. This will add to the volume of cake batter though, so make sure your pans are at least 2″ tall (taller ideally).

      Reply
  12. Molly says

    October 6, 2019 at 7:27 PM

    5 stars
    I used this recipe for one of the cakes I made for my aunts’ 70th birthday. It was delicious! This is definitely my go-to vanilla cake. Everything about it was perfect!

    Reply
    • Olivia says

      October 7, 2019 at 9:19 AM

      Hi Molly! Thanks so much for the great feedback, so happy you loved it 🙂

      Reply
  13. Nicole says

    September 30, 2019 at 5:50 PM

    Tried it last week and it came out AMAZING!! I’d love to use this recipe to make cupcakes!! Would I need to change anything?

    Reply
    • Olivia says

      October 1, 2019 at 1:47 PM

      Hi Nicole! So glad you loved it 🙂 All you need to do is reduce the baking time — start checking at 15mins or so.

      Reply
  14. Theresa says

    July 6, 2019 at 10:43 PM

    Hi Olivia, I’ve tried your recipe twice, the first time was very successful, but I tried to bake again last week, it was very greasy and the texture was like a corn bread, it’s completely different with the first time, but I did follow all your steps, I don’t know what went wrong :((((

    Reply
    • Olivia says

      July 10, 2019 at 5:01 PM

      Hi Theresa! How strange! Did you make any changes to the ingredients? If not, is it possible that you overmixed the cake batter?

      Reply
  15. Kirsty-Ann Leigh says

    June 12, 2019 at 1:29 PM

    This cake was next-level delicious! I was tasting the batter at every step. Butter and sugar – taste. After adding eggs – taste. After filling my pans there was a couple teaspoons of batter left over – scoffed the lot. Brown Butter is interesting, smells like caramel but tastes sweet-sour. It’s truly glorious in this cake. Thank you once again for a perfect recipe.

    Reply
    • Olivia says

      June 14, 2019 at 10:02 AM

      Hi Kristy-Ann! Thanks so much for the feedback. I’m glad you loved it as much as I do 🙂

      Reply
  16. Marni Greenspoon says

    March 1, 2019 at 7:20 PM

    5 stars
    I am SO glad i stumbled upon your site. Everything I make had been amazing. This cake if no different. My kids were clamoring for more. Followed the recipe exactly and it worked perfectly. Can’t want to see what’s next!

    Reply
    • Olivia says

      March 2, 2019 at 9:29 AM

      Hi Marni! So nice to see you here 🙂 Glad you loved the recipe as much as I do!

      Reply
  17. Catherine says

    January 30, 2019 at 8:57 AM

    5 stars
    I used the cake portion of this recipe for my wedding cake this past October and it came out so dang good! It was super easy to scale the recipe up and down to accommodate the need for 6, 8, and 10 inch layers and everyone raved about it! I just did brown butter cake, raspberry jam, and vanilla SMBC–super simple, but with good ingredients, it was fantastic. This cake is sooo good. Thank you for developing this recipe!

    Reply
    • Olivia says

      January 30, 2019 at 4:33 PM

      Hi Catherine! So happy to hear that you loved it and that it was easy to scale. Thank you for sharing!

      Reply
  18. Jennifer says

    January 27, 2019 at 2:46 PM

    5 stars
    This time around, I made the Brown Butter Cake! This cake is DELICIOUS! It baked up beautifully with zero issues. Very moist, yet sturdy, and the perfect density! Cannot recommend this highly enough and it’s definitely one of my new favorites!

    My baking notes:

    – Made HALF a recipe’s worth.

    – Baked it in a single 6-inch x 3-inch tin at 325F for 58 minutes.

    – Trimmed off the top and torted into two layers, which gave me two 1-inch tall layers.

    – Used LorAnn Butter Vanilla Bakery Emulsion in a 1:1 replacement of the Vanilla Extract.

    Reply
    • Olivia says

      January 28, 2019 at 4:44 PM

      Hi Jennifer! As always, thanks for all your tips and feedback. So glad you liked this cake!! It has such a unique and delicious flavour 🙂

      Reply
  19. Jennifer says

    December 17, 2018 at 9:52 AM

    I made only the Brown Butter Swiss Meringue Buttercream portion of this recipe. And I made it based on the original recipe, where all of the Butter was browned (the recipe has since been changed to be part Brown Butter and part regular [non-brown] Butter).

    I browned the Butter the day before, poured it into a glass storage container, put it in the refrigerator overnight, and took it out the next morning and allowed it to sit at room temperature.

    When I added the Brown Butter to my stiff meringue, the smell was amazing! I added all of the browned bits and pieces, which really gave it a neat look!

    The buttercream became very loose after adding the Brown Butter, so I stuck it in the freezer for 10 minutes and tried to rewhip it. I could never get it to stiffen up properly. I went ahead and frosted my cake and was able to get somewhat smooth sides. I put the cake in the refrigerator overnight. Even after being overnight in the refrigerator, the next day it was still tacky and sticky to the touch and would become melty if taken out of the refrigerator for even a short amount of time.

    I ended up scraping off the Brown Butter Swiss Meringue Buttercream and instead made Olivia’s Brown *Sugar* Swiss Meringue Buttercream, which is heavenly and one of my favorites!

    I will say that the Brown Butter Swiss Meringue Buttercream that I made was absolutely delicious in taste! The best way I can describe the flavor was that it tasted how a donut shop smells. It was strangely much sweeter than traditional Swiss Meringue Buttercream – I would say at least as sweet as American Buttercream. But the texture (in the original recipe) was more like a pâté, was sticky, and was not the traditional silky-smoothness that Swiss Meringue Buttercream is associated with.

    Very long story short, I am excited to try out this recipe with the changes Olivia has made! She was a gem trying to help me troubleshoot the issues I was having and with immediately changed the recipe when I told her of my issues!

    Reply
    • Olivia says

      December 17, 2018 at 2:00 PM

      Thanks so much for the detailed feedback Jennifer! I’m so glad you messaged me so I could help troubelshoot. I’m really sorry you had so much trouble with it!! I’m going to have to retest my original recipe and try to figure out why it worked for me but not for everyone. It was definitely softer than a regular SMBC, but shouldn’t have gotten a weird texture like that. Glad you liked the flavour though 🙂

      Reply
      • Stacey says

        February 17, 2019 at 12:05 PM

        I have been making this cake since summer of 2018 and recently noticed the change in the frosting recipe. I never had an issue with the prior recipe, but to me it just stayed more of a meringue than a frosting. I made it again recently and just added additional browned butter to bring the consistency to a more sturdy, smbc frosting. I just love this whole cake!

        Reply
        • Olivia says

          February 18, 2019 at 3:33 PM

          Hi Stacey! Thanks so much for the feedback! I didn’t have a problem with the frosting either, but multiple reports of people led me to change it to something a bit more stable. I’m not sure if it’s the type of butter used or the cooking process or what. So glad you love this recipe as much as I do though!

          Reply
  20. Rachael says

    December 6, 2018 at 7:54 PM

    Hi Olivia!

    Saturday is my grandmother’s birthday lunch, and I want to make her a layer cake inspired by her classic toffee bars.

    I’m thinking about making this recipe with smooth chocolate ganache on the outside and toffee bits all over the top – maybe a layer of whipped ganache and toffee bits in between the layers.

    What do you think – would this cake work for that? I know what brown butter looks and smells like, but have never baked with it.

    Either way, I know I’m going to try this recipe at some point: just looking at it makes my mouth water!

    Reply
    • Olivia says

      December 7, 2018 at 9:38 AM

      Hi Rachael! I think this cake would be delicious with a chocolate frosting/ganache. The brown butter has a bit of a nutty flavour, so I think it will pair perfectly with chocolate. Let me know if you try it and how it turns out!

      Reply
      • Rachael says

        December 9, 2018 at 10:29 AM

        5 stars
        Thank you for the quick response, Liv!

        I made the cake – used the ganache recipe below to frost it (whipped version inside, poured version over the top) and covered the top with a lot of Heath Bits o’ Brickle.

        https://www.allrecipes.com/recipe/33647/chocolate-ganache/

        It was absolutely delicious and got rave reviews from all my family.

        Side note: I forgot to let the brown butter cool before using it to make the cake – just poured it in hot. I also used 9″ pans and dark brown sugar, because that’s all I had to work with. The cake still turned out wonderfully.

        Reply
        • Olivia says

          December 10, 2018 at 4:50 PM

          Awesome, thanks so much for the update! I’m so glad you liked it 🙂

          Reply
  21. Valerie says

    December 5, 2018 at 10:21 AM

    Hello Olivia,

    I too am going to try this as cupcakes. Just wondering, how many do they yield? Does the batter need to go into the oven at once, e.g. once the baking powder becomes wet? I am wondering whether to get more cupcake tins. 🙂

    Reply
    • Olivia says

      December 5, 2018 at 4:56 PM

      Hi Valerie! Ideally you’d bake them as soon as the batter is done. I’m not totally sure but I’d guess it would make 18 or so cupcakes +/- depending on size.

      Reply
      • Valerie says

        December 5, 2018 at 5:03 PM

        Hi Olivia,

        I went ahead and backed them — and yes, the yield is 18 (in case anyone else is wondering). They will cool overnight, and I will ice them tomorrow. I just did a basic buttercream icing though (with the brown butter). I am really looking forward to how these turn out, and will let you know!!

        P.S. the dough for this recipe is so super-fluffy and beautiful, and the icing is so silky awesome (mouth watering in anticipation).

        Cheers,
        Valerie 🙂

        Reply
        • Valerie says

          December 5, 2018 at 5:04 PM

          *baked lol 😉

          Reply
        • Olivia says

          December 5, 2018 at 5:06 PM

          Oh, excellent, thank you for the update! Please let me know how you like them 🙂

          Reply
  22. Robin says

    November 12, 2018 at 8:00 PM

    5 stars
    I would like to add caramel in some way. What would you suggest? I can’t wait to try. Also what do you think about a thin layer of Nutella in between layers?

    Reply
    • Olivia says

      November 13, 2018 at 2:12 PM

      Hi Robin! You can add it to the buttercream, but I think that would take away from the flavour a bit. How about just on top of the buttercream between the layers? Then they’re still distinct, and maybe a caramel drip on top? I think Nutella would work great as the brown butter has a nuttier flavour already.

      Reply
      • Robin says

        November 13, 2018 at 5:19 PM

        5 stars
        Thank you Olivia. One quick question. Will the frosting hold over night for a luncheon tomorrow?

        Reply
        • Olivia says

          November 14, 2018 at 9:52 AM

          Hi! Yes, it should be fine 🙂

          Reply
      • Catherine says

        January 30, 2019 at 9:01 AM

        I experimented with incorporating caramel and like Olivia mentioned, it did take away from the flavor of the brown butter cake. Love both flavors so much, but they shine better on their own.

        Reply
  23. Jo says

    November 8, 2018 at 11:51 AM

    Hi there! How much more frosting would I need if I wanted to cover the whole cake in rosettes?

    Reply
    • Olivia says

      November 8, 2018 at 4:50 PM

      Hi Jo! I’m not totally sure as I’ve never tried that. I would 1.5x the recipe, maybe more.

      Reply
  24. Isabel says

    November 1, 2018 at 8:29 AM

    Hi there! Thanks for the recipe! Would this cake be ok to be carved and covered in fondant?

    Reply
    • Olivia says

      November 1, 2018 at 12:06 PM

      Hi Isabel! I think it would work fine for that.

      Reply
  25. Melimel says

    October 30, 2018 at 11:03 AM

    Liv…do you think I could make this cake and use a simple apple compote in between the layers? I could stack and ice it the day of my event. Just wondering if it would hold up? Thanks!

    Reply
    • Olivia says

      October 30, 2018 at 2:53 PM

      Hi Melimel! It should hold up just fine. I would pipe a dam of buttercream as a border to hold in the compote.

      Reply
  26. Oli Perkins says

    October 22, 2018 at 10:28 AM

    5 stars
    One of the few recipes I’ve found online that have succeeded beautifully on the first try. Tasted fantastic and the texture was great! Added blackberries for kicks and that tasted great as well.

    Reply
    • Olivia says

      October 24, 2018 at 9:23 AM

      So happy to hear that Oli!

      Reply
  27. Katie says

    October 17, 2018 at 8:49 AM

    Hi Olivia! It looks like you have something in between your cake layers and your frosting filling. What is it? Extra brown butter or..? 🙂 Katie

    Reply
    • Olivia says

      October 19, 2018 at 1:37 PM

      Hi Katie! There’s nothing else in there actually, it’s just the crust from the cake layers since I don’t trim mine 🙂

      Reply
  28. Miranda says

    October 15, 2018 at 4:35 PM

    5 stars
    I love this cake recipe and I am planning to make it for my daughter’s first birthday in cupcake form. Any ideas for a filling?

    Reply
    • Olivia says

      October 19, 2018 at 1:33 PM

      Hi Miranda! I think a caramel would be delicious as a filling!

      Reply
  29. Carol says

    October 7, 2018 at 6:00 PM

    5 stars
    I’ve made 3 of your cakes so far and gotten rave reviews for all, but this was the recipe I made for my own birthday. It was perfect!

    Reply
    • Olivia says

      October 9, 2018 at 2:39 PM

      Yay! So happy to hear that Carol. Happy belated birthday!

      Reply
  30. Meghan says

    May 6, 2018 at 8:10 PM

    So I made this today….delicious! But I was having some issues with my buttercream. The butter was a little too warm when I mixed it, so I used your trick of cooling it down. I ended up having to use my freezer, and whenever I would begin working with it for awhile it would just start melting again. Is this just a hazard with warm temps and buttercream, or did I mess something up? I had stiff peaks before I added the butter. Thanks for any feedback!

    Reply
    • Olivia says

      May 7, 2018 at 5:09 PM

      Hi Meghan! If your meringue was nice and stiff before you added the butter then it’s just a matter of temperature. Next time try it with butter that is still very slightly cool/firm and make sure the meringue is completely cool. The buttercream may curdle due to the colder butter, but I find that easier to deal with (aka fix – just keep whipping it until it comes together) than a soupy buttercream.

      Reply
      • Meghan says

        May 10, 2018 at 9:23 PM

        Thank you!

        Reply
        • Leea says

          March 17, 2019 at 7:47 AM

          Hi Meghan,
          Just want to let you know if you’re having problem with soupy buttercream, just wet a towel with cold water and put it around the mixing bowl, and re-mix it. It will turn stable.
          I learned it from YouTube and I tried it and it worked! 😊

          Reply
  31. Goldi says

    April 30, 2018 at 5:30 AM

    Can I make this cake in 1 tall cake round rather than 2 separate — bake it at a lower temperature?
    Then cut the cake in half and put it back “together” with a layer of frosting.

    Thanks in advance

    Reply
    • Olivia says

      May 1, 2018 at 9:43 AM

      Hi Goldi! You can give it a try, but it would take a much longer time to bake due to the height and could dry out along the edges.

      Reply
  32. Sapna says

    April 11, 2018 at 3:07 PM

    Hi! Is there a suitable substitute for egg whites or would regular buttercream work instead of Swiss buttercream? Thanks!

    Reply
    • Olivia says

      April 16, 2018 at 2:12 PM

      Hi Sapna! Regular buttercream would work just fine. You need the egg whites for the meringue buttercream.

      Reply
  33. Nedra says

    March 17, 2018 at 7:35 PM

    I just realized that the butter that I browned is salted. Can I still use it? Will it ruin my cake????

    Reply
    • Olivia says

      March 21, 2018 at 3:41 PM

      Hi Nedra! You can leave the salt out of the cake if you used salted butter. As for the frosting though, this will really come down to taste. Some people don’t mind this, but I prefer unsalted butter.

      Reply
      • Nedra says

        March 22, 2018 at 3:56 PM

        5 stars
        Thank you for your reply. I made it anyways. It was delicious! I even made it gluten free. I have also made your chocolate cake with mint frosting GF. Both delicious. Thank you for the wonderful recipes.

        Reply
        • Olivia says

          March 25, 2018 at 10:46 AM

          So happy to hear that you liked them! 🙂

          Reply
  34. Celine says

    March 9, 2018 at 11:10 PM

    This looks amazing!!! I’ve recently become obsessed with brown butter. I was wondering what other flavors you would pair with this cake and how you would incorporate them?

    Reply
    • Olivia says

      March 11, 2018 at 3:46 PM

      Hi Celine! Brown butter is so versatile, I think it could work with anything — caramel, chocolate, apples, etc.

      Reply
  35. Stephanie says

    February 27, 2018 at 7:35 AM

    5 stars
    The most amazing cake recipe ever! I had never heard of brown butter cake before and I decided to give it a try. My husband and I loved it! I am a newlywed and am always looking for new recipes to try. It is not overpowering, it is just perfect! It pairs perfect with a cup of coffee. Thank you for this recipe!

    Reply
    • Olivia says

      February 27, 2018 at 5:04 PM

      Thanks so much Stephanie! I’m so happy to hear that you both liked it 🙂

      Reply
  36. Alia says

    February 16, 2018 at 3:46 PM

    Hello! What altitude are you at? I’m planning on baking this for a birthday and we’re just over 5500 feet here. I am contemplating how much to adjust the recipe. Thanks!

    Reply
    • Olivia says

      February 18, 2018 at 3:59 PM

      Hi Alia! I’m at sea level here 🙂

      Reply
  37. Regina says

    February 3, 2018 at 2:06 PM

    I there. I want to make this cake for a friend’s birthday, which falls on a Thursday. As I am often pressed for time on week nights, do you think this cake would still come out OK if I made the browned butter in advance (Sunday) and kept it refrigerated until Wednesday?

    Another time saving question: Would it be detrimental to make the Swiss Meringue Tuesday and refrigerate it until assembly, Wednesday?

    Reply
    • Olivia says

      February 5, 2018 at 3:40 PM

      Hi Regina! You can totally make the brown butter in advance — that’s what I do! Cool it to room temp and stick it in the fridge in an airtight container. Then bring to room temp again before using.

      The cake layers can be baked in advance too, I do this all the time — cool completely, wrap twice in plastic wrap and freeze. Thaw for 2-3 hours before assembling the cake.

      The frosting can be made in advance too, but can act up a bit once brought to room temp again. Make sure it’s brought to room temp and rewhip it. If it looks off for any reason it can be saved! Mine looked like cottage cheese soup once because it was still a bit too cold when I rewhipped it. I used my hair dryer (true story) to heat the side of the bowl while whipping and it came together beautifully.

      For ease, I would make the cake layers and brown butter in advance and the buttercream on the day of to avoid having to “fix” it if needed. I hope that helps!

      Reply
  38. Melissa C says

    December 28, 2017 at 8:42 AM

    Arrggh, this is the third time I have made Swiss buttercream. One time it was gloriously perfect and the other two times it was so runny I could pour it! I am following the recipe exactly and can’t figure out where I am going wrong!

    Reply
    • Olivia says

      December 31, 2017 at 12:53 PM

      Hi Melissa! For the other two times, was the meringue stiff before you added the butter? If not, grease or stray egg yolk could be the culprit. If it was stiff, then it sounds like either the butter was too soft or the meringue was still warm when you added it. If that’s the case, it’s totally saveable! Just stick the whole bowl into the fridge for 20mins and re-whip. Keep doing that until it comes together properly. I hope that helps!

      Reply
  39. teddy says

    December 6, 2017 at 1:34 PM

    hi, so i’ve never baked before, and for some reason i’ve been put in charge of christmas dinner dessert. i was gonna just buy a cake from the local french bakery, but happened upon this recipe and i actually wanna try it out. looks gorg and sounds delish. would it be a big deal to turn this recipe into cupcakes? what would i need to do? bake a shorter time?

    Reply
    • Olivia says

      December 6, 2017 at 5:35 PM

      Hi Teddy! You could totally do this as cupcakes. All you need to adjust is the baking time! Start checking them at 15mins or so. Let me know how they turn out!

      Reply
      • Teddy Basladynski says

        January 29, 2018 at 3:06 PM

        5 stars
        Hiya, I forgot to respond with how the recipe turned out as cupcakes. GREAT! omg. brown butter everything!

        Reply
        • Olivia says

          January 29, 2018 at 3:26 PM

          Yay! So happy to hear that 🙂 Brown butter everything, indeed! I can’t believe it took me so long to try it!

          Reply
  40. Alexis says

    November 20, 2017 at 10:31 AM

    5 stars
    Loved this cake so much I gave it a shout out on my blog. I made it for my mom’s birthday and it was a huge hit. I had never used brown butter before, boy was I missing out. Thanks for always having clear instructions and amazing recipes!

    https://themillennialglow.com/2017/11/10/on-my-radar/

    Reply
    • Olivia says

      November 20, 2017 at 6:00 PM

      Yay! I’m so glad you liked it and that you found the recipe easy to follow 🙂 Brown butter is amazing, right?? How did we not have it in our lives this long??

      Reply
  41. Ina says

    November 15, 2017 at 4:08 AM

    Do you think brown butter would go well with a caramel filling?

    Reply
    • Olivia says

      November 15, 2017 at 5:33 PM

      Hi Ina! I think that sounds like an amazing combo!

      Reply
  42. Melinda says

    November 13, 2017 at 2:15 PM

    5 stars
    Oh my goodness, this looks out of this world delicious. I know what you mean about brown butter. I made chocolate chip cookies with brown butter for the first time last year, and was amazed how much flavor it added to the cookie. Can’t wait to try this cake!

    Reply
    • Olivia says

      November 13, 2017 at 7:49 PM

      It was SO good. I seriously need to try brown butter in everything now. Chocolate chip cookies will be next I think! Thanks Melinda! 🙂

      Reply
  43. Dana DeVolk says

    November 6, 2017 at 10:35 AM

    5 stars
    I’ve started experimenting with brown butter myself, I can imagine how insanely good this is!! I’m going to try this frosting with some cupcakes this weekend.

    Reply
    • Olivia says

      November 6, 2017 at 10:49 AM

      It’s SO good right?? Thanks so much Dana, I hope you like it! 🙂

      Reply
  44. Jessica says

    November 6, 2017 at 9:43 AM

    5 stars
    Browned butter is totally my weakness. This cake is beautiful!

    Reply
    • Olivia says

      November 6, 2017 at 10:49 AM

      Thanks so much Jessica!

      Reply
  45. Cindy Rodriguez says

    November 4, 2017 at 8:34 AM

    What a beautiful cake! And I love the brown butter bits in the frosting. Gives it a rustic look.

    Reply
    • Olivia says

      November 5, 2017 at 9:09 AM

      I love it too! Thank you Cindy <3 xo

      Reply
How To Bake The Perfect Cake

Learn How to Bake the Perfect Cake!

Tips, techniques, and troubleshooting to help ensure your cakes come out perfect every single time!

Get your copy today!

Featured Posts

Chocolate covered cake on a white cake stand with fresh raspberries around it.

Chocolate Raspberry Cake

A decorated cake on a cake stand

Cotton Candy Cake

This Pear & Walnut Cake with Honey Buttercream is the perfect way to kick off the Fall season. | livforcake.com

Pear & Walnut Cake with Honey Buttercream

A close up of oreo macarons

Oreo Macarons (French Macarons)

Cake on a cake stand.

Kahlua Cake With Mocha Buttercream

This Pecan Pie Cake is perfect for your holiday get-togethers! Brown sugar cake layers and buttercream filled with traditional pecan pie filling. | livforcake.com

Pecan Pie Cake

featured
olivia

Welcome to liv for cake!

I'm Olivia, a professionally trained pastry chef, recipe developer, and photographer from Vancouver, BC. Creating classic cake recipes with a modern twist.
Read More

sig

Subscribe for the latest recipes:

Copyright © 2010 - 2021, Liv for Cake. All Rights Reserved. Privacy & Disclosure
Design by Pixel Me Designs