
I went to visit my sister and nephew in Sydney for 3 weeks in February. Before I left I did some research into cake classes there to see what was available (yes, that’s how addicted I am). I thought it would be cool to take a class there and I might as well since I probably wouldn’t have the opportunity again.
I stumbled across a post on https://cakecentral.com/ that led me to the Planet Cake website. They had good feedback about their classes and a lot of variety, unfortunately, I’d have to start with their ‘basics’ class as they have a very linear system. Makes sense I suppose… you want to make sure everyone is at relatively the same level in the later classes so that you’re not spending time explaining the basics, but I was really hoping to take a later, more interesting course. I figured I probably wouldn’t get another chance to take a class there, so I went for it. The classes aren’t cheap….I think it was about $400 for the day…
It was a full day from 10am till about 4:30pm. We were provided with a cake that we needed to torte and level. We were also provided with ganache to put between the lagers and ice the cake with. Ganache is typically made by heating heavy cream, pouring it over chopped pieces of chocolate, then stirring till smooth. It can be very thick but easily thinned just by heating it. With the ganache we were able to cover our cakes very smoothly and prep them for fondant. Overall the ganache was easy to work with, but I thought it was a bit too heavy. It was like thick chocolate between the layers and I prefer lighter icings in general.
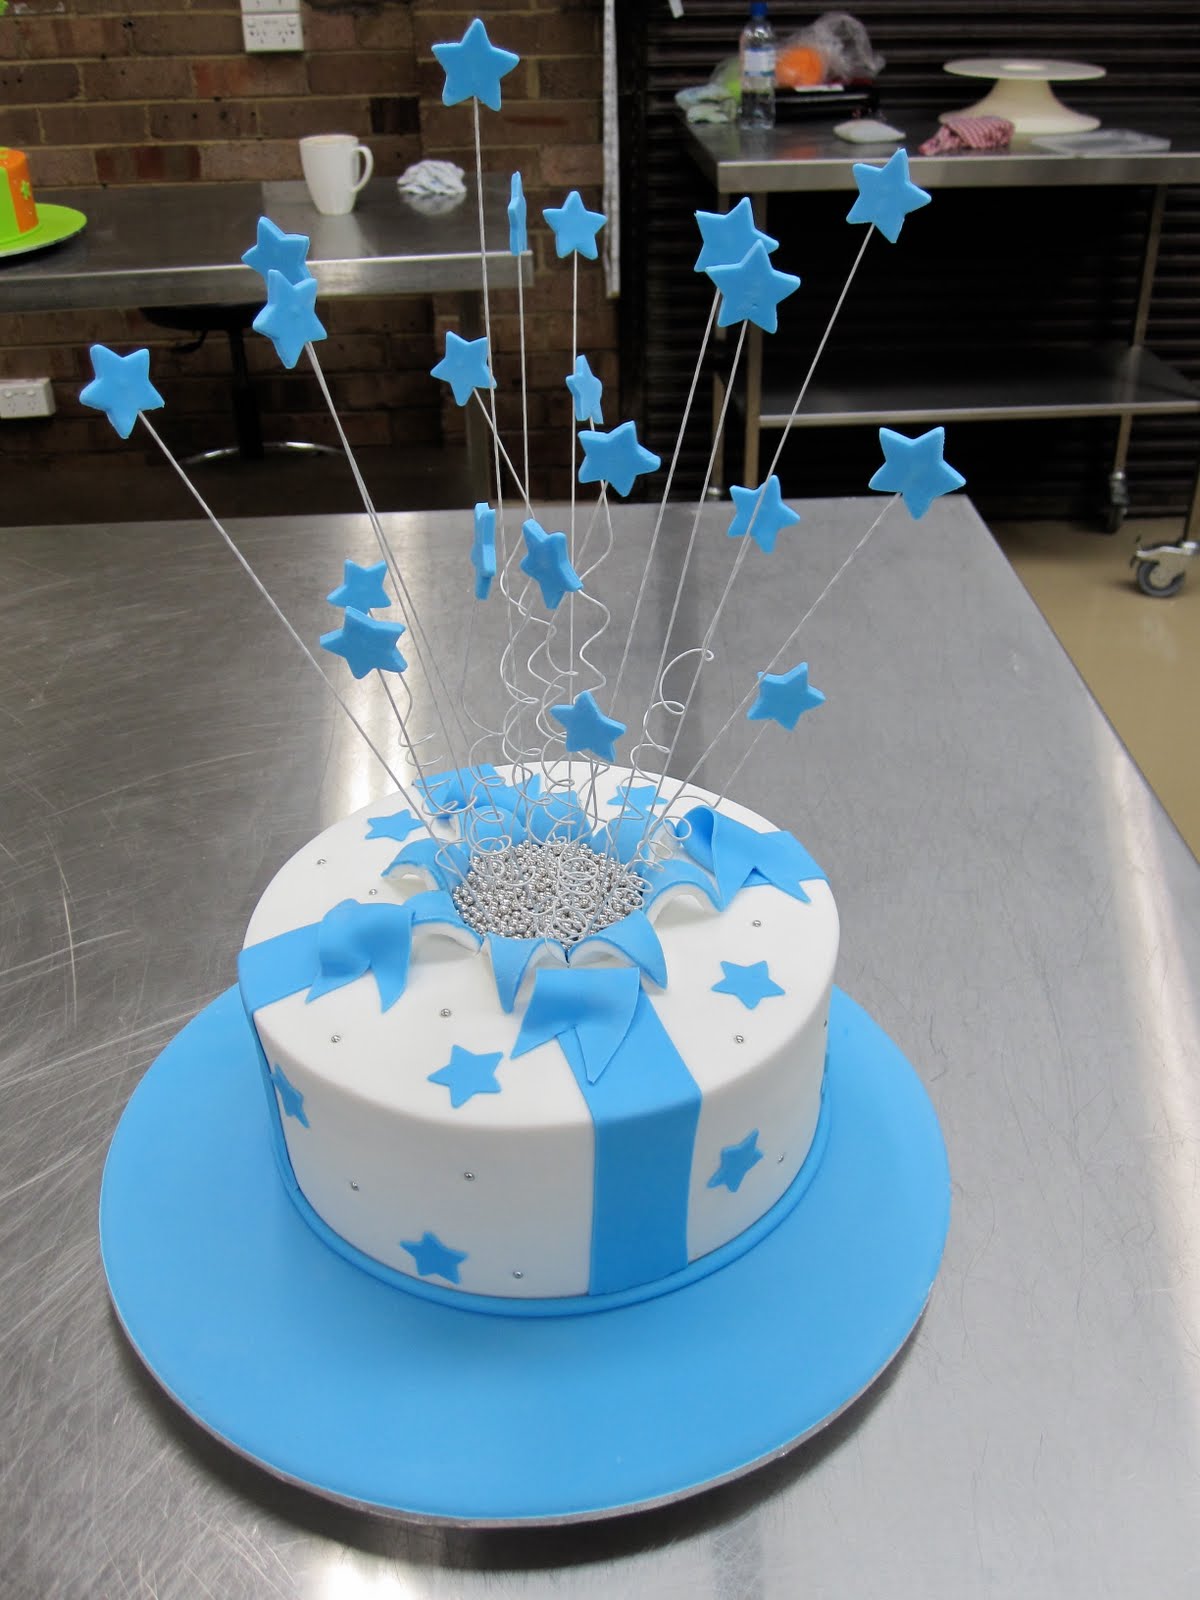
Once iced and smoothed, we set the cake aside and colored our fondant. I really wish I had chosen different colors, I don’t like the blue at all but I was thinking of my nephew at the time. A navy is what I was hoping for but they didnt have that. One lady in the class did a nice yellow & orange color scheme.
Covering the cake with fondant wasn’t too bad (I had done it before), but this was a larger cake than I’d done perviously so it was a bit tricky. To explain how to do the ‘exploding’ part of the cake is hard without pics but I’ll try…here’s a close up.

Basically, I cut two small blue, round discs and placed them on top of each other directly onto the cake. I brushed the top of the top disc with water and then covered the entire cake with the white fondant. The white fondant stuck to the top blue disc but not the bottom one. I then cut slits into the cake and pried the sections back to create the effect. After that was done we just had to add the ribbon and stars.
It was a lot of work and I was pretty tired after the 6 hours. I’m glad I took this course but I probably wouldn’t take another one there. I felt like it was a bit rushed and there wasn’t enough 1 on 1 time with the instructor. There were a couple of people that needed more attention and I think that detracted from my experience overall. Still though, I’m glad I took the class!
Things I learned:
- covering a cake board with fondant
- covering a cake with ganache
- how to get a very smooth, sharp edge at the top of the cake (the ganache really helps with this)
- how to do an ‘exploding’ effect with fondant
Things I would do differently:
- change the color scheme


Hungry for more? I've got you!
Join our Baking community on Facebook!
Follow Liv for Cake on Facebook, Instagram, Pinterest, and Twitter. Or sign up to get free recipes by email!