• Home
  • About
    • About Olivia
    • The Pastry Diaries
    • Privacy & Disclosure
  • eBooks
  • Recipes
    • Cakes
      • Birthday Cakes
      • Bundt Cakes
      • Chocolate Cakes
      • Christmas Cakes
      • Classic Cakes
      • Drip Cakes
      • Easter Cakes
      • Fruity Cakes
      • Halloween Cakes
      • Naked Cakes
      • Thanksgiving Cakes
      • Valentine’s Cakes
      • Vanilla Cakes
    • Cookie Cups
    • Cookies
    • Frostings & Fillings
    • Holiday Desserts
  • Shop
  • Tutorials

Subscribe for the latest recipes:

Liv for Cake

Classic Cake Recipes with a Modern Twist

  • Home
  • About
    • About Olivia
    • The Pastry Diaries
    • Privacy & Disclosure
  • eBooks
  • Recipes
    • Cakes
      • Birthday Cakes
      • Bundt Cakes
      • Chocolate Cakes
      • Christmas Cakes
      • Classic Cakes
      • Drip Cakes
      • Easter Cakes
      • Fruity Cakes
      • Halloween Cakes
      • Naked Cakes
      • Thanksgiving Cakes
      • Valentine’s Cakes
      • Vanilla Cakes
    • Cookie Cups
    • Cookies
    • Frostings & Fillings
    • Holiday Desserts
  • Shop
  • Tutorials

Home Β» Tutorial Β» Two-Toned Bundt Tutorial

Two-Toned Bundt Tutorial

By Olivia, 70 Comments

This post may contain affiliate links. Please see my full Disclosure Policy for details.
Jump to Recipe

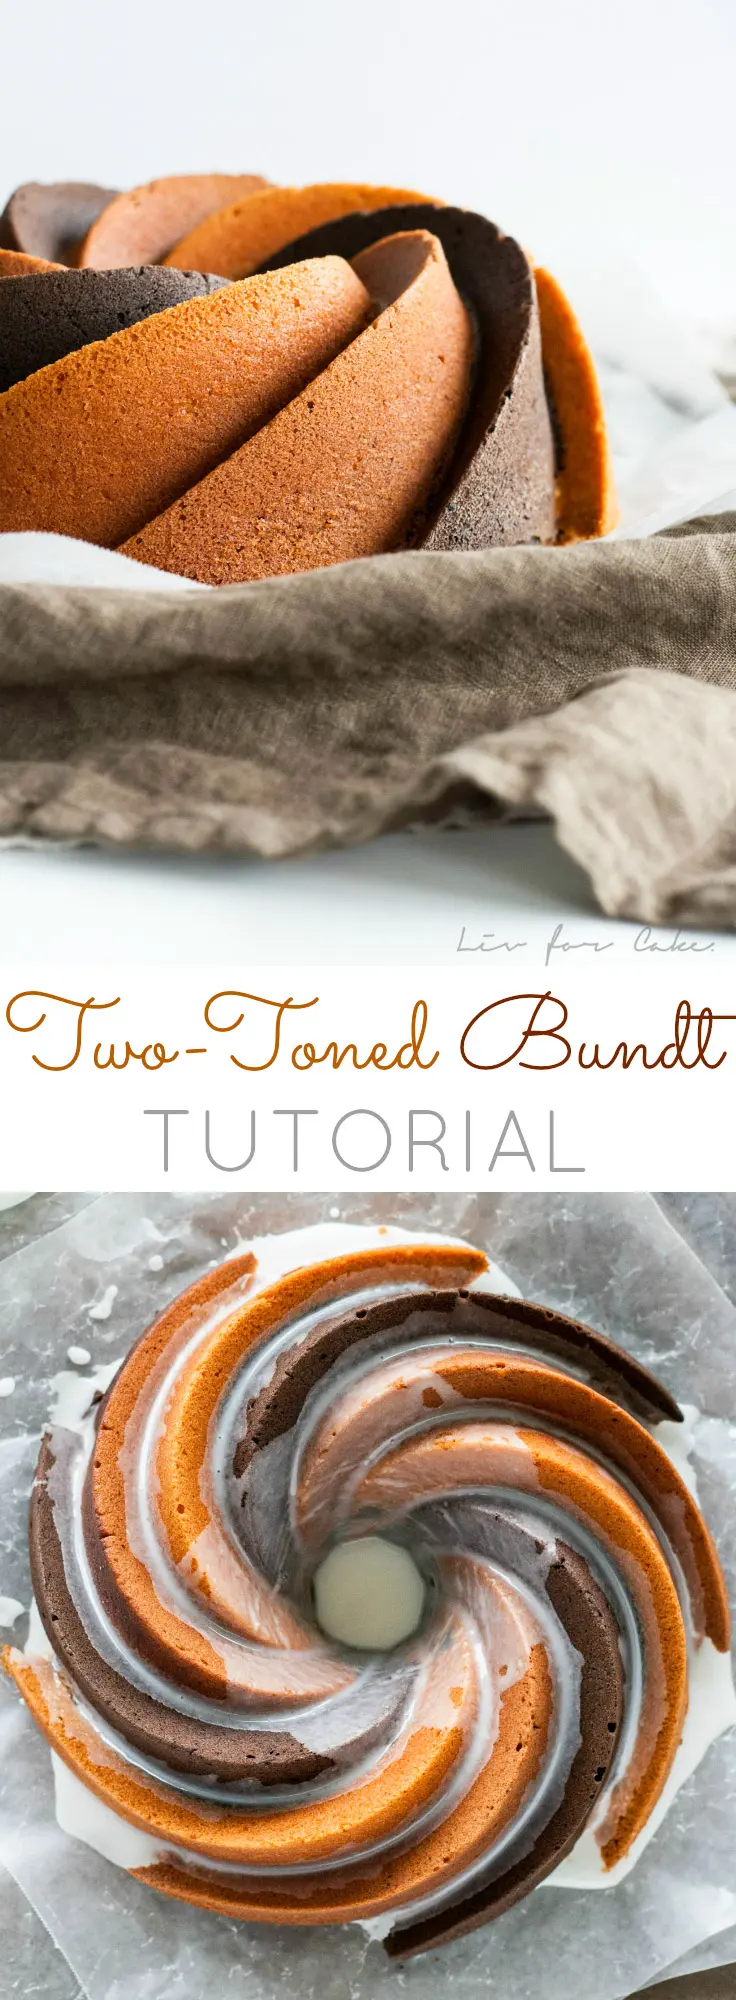
Learn how to do two-toned spirals in the Heritage bundt pan with this detailed tutorial.

Close up of the two toned Bundt.

The response to my Rocky Road Bundt Cake was amazing!!Β I’m so happy that people liked it, and many of you asked for a tutorial on how I did the multi-colored spirals. Unfortunately, I rarely take pictures when I’m baking. I never think of it. It’sΒ too chaotic and messy, and my kitchen doesn’t have the best natural light for photos. So I wait until everythingΒ is finished, and then haul all my photography gear and props into my brightly lit living room for photos. It’s a pain in the ass, I’ll be honest. While I was making the Rocky Road bundt, I did actually think:Β people are gonna want to know how to do this, I should be taking pics. So I took ONE crappy picture, but it didn’t tell the story at all. So for this tutorial post, I had to bake the whole thing again.

This was not the easiest thing to do given where I usually take my photos. My setup includes using a center leaf from ourΒ dining room table as the surface, which I place on an ottoman in the living room for better lighting. To get overhead shots, I climb a stepladder and do my best to notΒ fall over onto the whole setup while taking photos. There was just no way I was going to climb up a stepladder every 2 minutes for this tutorial though, ANDΒ I didn’t want to go back and forth between my kitchen for each step because that 15 foot distance is really just too much for my lazy self. So, I placed the table leaf on the floor so I could stand over it to take pics, and I literally sat on the floor doing every step of this tutorial. The whole process (making bundtΒ batter, step-by-step photos) took about 2 hours start to finish. No joke. That doesn’t include cleaning, or taking photos of the glazed cake the following day because it clouded over once the cake cooled and I lost my light. Not that I’m complaining or anything, hah.

Oh and also, this is actually a three-toned bundt, but my 3rd tone was a bit of a fail. In light of not wanting it to be too dark chocolate, I made it too light and it looks like the plain one. Oh well! At least there’s an even distributionΒ of colored spirals this time.

For this tutorialΒ you’re going needΒ a bundt pan (obviously), enough pastry bags for each color you do, enough cake skewers for each color (or something equivalent), and a spatula.

The Ultimate Cake Collection

Over 50 of my very favorite cake recipes all in one place! From Classic Cakes to Holiday favorites and everything in between.

Get your copy today!

Overhead shot of the tools required.

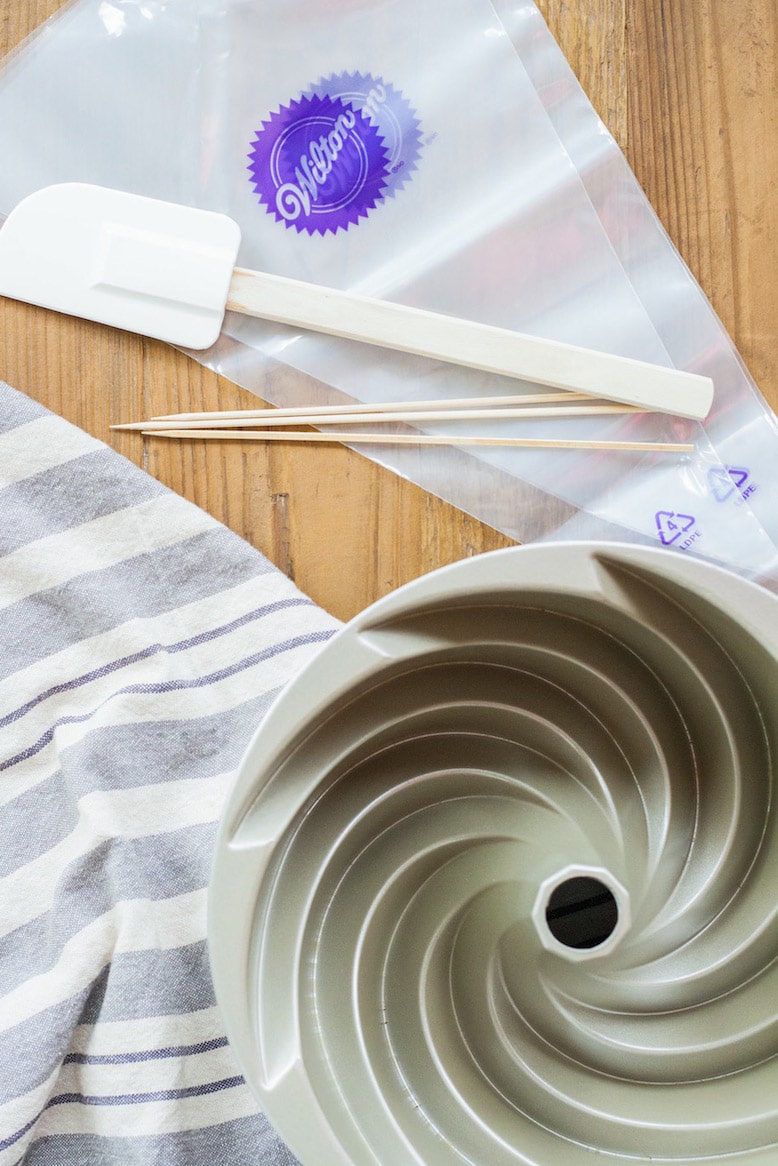
Alright, lets get started. At this point I’m going to assume you’ve already prepared your bundt batter and colored it per the directions in the recipe below. The recipe I used this time is a very basic pound cake that’s easily customizable, but you can use any 10-cup bundt recipe for this pan. And really, this technique should work in most bundt pans (depending on your patience), but the one I’m showing specifically isΒ the Heritage Bundt pan from Nordic Ware.

Step #1: Grease your bundt pan (I used cooking spray), and fill each of your pastry bags with one of the colors of batter.

Cake batter filled piping bags.

Step #2: Cut the tip off the bag with the darkest color. I can’t remember why I started with the dark, but it made sense to me at the time… Be careful not to cut off too much or it will be harder to control the flow! (Glasses to hold your piping bags come in handy).

Dark cake batter in a piping bag.

Step #3: Pipe the batter into the spirals, offsetting by the amount of colors you have. If you only have 2 colors you’ll have an uneven amount of spirals as I did in the Rocky Road Bundt. Not many people noticed this, so I wouldn’t worry about it.

Overhead of the dark batter piped into the Bundt pan.

Step #4: Use a cake skewer to nudge the batter into each crack and up towards the center of the spiral.

Using a bamboo skewer to nudge the cake batter into the crevices.

Step #5: Fill the rest of the spiral with the cake batter by piping it in.

Filling in the rest of the section with cake batter.

Step #6: Spread the batter out evenly using the same skewer or a spatula. Be careful not to let it creep into the neighboring spiral. If it does, just nudge it out with the skewer. The good thing is that these areas of overlap will likely be covered with a glaze if you use one.

Spreading the cake batter out in the sections.

Step #7: Repeat process above with the second color.

Adding the lighter colored cake batter.

Spreading the lighter colored cake batter out in the section.

Step #8: And a third color if you have it.

Lightest color going in to the final sections.

Step #9: Using a skewer, mergeΒ the batter between the spirals so there are no gaps.

Spreading the lightest colored batter out.

Step #10: Roughly pipe in the rest of the batter. It doesn’t really matter how you do this, as you’ve already created a “shell” for your cake. Last time, I just layered each color. This time I tried to keep with the general flow of the spirals.

Adding the rest of the cake batter into the pan.

Step #11: Marble the batter (optional) with a cake skewer, and spread the top evenly with a spatula.

Swirling the cake batter.

Step #12: Bake per directions in your recipe. You can see here how the two lighter colors pretty much blended together.

Overhead shot of the baked cake in a pan.

Step #13: Pray. Flip your bundt cake out onto a cooling rack. You can kiiiiinda see the 3 colors here.

Cake turned out onto a cooling rack.

Step #14: Glaze and devour.

Close up of the side of the cake.

Overhead shot of the cake.

A piece of cake sitting on top of a wooden table

I hope this two-toned tutorial has been helpful. If anything’s unclear or if you have any questions, please just ask! And if youΒ like this kind of tutorial post and want more like it in the future, let me know what you’d like toΒ see in the comments below!

Close up of the two toned Bundt.
Print Rate
4.92 from 12 votes

Two-Toned Bundt Tutorial

Simple, basic pound cake. Easy to tweak and modify to your desired flavour.
Course Dessert
Cuisine Cake
Prep Time 1 hour 5 minutes
Cook Time 55 minutes
Total Time 2 hours
Servings 12
Calories 607kcal
Author Olivia

Ingredients

Cake:

  • 3 cups all-purpose flour
  • 1 1/2 tsp baking powder
  • 1 1/2 cups unsalted butter room temperature
  • 2 1/2 cups granulated sugar
  • 5 large eggs room temperature
  • 2 tsp vanilla
  • 1 cup milk room temperature
  • 2 Tbsp Dutch-processed cocoa powder optional
  • 2 Tbsp black cocoa powder optional

Glaze:

  • 2 cups powdered sugar
  • 3 Tbsp milk
US Customary - Metric

Instructions

Cake:

  • Preheat oven to 325F and grease a 10-cup bundt pan with cooking spray.
  • In a medium bowl, whisk flour and baking powder, set aside.
  • In a stand mixer fitted with the paddle attachment, cream butter and sugar on med-high until pale and fluffy (approx 5mins).
  • Add eggs one at a time, fully incorporating after each addition. Add vanilla.
  • Reduce speed to low. Add flour mixture in 3 portions, alternating with 2 portions of milk. Mix until just combined.
  • Separate the batter into 3 bowls.*
  • Add 2 Tbsp Dutch-processed cocoa powder to one and 2 Tbsp black cocoa to another. Mix each until well combined.
  • Prepare 3 separate pastry bags and fill each with one of the batters.
  • Pipe the batter, alternating the colors, into the cracks of the Heritage bundt pan, being careful to avoid spilling over into neighbouring cracks. **
  • Once cracks are sufficiently filled, add remaining batter in alternating layers and use a kitchen skewer to marble it. Spread the batter evenly.
  • Bake for 55-60mins or until a skewer comes out clean.
  • Remove from oven and transfer bundt pan to cooling rack for 10-15mins. Rap the bundt pan against the counter to loosen it then turn cake out onto cooling rack to cool completely.

Glaze:

  • Combine powdered sugar and milk in a medium measuring cup. Stir until well combined. Add more milk as needed until desired consistency is reached. Pour glaze into cracks of cooled cake.

Recipes You May Like

  • A bundt cake on a white cake stand sitting on top of a wooden table.
    Rum & Eggnog Bundt Cake
  • Pumpkin Spice Latte Bundt Cake. Your favourite Fall beverage in a cake! Pumpkin & coffee flavoured cake with a milk & sugar glaze. | livforcake.com
    Pumpkin Spice Latte Bundt Cake
  • Bundt cake on a wooden cake stand.
    Marble Bundt Cake
  • Tropical bundt cake with a pineapple stalk sticking out of the middle.
    Aloha Bundt Cake

Notes

*I use a kitchen scale to weigh the batter to ensure I had even amounts, but a normal person would probably just eyeball it.
**I used a kitchen skewer for the finer points of the cracks. It's a process.
Note: Prep time is 45mins assuming you're doing the colored spirals. Otherwise it would take 20mins or so.
NOTE: Measurements in grams have not been tested. An online tool was used to convert these measurements.
Adapted from Add a Pinch.
Calories: 607kcalCarbohydrates: 88gProtein: 7gFat: 26gSaturated Fat: 15gCholesterol: 140mgSodium: 45mgPotassium: 191mgFiber: 1gSugar: 62gVitamin A: 860IUCalcium: 80mgIron: 2.1mg
The nutritional information and metric conversions are calculated automatically. I cannot guarantee the accuracy of this data. If this important to you, please verify with your favourite nutrition calculator and/or metric conversion tool.

Photo collage.

Learn How to Bake the Perfect Cake!

Tips, techniques, and troubleshooting to help ensure your cakes come out perfect every single time!

Get your copy today!

Hungry for more?

Join our Baking community on Facebook!
Follow Liv for Cake on Facebook, Instagram, Pinterest, and Twitter
Or sign up to get free recipes by email!

Subscribe for the latest recipes

June 7, 2015

Comments

    Leave a Reply Cancel reply

    Your email address will not be published. Required fields are marked *

    Recipe Rating


  1. Ruth-Ann says

    March 15, 2021 at 10:47 PM

    5 stars
    Hi, I have successfully used this recipe and the rocky road one. They look fabulous! I am inspired by someone else’s recipe for a smores cake in this pan. That includes Graham crumbs in the batter. Sadly that was a fail for me. I’d like to use your pound cake with crumbs. Any suggestions on how much or how to adjust the recipe for it? Thanks!

    Reply
    • Olivia says

      March 16, 2021 at 9:47 AM

      Hi Ruth-Ann! So nice to hear from you again. I actually have a S’mores Bundt cake recipe here: https://livforcake.com/inside-out-smores-bundt-cake/ Let me know if you give it a try πŸ™‚

      Reply
  2. Andrea says

    November 14, 2019 at 8:22 AM

    I came here from a Google search for a candied hazelnuts recipe and loved your detailed instructions. Then I saw a photo of this two-tone cake on that page and could not resist clicking on it. It is so beautiful, I am now on the lookout for the pan on sale. Your detailed instructions and photos are much appreciated. It takes a lot of effort to cook or bake, but to take pictures and develop a recipe is a whole ‘nother thing. I like that you post tips and little fails you’ve experienced also. Can’t wait to try this and many more of your recipes!

    Reply
    • Olivia says

      November 14, 2019 at 9:42 AM

      Hi Andrea! Thank you so much for your sweet comment. I am so glad you find my posts helpful! I hope you find this pan soon — I sometimes see them at Homesense (Homegoods or similar) for a steal. I hope you love this recipe!

      Reply
  3. Cindy says

    September 30, 2019 at 11:05 AM

    Am making this in the coming week. You mention that you didn’t add enough regular cocoa to make a color difference in the 3 color version. Does your recipe reflect that, or is it modified to make a more distinct color diff between the three??

    Reply
    • Olivia says

      October 1, 2019 at 1:44 PM

      Hi Cindy! The recipe is what you see in the pics. It looks pretty in the slice shot with the three colors, but not so much with the spirals. I would add a bit more regular cocoa powder if you’d like the colors more distinct πŸ™‚

      Reply
  4. Ruth-Ann says

    April 30, 2018 at 9:15 PM

    5 stars
    I’ve already made the rocky road cake – so worth the effort (visually anyway; I didn’t get to taste it). Now for another two-toned version. Silly question perhaps but will this cake be heavier than the Rocky Road cake? I’d like to do a two-toned as a birthday cake but due to peanut allergies, can’t do that other recipe. Usually such cakes are lighter texture but if this one is similar to the meyer lemon cake or lemon poppyseed texture, that would be ok. You mentioned easy to modify flavor – A nice strong vanilla would work. If I wanted orange flavor for the light color cake, would I just add orange zest to that one batter? Or maybe substitute orange for vanilla for the whole cake… or maybe just after I divide the batter? Thanks!

    Reply
    • Olivia says

      May 1, 2018 at 9:52 AM

      Hi Ruth-Ann! This is more of a traditional pound cake recipe. I would use my Meyer lemon cake recipe and swap out the lemon for orange in it πŸ™‚ When adding flavouring, it’s important to do it before the flour gets added as you don’t want to overmix the batter too much once you add the flour.

      Reply
      • Ruth-Ann says

        May 1, 2018 at 10:16 AM

        Thanks Olivia. That’s easy enough. How could I add chocolate as the second ‘color’/flavor? Just add 2 TBS black cocoa powder to half the batter? Would I need to increase the liquid a bit? Thanks!

        Reply
        • Olivia says

          May 1, 2018 at 10:49 AM

          Yes I would just add any kind of cocoa to it. No need to add more liquid, for such a small amount it should be fine πŸ™‚ Let me know how it turns out!

          Reply
          • Ruth-Ann says

            May 1, 2018 at 3:47 PM

            Merci! πŸ™‚ Will definitely let you know!

          • Ruth-Ann says

            May 8, 2018 at 8:07 PM

            5 stars
            Hi Olivia,
            Well, I adapted the meyer lemon recipe as you suggested and it turned out great so thank you! For some reason, it was messy (partly due to an overfilled piping bag but also maybe ingredients were a bit too warm) so not 100% perfect this time round (maybe I’m a 1-time-wonder – haha). However, it looked really good, tasted good, and the texture was spot on. Next time I may use a bit more cocoa (used 3 TBS) b/c it wasn’t as chocolate-y as I wanted but the orange flavor came through. I’m pleased with the result and my dad was thrilled with this as his birthday cake. Next up: Chai cake in the blossom pan for Mother’s day! πŸ™‚

          • Olivia says

            May 11, 2018 at 2:53 PM

            So happy to hear that Ruth-Ann! Glad it worked out and that your dad loved it πŸ™‚ Exciting about the Chai Cake! I hope you like it too πŸ™‚

  5. marilyn warren says

    April 30, 2018 at 8:07 AM

    5 stars
    I HAVE THIS TIN ALREADY AND AM LOOKING FOR A RECIPE WHICH IS A PLAIN CAKE IF I OMIT THE COCOA DO IN NEED TO INCREASE THE FLOUR OR WHAT WOULD YOU SUGGEST?

    Reply
    • Olivia says

      May 1, 2018 at 9:44 AM

      Hi Marilyn! You can just leave the cocoa out.

      Reply
  6. EILISH says

    September 8, 2017 at 9:02 AM

    Hi! I have your cake in the oven presently. I mixed things up a bit and used only two colours. I used your Graham cracker cake recipe for the light and it piped in lovely, then I poured the remaining chocolate batter from the recipe above in with the cake. I’m not sure if the pressure from pouring the batter in will upset the alignment of my cake, but damn that Graham cracker batter is delightful! Thanks so much for posting the tutorial, it was nice to see recipes using one of my existing pans. Oh, a question, for your chocolate cheesecake bunch, your crown pan, is it Nordicware?

    Reply
    • Olivia says

      September 8, 2017 at 4:50 PM

      Hi Eilish! I’m so glad you gave this one a go! Love that Heritage Bundt pan (and the graham cracker cake batter πŸ˜‰ ). The crown pan is from NordicWare! You can find it here: http://amzn.to/2wftXjy

      Reply
  7. Ross says

    April 4, 2017 at 5:20 AM

    Just stumbled into this recipe and wow! this looks amazing. Never had I any intention to try and make any bundt cakes before and now, I could blame you for making me wander into the bakery supply store to look for the pan. Though I havent had any luck yet (well, from where I come from, bakery supplies is far too limited), I won’t give up. Love this!

    Reply
    • Olivia says

      April 4, 2017 at 10:46 PM

      Hi Ross! I’m so excited that you’re excited about the Bundts! This pan is particularly a fave πŸ™‚ I hope you can find it somewhere.

      Reply
    • Andrea says

      November 14, 2019 at 8:15 AM

      It’s available online now. There’s even a generic one too. It’s a little pricey for me and I like to avoid Amazon, but hope this helps you out.

      Reply
  8. Edite sousa says

    January 4, 2017 at 11:27 AM

    Just love this cake, unfortunately cannot get a hold of the pan in South Africa. A huge fan of yours. Thk u for sharing.

    Reply
    • Olivia says

      January 4, 2017 at 7:17 PM

      Hi Edite! What a shame, I hope you’re able to get it someday, somehow. It’s my favourite Bundt pan!

      Reply
  9. Liliana says

    May 20, 2016 at 5:30 PM

    5 stars
    Simplemente, !!Maravillosa !!! Acabo de comprar el molde y lo voy a inaugurar con tu enseΓ±anza, gracias, Le envio un cariΓ±oso saludos desde CHILE, El fin del mundo.

    Reply
    • Olivia says

      May 22, 2016 at 11:53 AM

      Hi Liliana! Thank you!! I’m excited that you’re going to try this! Please let me know how it turns out πŸ™‚

      Reply
  10. Noga says

    February 5, 2016 at 1:53 PM

    5 stars
    Thank you so much for this! I saw your gorgeous cake and just had to buy that beautiful pan, and within a day I made a two toned bundt with your recipe and tutorial, with chocolate ganache on top. It came out beautifully and it tastes amazing, everyone in my family was just floored by it πŸ™‚

    Reply
    • Olivia says

      February 5, 2016 at 2:14 PM

      Hi Noga! So glad it worked out for you! I love that pan, you will get a lot of use out of it :).

      Reply
  11. Donna Coleman says

    January 18, 2016 at 11:16 PM

    5 stars
    Hi Olivia,just happened across your beautiful picture and the tutorial. What an inspiration! I have taken several cake decorating classes and this is going to be my next challenge. My family is always eager for my new trials that they will get to enjoy eating.
    I do have a question for you though, what is the difference in chocolates you used? Cocoa & black, does that mean cocoa powder and dark chocolate cocoa powder?

    Reply
    • Olivia says

      January 19, 2016 at 8:38 AM

      Hi Donna! I’m so excited that you’re going to try this!! Black cocoa powder is super dark, it’s what’s used to make things like Oreo cookies. You can find some online here. I’m not sure if dark chocolate cocoa powder is the same as black (I don’t think so), but if it’s noticeably darker than regular cocoa powder, it will work just fine :). Hope that helps!

      Reply
  12. Chloe Crabtree says

    November 23, 2015 at 7:49 PM

    Wow, Olivia, this is just so amazing! You make it look so easy, I certainly would like to try this! I have shared this over at FB and Twitter! I would love it if you would come by and share it at Celebrate Your Story over at Celebrate and Decorate! Happy Thanksgiving!

    Reply
    • Olivia says

      November 24, 2015 at 9:15 AM

      Thanks so much Chloe! I hope you try it and let me know how it turns out!

      Reply
  13. Valerie says

    October 5, 2015 at 10:02 AM

    I found this pan at a second hand store brand new and have made some amazing cakes in it. But coming across this design takes the cake! (excuse the pun) I cannot wait to recreate this. I will repost once I make your recipe. Thanks for sharing!

    Reply
    • Olivia says

      October 5, 2015 at 10:37 AM

      Awesome!! I love this Bundt pan, what a score getting it at a second hand store! I can’t wait to see your take on the two-toned! πŸ˜€

      Reply
  14. bridget {bake at 350} says

    September 8, 2015 at 3:45 AM

    This cake is stunning!

    Reply
    • Olivia says

      September 8, 2015 at 8:46 AM

      Thanks Bridget! πŸ™‚

      Reply
  15. Laura says

    August 12, 2015 at 3:56 AM

    oh wow! So cleve and pretty. I love it when something I’m going to eat is decorative too.

    Reply
    • Olivia says

      August 12, 2015 at 8:58 AM

      Thanks Laura! I hope you try it :).

      Reply
  16. Melanie says

    July 26, 2015 at 10:25 PM

    5 stars
    Made your beautiful cake this weekend. I used Red Dutch-processed cocoa and black and it did come out beautifully, but I was a mess. Thanks for always keeping me inspired to bake. I posted the photos on my Facebook page and people were blown away…I almost felt I was stealing your thunder.

    Reply
    • Olivia says

      July 26, 2015 at 10:29 PM

      Hi Melanie! Thank you so much! Why were you a mess?? It is a bit of an undertaking for sure, but I’m so glad you tried it and I totally want to see your cake!!

      Reply
  17. Mondo | I bake he shoots says

    July 20, 2015 at 2:30 PM

    What an amazing technique! Can’t wait to see what else you have in store.

    Reply
    • Olivia says

      July 20, 2015 at 3:10 PM

      Thanks Mondo! πŸ˜€

      Reply
  18. Mona Hass says

    July 9, 2015 at 4:39 PM

    I had just ordered this Heritage Bundt pan from Walmart.com (great source for assorted Nordic Ware pans at reasonable prices). Unbeknownst to me, I see your recipe. I anticipate using the pan in this fashion alternating colors. I just ordered it because I liked the design.

    Reply
    • Olivia says

      July 9, 2015 at 6:04 PM

      I’m so glad you came across this tutorial! I love the Heritage Bundt pan too, and am glad you’re going to try the alternating colors. I would love to see a picture of your finished bundt!

      Thanks for the tip about Walmart, unfortunately, Walmart.ca doesn’t carry any Nordic Ware pans, I wish!

      Reply
      • Mona Hass says

        July 31, 2015 at 9:35 AM

        What about Amazon? They carry many Nordic Ware pans, all costing less than the Nordic Ware website/ I wish I could figure out how to post the photo of a white chocolate / peach bundt cake I made using the Nordic Ware Jubilee pan.

        Reply
        • Olivia says

          July 31, 2015 at 12:53 PM

          Amazon is a great resource for sure! That’s usually where I order my stuff, but the exchange rate to Canada plus shipping can make it less cost effective and they’re always way more expensive on the .ca site :(.

          I don’t think you can post photos in the comments, but you can always email me your picture, I’d love to see it :).

          [email protected]

          Reply
  19. Beverly says

    July 9, 2015 at 5:18 AM

    4 stars
    Nice cake, Olivia, and I really appreciated the tutorial, as well. I’m very experimental in my approach to baking/cooking and anticipate opening an authentic British pub, bakery & banquet facility in honor of my father’s family from London and my launching into semi- retirement. I have a Nordic ware bundt pan that has the appearance of steeples on top of the upright cake with a crosshatched lattice pattern along the sides. I believe that I will try to vary the cake batters from one steeple to the next and see how that comes out. The explanation of your “technical photography” was creative and quite McGyver-istic”!

    Reply
    • Olivia says

      July 9, 2015 at 8:41 AM

      Thanks Beverly! I think I know the bundt pan you’re taking about and I think the two-toned batter will look awesome in it! Good luck with your pub!!

      Reply
  20. Lindsey | Lou Lou Biscuit says

    July 1, 2015 at 8:04 AM

    Thanks so much for taking the time to make this tutorial! I can’t wait to try it!

    Reply
    • Olivia says

      July 1, 2015 at 8:48 AM

      You’re welcome! I can’t wait to see how it turns out πŸ™‚

      Reply
  21. Nancy @ gottagetbaked says

    June 15, 2015 at 5:15 PM

    Girl, you are brilliant. I bow down to you and your cake baking prowess. My simple mind couldn’t even comprehend how you made that two-toned bundt so this tutorial is my everything.

    Reply
    • Olivia says

      June 16, 2015 at 10:53 AM

      Lol Nancy! Too funny, thank you! <3

      Reply
  22. Linda Jean says

    June 11, 2015 at 5:08 PM

    5 stars
    Beautiful cake. Thank you so much for this tutorial. I love this pan and I’m definitely going to have to try making a two or three color Bundt in it.

    Reply
    • Olivia says

      June 11, 2015 at 6:23 PM

      Yay! Please let me know how it turns out! πŸ™‚

      Reply
  23. Catarina says

    June 11, 2015 at 8:27 AM

    5 stars
    Hi! It is the first time I visit your blog. And I like it! Lovely recipe πŸ˜‰
    Keep on doing the good work :p

    Reply
    • Olivia says

      June 11, 2015 at 8:59 AM

      Thanks Catarina!

      Reply
  24. Patricia Blanco says

    June 11, 2015 at 12:35 AM

    Thank you very much for the tutorial!! It’s fantastic!! I’m looking forward to doing it!!! XOXO

    Reply
    • Olivia says

      June 11, 2015 at 8:59 AM

      Yay! I can’t wait to see how it turns out πŸ™‚

      Reply
  25. Oana says

    June 9, 2015 at 10:52 AM

    5 stars
    That’s one great tutorial. The cake looks great, somehow mesmerizing, especially the glaze shot. I love the pattern of this pan, although I’m sure I’d hate washing it up after baking πŸ˜€

    Reply
    • Olivia says

      June 9, 2015 at 5:50 PM

      Thanks Oana! The pan is virtually non-stick. I basically just had to rinse it out! πŸ˜€

      Reply
  26. Marilisa says

    June 9, 2015 at 5:35 AM

    Potrei avere la ricetta con il peso degli ingredienti per non sbagliare la consistenza dell impasto perchΓ© credo sia importante x la giusta riuscita del dolce
    Grazie

    Reply
    • Olivia says

      June 9, 2015 at 8:41 AM

      Hi Marilisa, I have added the measurements in grams to the recipe, but know that I have not tested this recipe using these measurements. I used an online tool to convert the amounts. Hope that helps!

      Reply
  27. mimi says

    June 8, 2015 at 7:32 PM

    Thx for sharing! This is a great idea! I also enjoyed reading what you did to get these photos πŸ˜‰

    Reply
    • Olivia says

      June 8, 2015 at 9:08 PM

      Haha, thanks Mimi! xo πŸ™‚

      Reply
  28. Kate (Kate's Weekend Kitchen) says

    June 7, 2015 at 11:56 PM

    Olivia, As normal I am in awe of your skills. Love the post and I retract my “I will not be making this” to OH WOW I wonder if I could do this in my bundt pan πŸ™‚

    Thank you for the fantastic photos.

    Kate

    Reply
    • Olivia says

      June 8, 2015 at 2:28 PM

      Yay! I’m so glad you’re willing to try it! I think it would work in most bundt pans. What kind do you have? I think as long as the batter is thicker (which it usually is for bundts) you shouldn’t have too much trouble piping it in πŸ™‚

      And thank you for the lovely compliments!!

      Reply
  29. Christine says

    June 7, 2015 at 8:34 PM

    This is gorgeous!!!

    Christine | DimesandDonuts.com

    Reply
    • Olivia says

      June 8, 2015 at 2:27 PM

      Thanks Christine!

      Reply
  30. Kim - Liv Life says

    June 7, 2015 at 7:44 PM

    I don’t bake cakes all that often… but I’m loving the shape of this cake so much I just put that pan on my birthday list!!

    Reply
    • Olivia says

      June 8, 2015 at 2:26 PM

      This pan is the BEST. My fave for sure. I’m so excited that you’re going to try it! πŸ˜€

      Reply
  31. Lorena says

    June 7, 2015 at 7:43 PM

    WOW!! This cake is gooorgeous!! And the photography is outstanding. Congrats Olivia. Will pin this right away!

    Reply
    • Olivia says

      June 8, 2015 at 2:26 PM

      Thanks so much Lorena! πŸ˜€

      Reply
How To Bake The Perfect Cake

Learn How to Bake the Perfect Cake!

Tips, techniques, and troubleshooting to help ensure your cakes come out perfect every single time!

Get your copy today!

Featured Posts

A close up of a cookie

Brownie Cookies

Close up of the side of a cake

French Opera Cake

Close up of the cake on a glass cake stand.

Blueberry Banana Cake with Cream Cheese Frosting

Cake on a cooling rack

How to Bake Flat Cakes

This Pecan Pie Cake is perfect for your holiday get-togethers! Brown sugar cake layers and buttercream filled with traditional pecan pie filling. | livforcake.com

Pecan Pie Cake

Slice of cheesecake stuffed bundt cake on a plate.

Chocolate Cheesecake Stuffed Bundt Cake

featured
olivia

Welcome to liv for cake!

I'm Olivia, a professionally trained pastry chef, recipe developer, and photographer from Vancouver, BC. Creating classic cake recipes with a modern twist.
Read More

sig

Subscribe for the latest recipes:

Copyright Β© 2010 - 2021, Liv for Cake. All Rights Reserved. Privacy & Disclosure
Design by Pixel Me Designs