

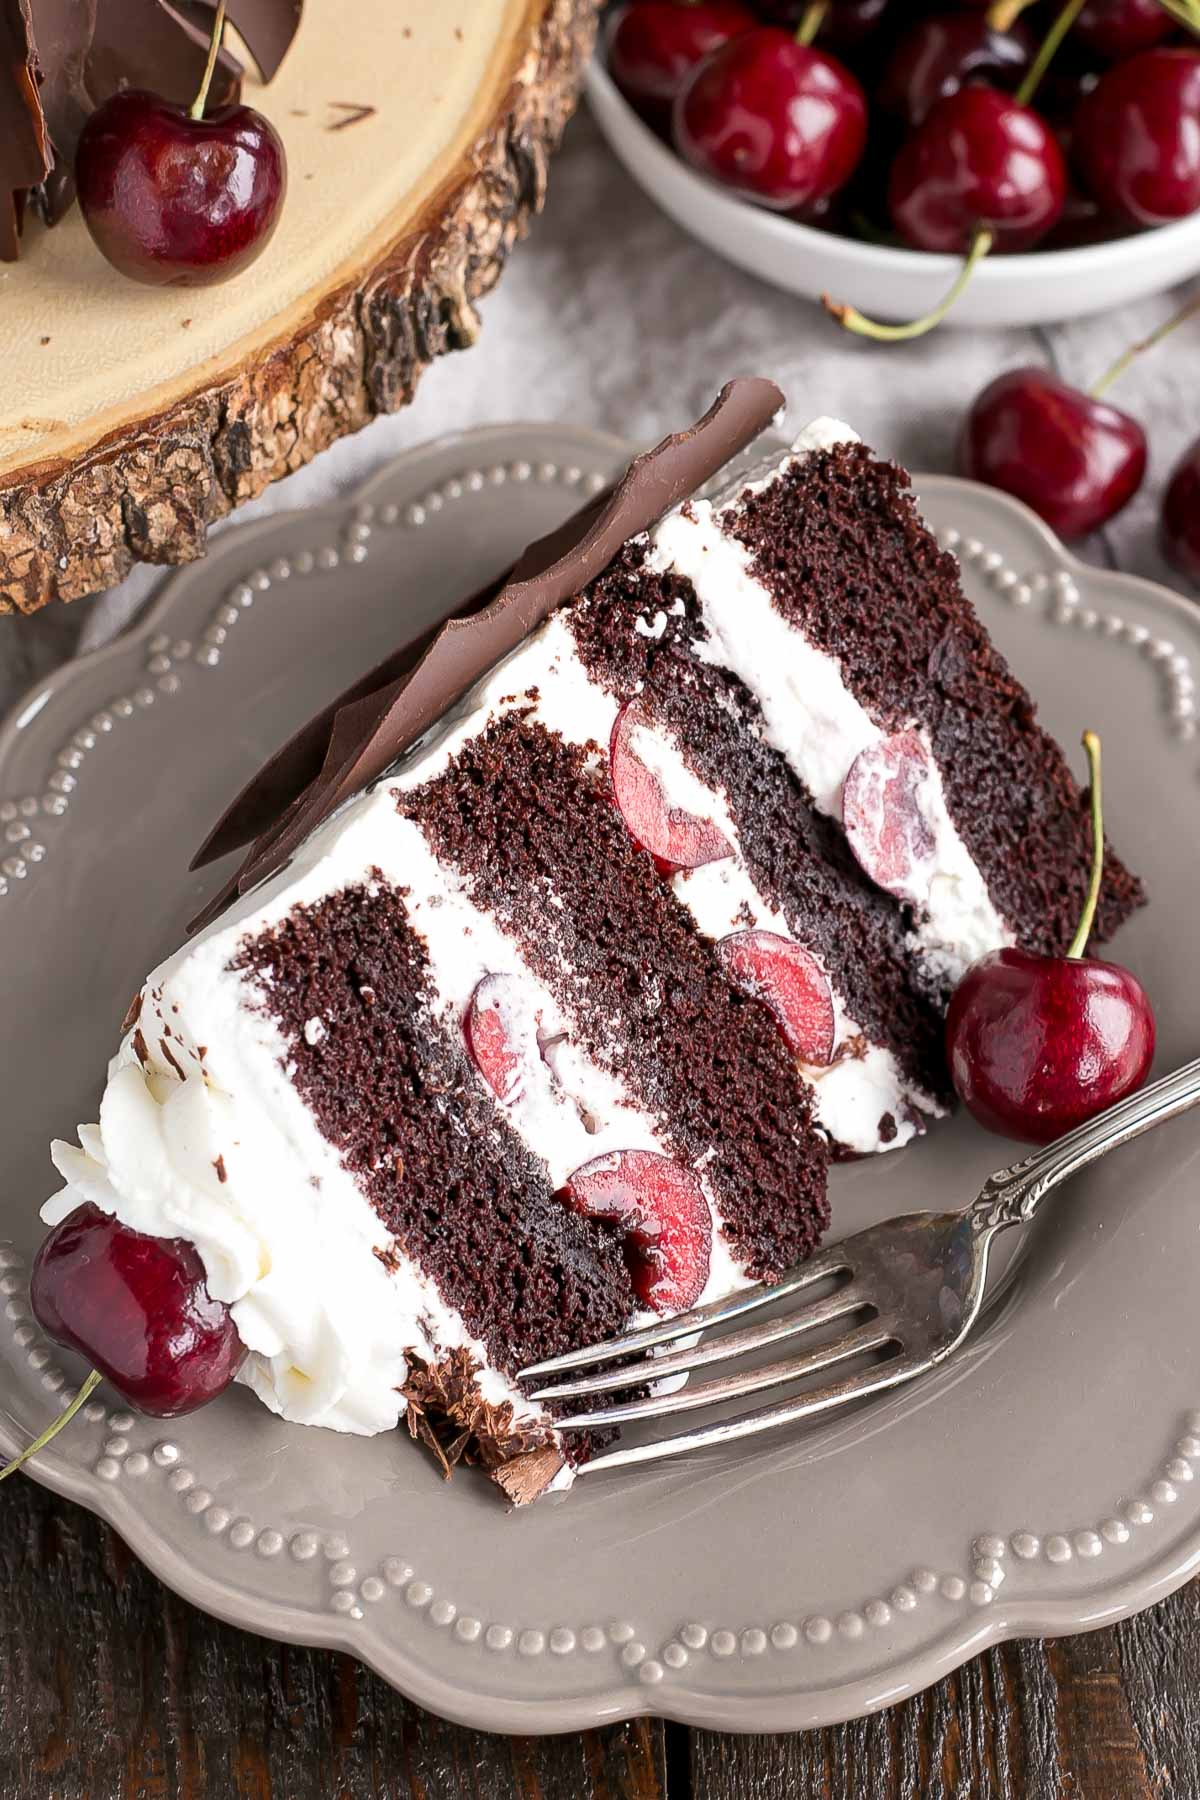
This Black Forest Cake combines rich chocolate cake layers with fresh cherries, cherry liqueur, and a simple whipped cream frosting.

Black Forest Cake was a staple when I was growing up (much to my dismay…read on).
You know, the grocery store kind with the nuclear red maraschino cherries? My mom loooooved that cake and always got it for her birthday, and often at other times throughout the year as well. This was epically disappointing to me.
Why on earth would you ruin a perfectly delicious cake with those sickly sweet, sticky, artificial tasting cherries? Whyyyyy? Needless to say, I ate around them, but they totally tainted the cake and frosting. Sad times.
Now that I think about it, it’s probably been a good 20-25 years since I’ve had that cake.
I’ve talked about my disdain for maraschino cherries before, and that feeling still holds true to this day. I have caved and used them as a garnish because I will admit, they look pretty and just go with certain desserts, but they get plucked right off before eating the cake.
Thing is, I actually love cherries. Real cherries. Fresh cherries. They are one of my favourite summer seasonal fruits. So, I set off to re-create the decades-old Black Forest Cake my way.

I promise you, this is one of the easiest cakes you will make.
It looks fancier than it is, and the chocolate bark was actually dead easy to make. The trickiest part of this cake is making sure you don’t have any lingering cherry pits in your cherries, which totally happened due to a less-than-stellar cherry pitter that broke after about 10 cherries.
Needless to say, it got returned.
So, super easy chocolate cake, a simple whipped cream for frosting, and fresh cherries. That’s really all you need.
In order to keep it traditional, I also made a cherry syrup (using kirsch – cherry liqueur) to brush onto the cake layers.
You can leave this out if you’d like to keep it kid-friendly or use a non-alcoholic cherry syrup.
How to Make Chocolate Bark
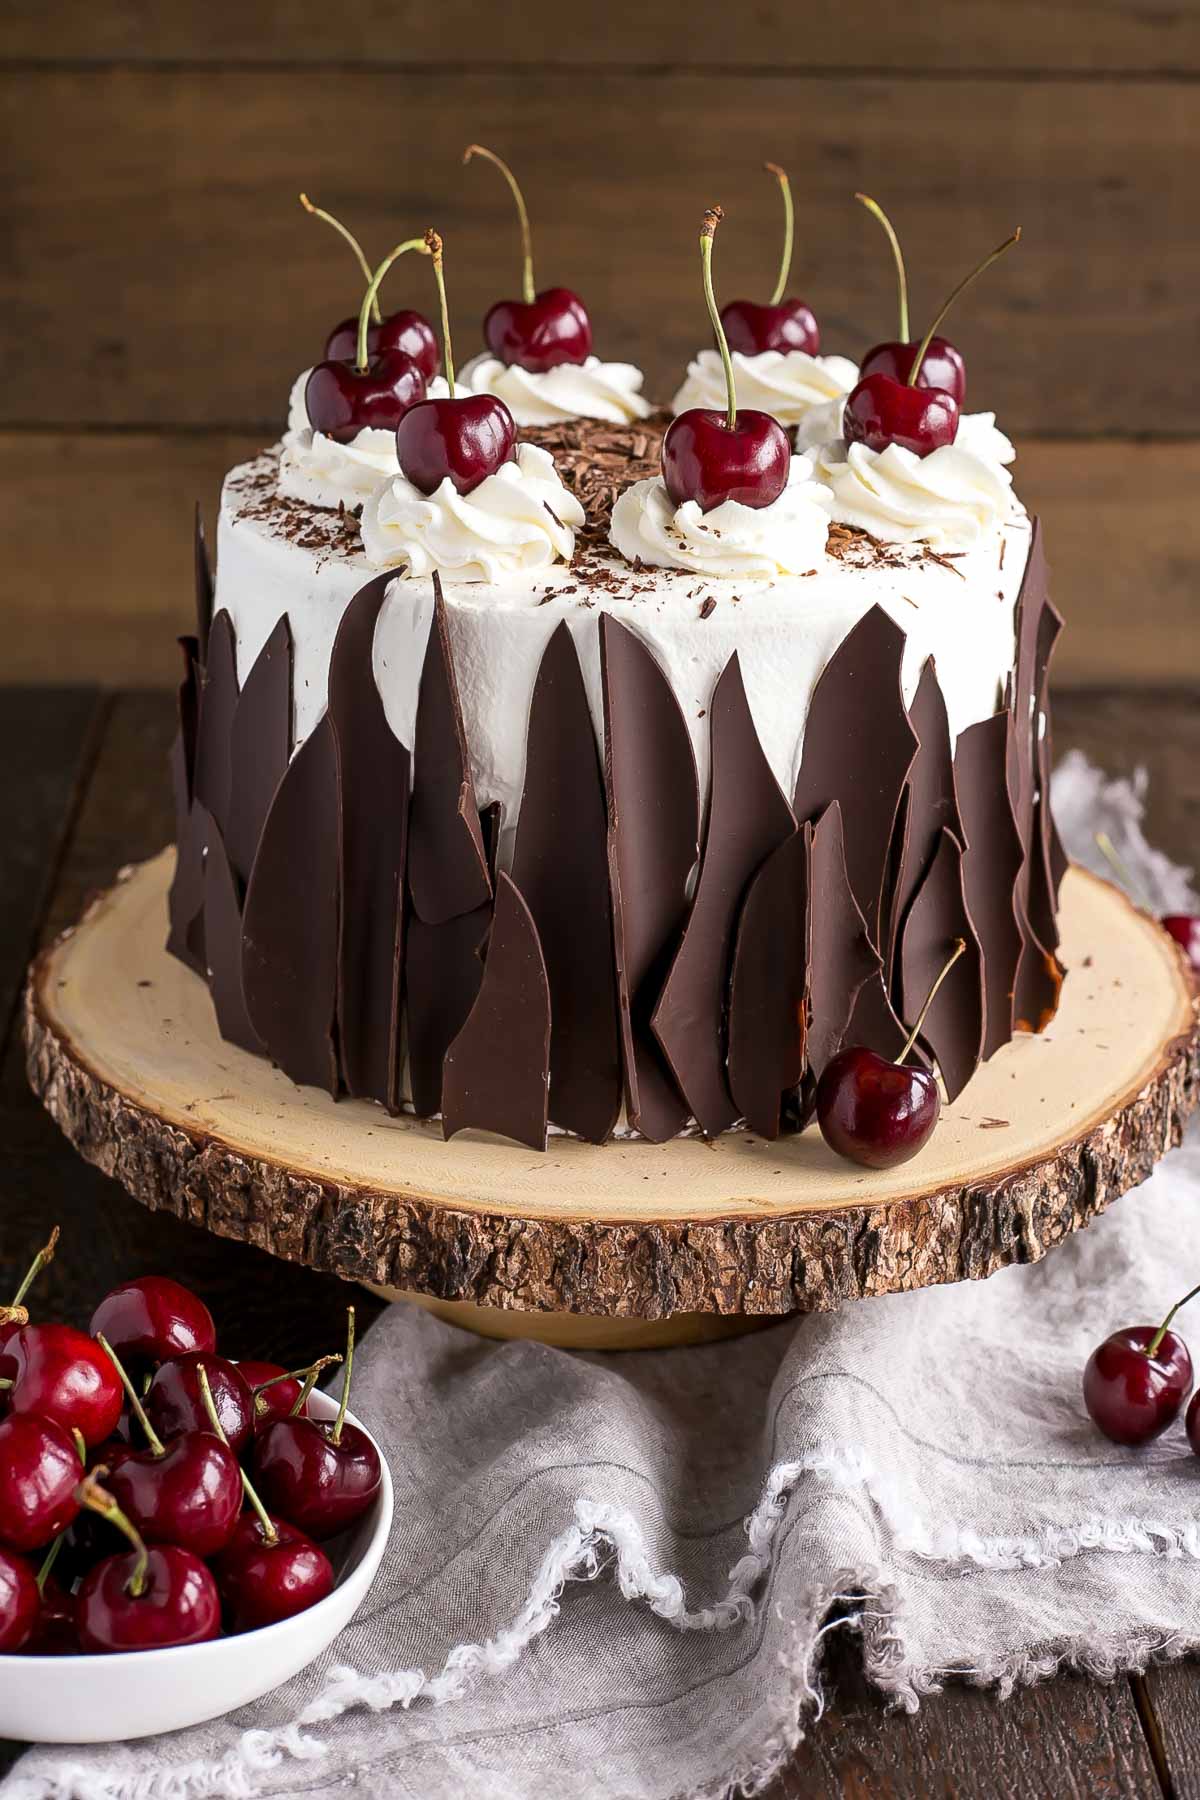
The chocolate bark on the side of the cake is much easier to make than it looks. I first saw this on my friend Janette’s Irish Chocolate Cake. She has a video tutorial to show you how to make it, and I basically followed her steps: melt chocolate, spread on parchment, chill, unroll.
The only difference is that I popped mine into the freezer for 20mins instead of the fridge for 30mins because I’m mega impatient.
I actually didn’t think it would work out, to be honest, since it was my first time trying it and all, but it worked great!
I actually thought my pieces were too big/thick and was thisclose to re-melting it and trying it again, but after I placed them on the cake they looked perfect.

You will have to work quickly with this chocolate bark — since the chocolate isn’t tempered, it will melt on contact.
I recommend using food safe latex gloves so that you’re not touching the chocolate directly. It will help a ton. I also popped the chocolate shards back in the fridge/freezer here and there to cool them off — it was a hot day too, so that didn’t help my plight.
At one point I actually had the cake and bark in the fridge and was placing the shards on the cake with the fridge door open (lol).
Desperate times. Is it Fall yet??
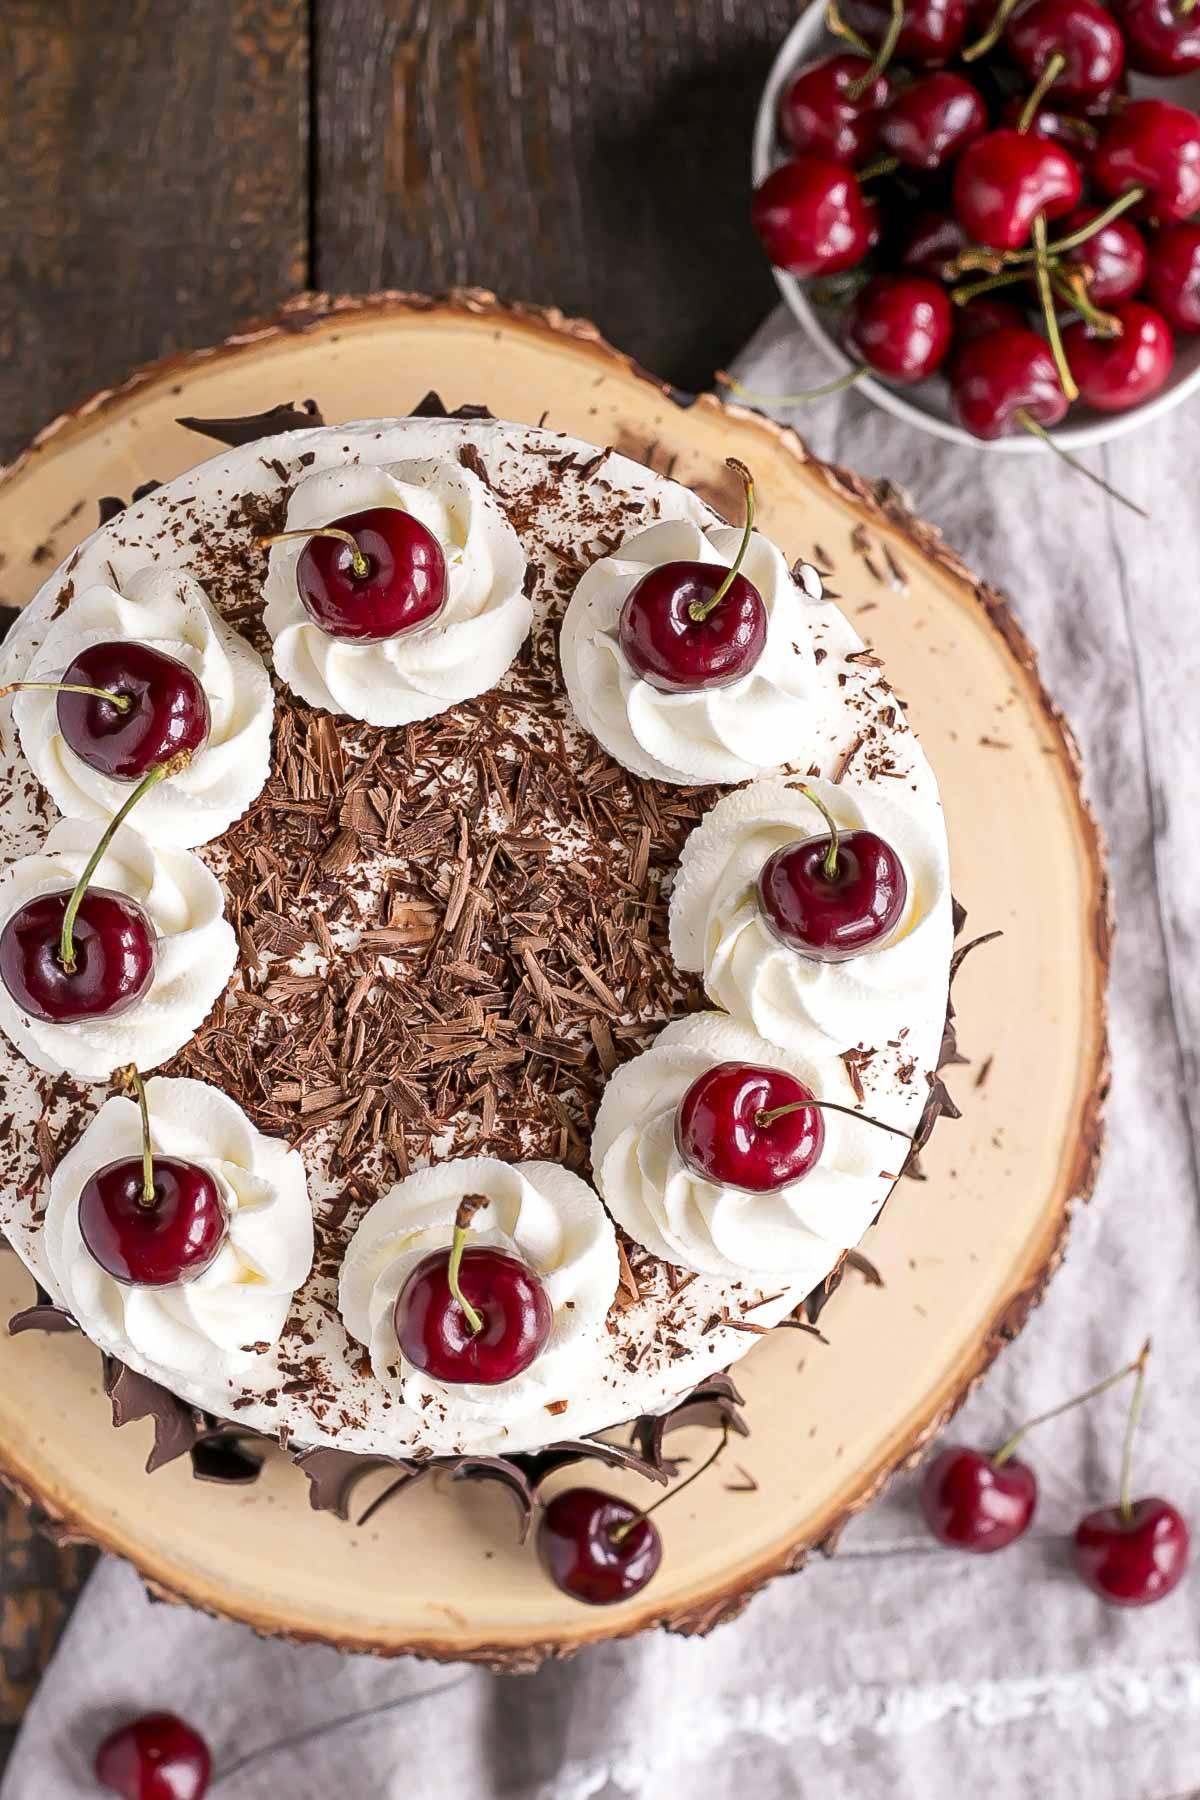
I used a vegetable peeler on a block of chocolate to create the chocolate shavings on top, and then used a 1M tip to pipe rosettes out of the whipped cream on top.
Really though, you could skip all the bells and whistles and just do a rustic frosting job with the whipped cream.
If you’re a Black Forest Cake fan, I hope you try this version! And if you’re not, maybe this recipe will convert you.
It is much better than the ones you can get at the grocery store, I promise!
Tips for this Black Forest Cake:
- The cake batter will be very thin and rises a lot! The cakes will double in size and rise right to the top of two 8×2″ pans. I do not recommend using springform pans.
- You can leave the cherry liqueur out (though it is traditional) or use a non-alcoholic version.
- You can use maraschino cherries or use cherry pie filling instead of fresh cherries.
- When making the whipped cream frosting, make sure everything is chilled, as the cream will whip up better. I stick my mixer bowl and whisk in the freezer beforehand to chill them before starting.
- I used this technique from my friend Janette to create the chocolate bark. I recommend wearing food safe latex gloves when handling the bark, as the heat from your hands will melt the chocolate. Work quickly regardless!
- This cake will not keep incredibly long due to the whipped cream. I recommend eating within 1-2 days and storing in the fridge. I do not recommend freezing.
- To help ensure your cake layers bake up nice and flat, see my Flat Top Cakes post.

Black Forest Cake
Ingredients
Chocolate Cake:
- 2 cup all-purpose flour
- 2 cups granulated sugar
- 3/4 cup Dutch-processed cocoa powder sifted
- 2 tsp baking soda
- 1 tsp baking powder
- 1 tsp salt
- 1/2 cup vegetable oil
- 1 cup buttermilk room temperature
- 1 cup hot water or hot coffee
- 2 large eggs
- 2 tsp vanilla extract
Cherry Liqueur Syrup:
- 1/2 cup granulated sugar
- 1/2 cup water
- 1/4 cup cherry liqueur
Whipped Cream Frosting:
- 3 cup whipping cream cold
- 1/4 cup powdered sugar sifted
Chocolate Bark:
- 250 g good quality dark chocolate chopped
Assembly:
- 2 1/2 cups cherries pitted and cut in half
- 1 bar dark chocolate for shavings (optional)
- cherries
Instructions
Chocolate Cake:
- Preheat oven to 350F, grease two 8" round baking pans and dust with cocoa powder. Line bottoms with parchment.
- Place all dry ingredients into the bowl of a stand mixer fitted with a paddle attachment. Stir to combine.
- In a medium bowl whisk all wet ingredients (pour hot water in slowly as not to cook the eggs).
- Add wet ingredients to dry and mix on medium for 2-3 mins. Batter will be very thin*.
- Pour evenly into prepared pans. I used a kitchen scale to ensure the batter is evenly distributed.
- Bake for 45 mins or until a cake tester comes out mostly clean.
- Cool 10 minutes in the pans then turn out onto a wire rack to cool completely.
Cherry Liqueur Syrup:
- Place sugar and water into a small pot. Stir and bring to a boil. Simmer for 1 min then remove from heat. Stir in cherry liqueur and allow to cool completely.
Whipped Cream Frosting:
- Whip cream and powdered sugar until stiff peaks. Ideally in a cold bowl with a cold whisk.
Chocolate Bark:
- Melt chocolate over a double boiler or in 20 second bursts in the microwave.
- Using a large offset spatula, spread melted chocolate in a thin layer on a large sheet of parchment.
- Roll up from the short side of the parchment. Place on a baking sheet and refrigerate or freeze until firm.
- Unroll to create chocolate bark.
Assembly:
- Cut each cake layer in half horizontally.
- Place one layer of cake on a cake stand or serving plate. Brush generously with cherry syrup.
- Top with approximately 1 cup whipped cream and spread evenly. Top with approximately 1 cup of cherries and gently press them into the whipped cream. Repeat with remaining layers and frost the outside of the cake.
- Decorate with chocolate bark, chocolate shavings, rosettes, and cherries if desired.


j c morrison says
hi there this recipe sounds great been wanting to make one for sometime and it really sounds quite basic just one question
can i use a combination of cream cheese and cream for the frosting
many thanks
jonathan
Olivia says
Hi J C! You can for sure and it will make the frosting a bit more stable but it will have a cream cheese taste which isn’t traditional. Just a matter of preference 🙂
Kat says
I’m so excited to try this! Just a question, do you think substituting the hot coffee with water would work? Or even half water half coffee? I have espresso as well that I could use. I love how coffee makes the chocolate flavor so rich
Olivia says
Hi Kat! Yes that will work just fine!
Monika Moore says
Could frozen cherries be also used instead of fresh ones, since they are not in season yet?
Olivia says
Hi Monika! I haven’t tried this myself but it should work. Be sure to thaw them, obviously. They will probably be softer so keep that in mind in terms of cake stability.
Monika Moore says
One more question: could I use canned or jarred cherries that are in syrup?
Olivia says
Yes, that should work fine too. I would definitely stabilize the whipped cream if you’re going to use canned cherries. Let me know how it turns out!
Monika Moore says
Love your cake! It looks absolutely beautiful! I was wondering if I could add gelatin to the whipped cream so it would be more stable.
Thank you!
Olivia says
Hi Monika! I havent done it myself but it should be totally fine to do so.
Frances says
Don’t have 2 eight inch pans. Can I bake in one and make 2 horizontal cuts for layers? If so, what is new cooking time?
Olivia says
Hi Frances! It’s best to bake the batter right away as the raising agents start working as soon as the batter is combined. If you must, then refrigerate the unused batter. The baking time will be similar, maybe slightly shorter. Every oven bakes differently though so be sure to check on the cakes as they are baking.
J says
Hi 🙂 Question for ya – can I use frozen cherries to make a sort of cherry filling in place of the fresh ones? They’re not always the easiest to find where I am!
Olivia says
Hi J! You can use a cherry filling for sure, but the cake may be less stable since the whipped cream is a very light frosting.
Cindy says
Hi I was wondering why are the metrics different. Like the sugar is higher in the metrics. While flour and sugar in cups are the same
Olivia says
Hi Cindy! Sugar weighs more than flour which is why it’s higher in metric.
Rebbecca says
I was wondering about the whiped cream, won’t it make the cake saggy. How do you keep it from not doing that and is it okay to freeze it before serving.
Olivia says
Hi Rebbecca! The whipped cream does not make the cake soggy. You need to whip it until it’s fairly stiff. And no, do not freeze with the whipped cream. It’s best served same day.
Siobhan says
Hi would I be able to split the receipe into 3 x 8inch sandwich tins please instead of having to cut the 2 layers in half?
Olivia says
Hi Siobhan! For sure, that will work fine! Just be sure to adjust (reduce) the baking time if needed (likely).
Neha says
I be followed the instructions for cake batter. It baked and rose real high in the middle. While cooling down it sunk quite within. Also there were layers of condensed batter as if it didn’t cook properly. I was wondering feting what mistake did I do? How to know if your batter is too thin or moist? Any suggestions?
Olivia says
Hi Neha! Usually if a cake sinks while cooling that means it wasn’t done baking and should have been left in the oven longer. The batter is very thin and rises a lot but be sure to leave the cakes in the oven until they are done baking. Baking times are just a guideline as every oven bakes differently. Here are my tips for testing if a cake is done:
1. Peek through the oven window. To see if the cakes are a nice golden brown (doesn’t really work for chocolate cakes).
2. Nudge the oven. Gently nudge your oven (assuming it’s free-standing and not built-in). If there is any jiggle in the center of the cakes, leave the oven door closed and bake for a few minutes longer.
3. Nudge the pans. Open the oven and gently nudge the pans. If there is any jiggle in the center of the cakes, close the oven door and bake for a few minutes longer.
4. Poke the cake. Gently poke the top of the cake with your finger. If the cake is firm and springs back, it’s ready for the next step.
5. Toothpick test. Insert a toothpick into the middle of the cake. When there are a few crumbs on the toothpick, the cake is ready. You want crumbs on there because the cake keeps cooking when you take it out of the oven.
If the cake sunk IN the oven, that’s a whole different issue though so let me know if that was the case. I hope this helps!
Kalista says
Would it be possible to reduce this recipe to fit in two 7″ pans? I unfortunately don’t have 8″ pans. Thanks!
Olivia says
Hi Kalista! There would be too much batter for 7″ pans (unless they are 3″ tall). Converting pan sizes is always tricky. Here are some sites I use as a guideline:
http://www.joyofbaking.com/PanSizes.html
https://www.cookipedia.co.uk/recipes_wiki/Cake_tin_conversion_charts
You could also just make the full recipe, fill the pans only half full and make cupcakes with any extra batter.
Erica says
I made this cake yesterday and it was so good! It was so moist and full of flavor! Everyone really enjoyed it and couldn’t stop talking about how good it was! I followed the recipe but made a 3 layer 6in cake instead and it worked out great! I had enough batter left over for another layer. Next time I’ll just change the servings to 9. I also didn’t have time to make the bark, but would love to try that next time! I just threw shavings on the side and it still turned out beautiful. Thank you so much for sharing this wonderful recipe!
Olivia says
Hi Erica! So happy you loved it 🙂 Thanks for your feedback and tips!
Austin, Derrick says
Are you putting parchment on top on greased/dusted pan??
Olivia says
Hi Derrick! Correct. It helps ensure the cake comes out of the pan perfectly. Greasing and flouring sometimes isn’t enough.
Joanna says
This was the best cake I’ve ever made. We have a family recipe for chocolate cake that we’ve used for decades and after trying this cake, my mom agreed that this recipe was superior.
Olivia says
Hi Joanna! Thank you for the wonderful feedback! I’m so happy you all loved it.
Mary says
Just wondering do you use room temperature eggs for this cake or use them straight out of fridge?
Thanks!
Olivia says
Hi Mary! Good question, I usually mention that in the posts! I use room temperature. It’s not as big a deal here though as the hot water/coffee will warm them up.
Shwetha says
Hello! Is there a way I can adapt the recipe to make a smaller cake? I made this once (as in recipe) for my husband’s birthday, it was DELICIOUS and HUGE. I’m trying to make this for my friends birthday now and would like to scale down to make a smaller version. Any tips and advice?
Thanks,
Shwetha
Olivia says
Hi Shwetha! What size cake are you wanting to make? You can 2/3 the recipe (change the Servings to 8) and make it in two 6″ pans instead. Baking time may need to be adjusted.
Shwetha says
Hi Olivia,
That could work! I was thinking of downgrading to 6” which now works perfectly with your 2/3rd or 8 servings adjustment. I’ll adjust the baking time accordingly. Thanks!
Olivia says
Great! Let me know how it turns out 🙂
Kay says
Hi, is it possible to substitute the Dutch-processed cocoa with regular cocoa? I noticed the recipe has both baking soda and baking powder, so I’m hoping it’s a 1 to 1 substitution, but I just wanted to ask anyway. Thanks!
Olivia says
Hi Kay! Regular cocoa will work just fine 🙂
Tamlyn H says
I saved this recipe. It was SO good. I think I might just use this chocolate cake recipe for all chocolate cakes in the future, not just black forest! I wish I could post a pic cause it looked almost professional and I got SO many compliments on looks and taste (seriously the guests thpught i had purchased it!) The shards of chocolate really made the look and was super easy to make. I used frozen cherries that I defrosted and used the juice from the frozen cherries to make the syrup. Yummmmmm.
Olivia says
Hi Tamlyn! I am so happy to hear that! I would love to see a pic, you can email it to me at livforcakeblog@gmail.com 🙂
Joey Tasso says
Apologies for so many questions, but I’ve never made this cake before and trying to follow your instructions and recipe. Approximately, how many cherries do you need?,
Also, if each layer takes 1 c. of whipped cream as indicated in the recipe, that would be a total of 4 cups, correct?
Thank you.
Olivia says
Hi Joey! No worries at all, I’d rather people ask for clarification than make something incorrectly because they aren’t sure. I’m not exactly sure how many individual cherries, and this can vary somewhat depending on their size. I’d say at least 3 cups or so of whole cherries to make 2 1/2 cups of halved pitted ones. The 3 cups whipping cream in the recipe doubles in volume once you whip it so you should have about 6 cups total to decorate the cake. Use about 1 cup between each layer and the extra for the top and sides.